Migrating from Moss 2007 to SharePoint 2010 has left many in the past scratching their heads in frustration. Well scratch no more, for we are about to provide you with a simple method to complete the migration using In-Place Upgrade.
So, you may ask, what are the pros and cons of migrating using In-Place Upgrade?
In-Place Upgrade Pros:
1. Make use of previously existing hardware.
2. There’s no longer need to change any settings as they’ll remain the same.
3. Customizations will also remain unchanged.
In-Place Upgrade Cons:
4. User may experience extended downtime.
5. In-place upgrade can only finish its migration in one operation for all the
servers in the Moss 2007 platform.
6. Existing farm must meet the SharePoint2010 requirements.
First let’s check to make sure your current SharePoint environment Moss 2007 meets the requirements of the In-Place Upgrade.
SharePoint Server OS Requirements:
Windows Server 2008 Standard (64-bit), Enterprise, Data Center, or Web Server with SP2, Windows Server 2008 R2 Service Pack1 (SP1) Standard (64-bit),Enterprise, Data Center, or Web Server, if you are running Windows Server 2008 without sp2, the Microsoft SharePoint Products Preparation Tools installs Windows Server 2008 SP2 automatically.
Database Version Requirements:
1. Microsoft SQL Server 2008 R2 (64-bit), Microsoft SQL Server 2008 with Service Pack (SP1) and Cumulative Update2 (CP2).
2. Microsoft SQL Server 2005 (64-bit) with Service Pack3 (SP3).
Now that you’ve confirmed that your current environment meets the requirements of the In-Place Upgrade, the following steps will teach you how to complete the upgrade in the following clearly defined steps.
1. Start by creating a MOSS 2007 site as shown in the following screenshot.
2. We need to add data as well as add custom configuration in the site to verify after you complete your upgrade to SharePoint 2010.
3. Install the SharePoint Server 2010 directly on the existing SharePoint 2007 Server. In the Setup window, we can view the hardware and software requirements, installation guide, etc.
Let’s skip this part and proceed straight to the installation.

SharePoint Server installation screen
4. Select Install software prerequisites. You may already have all the required components in Moss 2007, but to be sure, we’ll select this option.
The Products Preparation Tool will check the required components for the current server, and then install any if necessary.
5. Click Next and accept the license terms. The Preparation Tool will then immediately start updating the server.

Installation preparation windows
6. After this configuration completes, the following screen will be displayed and you will be requested to reboot your system.

Preparation Tool Summary Screen
7. When the computer reboots, the Preparation Tool will launch again, finishing the rest of the steps.
Now our system is ready to install SharePoint Server 2010. Select Finish from the setup pane.
8. Enter the Product Key.

Product Key Window in SharePoint 2010 Setup
9. Read and accept the license terms.The next screen informs you that MOSS 2007 has been detected.
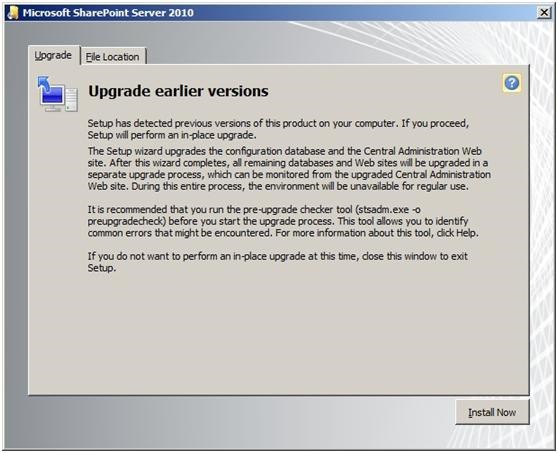
SharePoint Server 2010 Setup Screen – the Upgrade Window
10. As advised in the screen above, we need to run the stsadm command to ensure our MOSS 2007 site can be successfully migrated. Open cmd.exe console in Administrator Mode.

Start – Cmd.exe in Administrator mode
11. Navigate to the MOSS 2007 Bin directory, which is located by default at C:\Program Files\Common Files\Microsoft Shared\Web Server Extensions\12\BIN directory
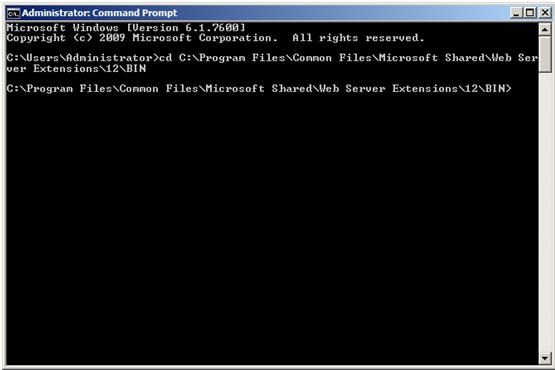
Cmd Window in the MOSS 2007 Bin folder
12. Enter stsadm – opreupgradecheck
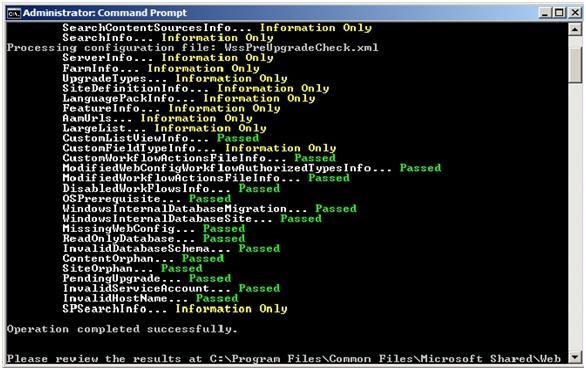
This command does not perform any repairsbut only checks for and reports issues with possible solutions to apply before the migration. As the command executes, we see the output continuously changing on the screen with different status notifications. You will eventually see“Aborted due to internal error”. Ignore this for now as the overall check will prove to besuccessful.
The browser will open to display the html document with the summary of the output and details of every issue. All components should pass the test meaning it is now ready for the migration.
13. Go back to SharePoint Server 2010 Setup Window and clickInstall Now.
After the installation, the final screen informs you that you must launch the SharePoint Configuration Wizard in order to update our content to the latest SharePoint Version.

SharePoint 2010 Installation Summary screen
14. Click Close to run SharePoint Configuration wizard.
If you were expecting a wizard similar to the SharePoint 2007 Wizard, you may be disappointed. We now have an entirely new environment for SharePoint 2010 version and hence a new Configuration Wizard.

SharePoint 2010 Configuration Wizard
15. Click Next. Following this, the below warning will be shown.

Warning Window in SharePoint 2010 Configuration Wizard
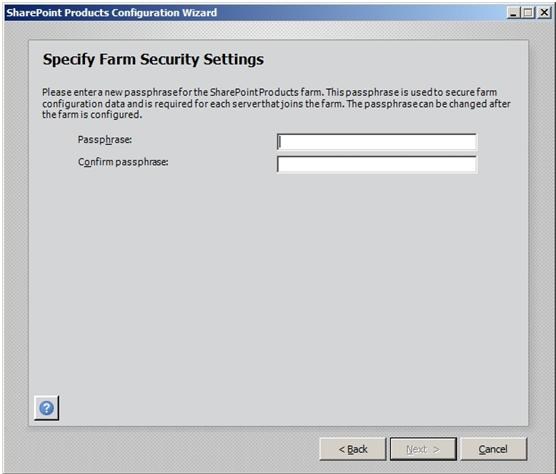
16. Click Yes and you will see a new feature of SharePoint 2010 – Farm Passphrase.
17. The Farm Passphrase will prevent server administrators from changing any data in our SharePoint 2010 installation when no password is provided. Administrations won’t be able to use content or be able to configure databases even if full database backups are obtained.
Enter a password and continue with the configuration.
The next step is the Visual Upgrade.
Now you can decide how your SharePoint site looks and feels. This enables you to upgrade your entire farm to the SharePoint 2010 visual experience. In order to ensure that everything will run fine in 2010 before modifying the design, do not do this in this demonstration. SharePoint Server 2010 allows you to preview the look and feel of sites before switching to the new SharePoint design.
18. Select “Preserve the look and feel of existing SharePoint sites” option, which will maintain the original SharePoint Server 2007 design.
19. Review your settings at the Summary Screen and then click Next to start the farm configuration.
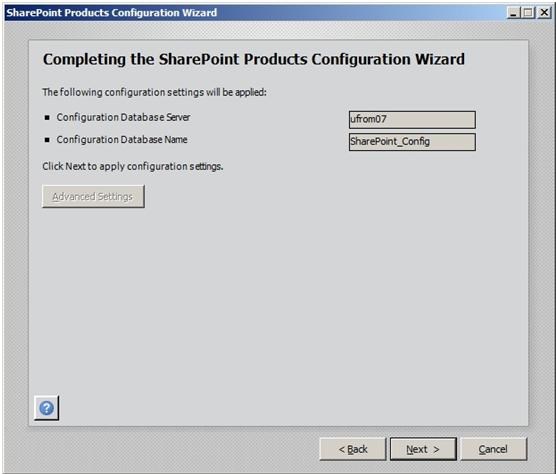
SharePoint 2010 Configuration Wizard Summary Window
20. In general, if there is no error the Configuration Successful window will appear. This signifies the upgrade is finished.
In the case of my configuration progress, I must open Central Administration to complete upgrading the timerjob.

Configuration Wizard Setup Finished Screen
The dialogue reads “The upgrade has not completed yet”. Continue to the next page.
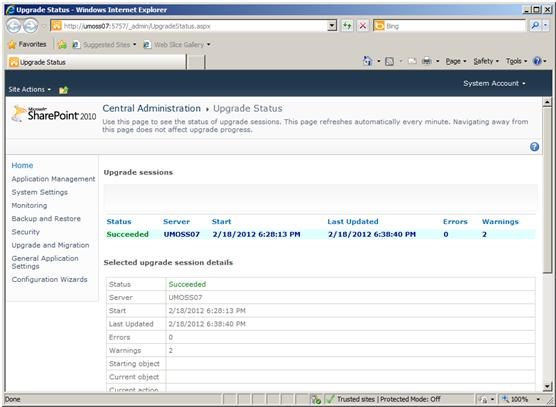
SharePoint Server 2010 Upgrade Status page
Now let’s have a look at the newly migrated site.

Our upgraded site on SharePoint 2010
Since we have chosen to preserve the original ShrarePoint 2007 design, the site looks identical to the site prior to migration (except for the large Give Feedback button).
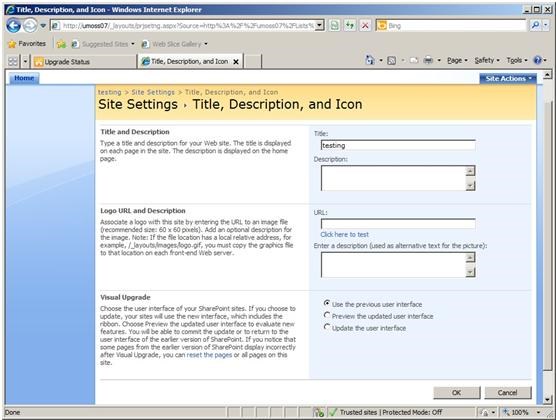
We can now preview the new layout. In the Site Actions menu, select Visual Upgrade.
The configuration window will open, where you can select the site’s generic options, such as the title, description, logo and the template.
21. Under the Visual Upgrade option, select “Preview the new SharePoint user interface“. This allows us to view the site with the SharePoint 2010 design with the option to revert back to the SharePoint 2007 layout if any errors occur.
Click OK to view the results.

Site Preview of the SharePoint 2010 Design
Here you can view the new layout where it should work just as expected.
22. From here, go back to the Visual Upgrade option to finish the migration completely.

Site settings screen – we’ve selected Use the New SharePoint User Interface option.
Job well done! As you’ve seen, there’s no longer any reason to be scratching your head over such a small issue.


