Secure Sockets Layer (SSL) encryption protects confidential or personal information sent between a client and a server. When SSL is enabled, remote clients access your site by using URLs that start with https://.
In this learning note, I documented the configuration steps, which will enable SSL for a URL so that the Web address will start with “https“ instead of “http.”
To enable SSL web site, you must first open the Internet Information Services (IIS) Manager and complete the main three steps as below:
I. Obtain a Certificate
II. Create an SSL Binding
III. Verify the SSL Binding
I. Obtain a Certificate
1. Open the IIS section in server administration.
2. Select the server node in the treeview on the left side of the window and double-click the “Server Certificates” icon under the IIS section:
3. Select “Create Self-Signed Certificate…” in the Actions pane in the panel on the right.
4. Input a friendly name (e.g. Enable SSL) for the new certificate and click “OK” button.
5. Now you have a self-signed server certificate. Use this feature to request and manage certificates that the Web server can use with Web sites configured for SSL.
II. Create an SSL Binding
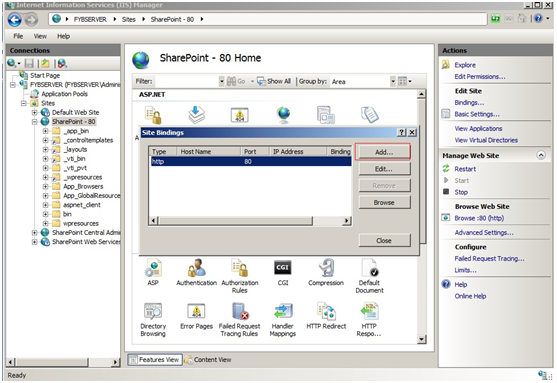
1. Select a site in the treeview and click “Bindings…” under the Actions Pane in the panel on the right. This brings up the bindings editor that lets you create, edit, and delete bindings for your Web site.
2. Click the “Add…” button to add your new SSL binding to the site.
Note: New bindings default to http on port 80.
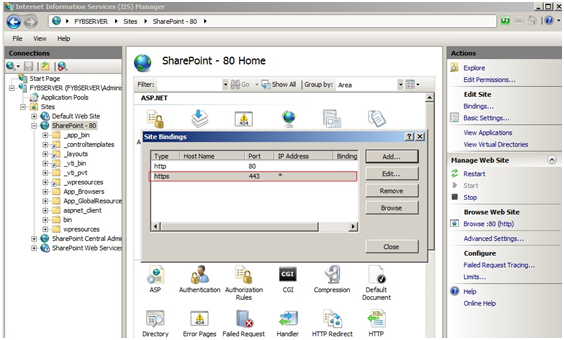
3. Select “https” in the Type drop-down menu.
4. Select the self-signed certificate you created earlier (“Enable SSL“) from the SSL Certificate drop-down menu and click the “OK” button.
5. Select “https” in the Type drop-down menu.
6. Select the self-signed certificate you created earlier (“Enable SSL“) from the SSL Certificate drop-down menu and click the “OK” button.
III. Verify the SSL Binding
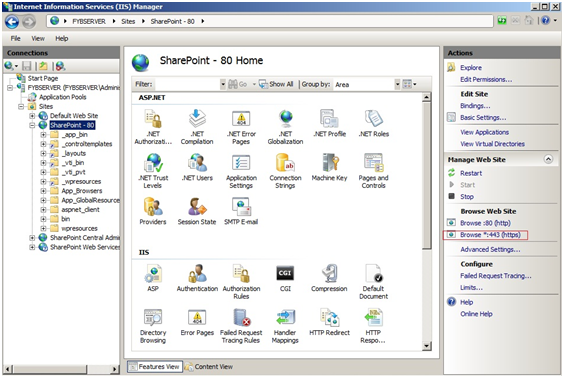
1. Look at your site’s Action pane in the right panel for a link that will let you browse your site with the new HTTPS binding.
2. Click this link “Browse * 443 (https)” to test your new binding.
3. Click “Continue to this website (not recommended).”
The End.
Thanks.


