This SharePoint feature provides storage and mapping of credentials such as account and password so that you do not need to login again when you access portal site-based applications such as Custom Relations Management (CRM) system.
Its configuration includes the following five parts:
- Enable the Service on the SharePoint Server
- Manage Server Settings
- Manage Encryption Key(s)
- Manage the Settings for Enterprise Application Definitions
- Manage the Account Information for Enterprise Application Definitions
1. Enable the Service on the SharePoint Server
The first step is to start the SSO service or else other configuration cannot be processed.
(1) Login to the SharePoint server.
(2) Click the “Start” button, select All Programs -> Administrations Tools -> Click Services.
(3) Find the “Microsoft Single Sign-on Service” and click it.
(4) Confirm that the “Startup Type” is Automatic.
(5) Click the “Start” button.
Note: Do not forget to enable the service in all WFEs (web-front end).
2. Manage Server Settings
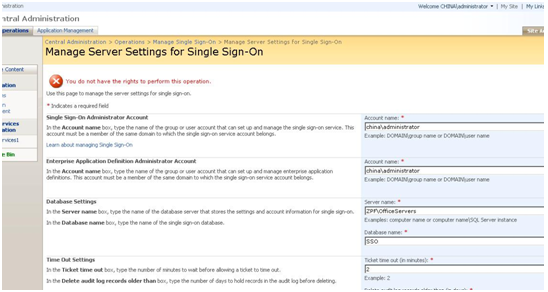
(1) Go to Central Administration > Operations > Manage Sign-On.
(2) The original error “Failed to connect to Microsoft Single Sign-On Service. To configure, please ensure the service is running.” will disappear.
(3) Click “Manage server settings.”
(4) Type the Single Sign-On Administrator Account and Enterprise Application Definition Administrator Account.
Note: The two accounts is that they have enough permission.
(5) They need meet these three conditions they must be a member of the same domain to which SSO service account belong and a member of domain administrator group and have the permission to create database.
(6) Here, I set china\administrator as the administrators account. Other settings such as Database Settings, Time Out Settings can keep unchanged.
3. Manage Encryption Key(s)
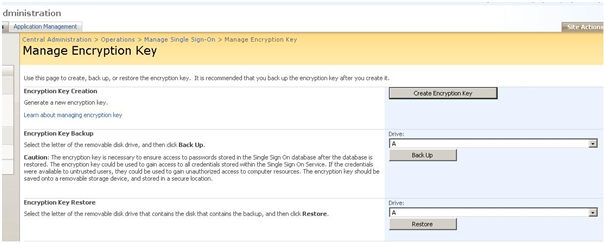
(1) Open the Manage Encryption Key page.
(2) Click the “Create Encryption Key” button.
(3) Check the “Re-encrypt all credentials by using the new encryption key” checkbox.
Note: Refer to the related description on the Manage Encryption Key page to complete restore and backup.
4. Manage the Settings for Enterprise Application Definitions
(1) Click Manage Settings for Enterprise application definitions.
(2) Select “New Item.”
(3) Specify a Display name, an Application name and a Contact e-mail address.
(4) Select Account type, Authentication type and set the Logon Account Information.
5. Manage the Account Information for Enterprise Application Definitions
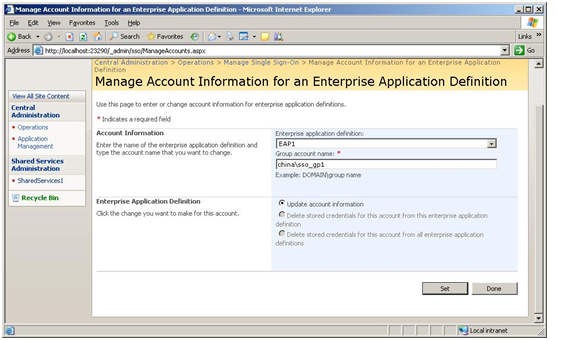
(1) Select the Enterprise application definition from the drop-down list and type the account name you want to change.
(2) Click the “Set” button to save the current settings and not exit.
(3) If the configurations are complete, click the “Done” button to exit from the page.
All configurations have been completed!


