- BoostSolutions
-
Products
-
- Microsoft Teams
- HumanLike Alert Reminder
- View All Apps
- Pricing
- Support
- Company
a. Go to the site or page where you wish to add Password Change Web Part, and click Settings and then click Edit Page to modify the page.
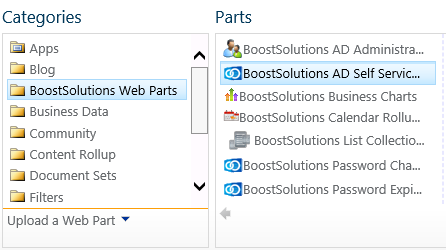
b. On the ribbon, click Insert tab, and then click Web Part.
c. In the Categories box, select BoostSolutions Web Parts, select AD Self Service Web Part, and then click Add.
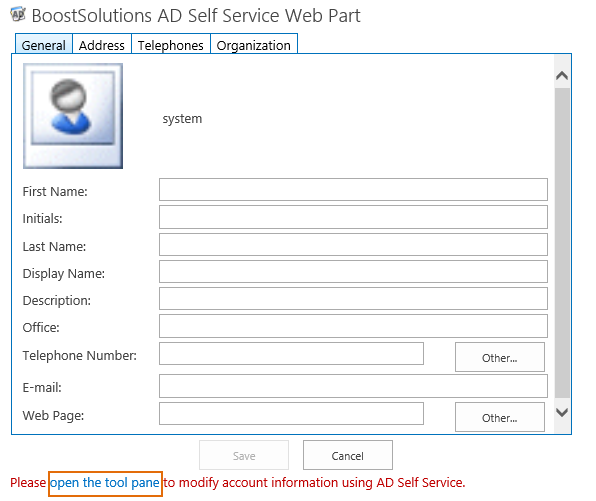
After adding AD Self Service Web Part, you need to configure credentials to connect Active Directory.
Click the open the tool pane link to access this configuration.
In the Administrator login credentials section, enter the username and password to connect to the Active Directory.
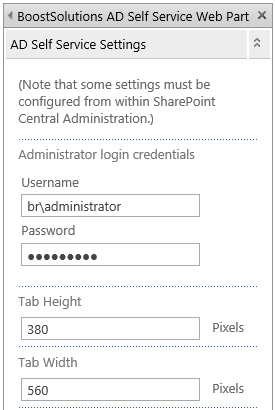
Note that the user must be a member of Domain Admins. If the account is not member of Domain Admins, any changes made to AD information in the AD Self Service Web Part will not be saved.
After configuring the account information, SharePoint site collection users can modify their AD information with the AD Self Service web part.
Users can now log onto the site page, where their profile information will automatically be displayed. Here, users are able to modify his AD information based on updates of status.
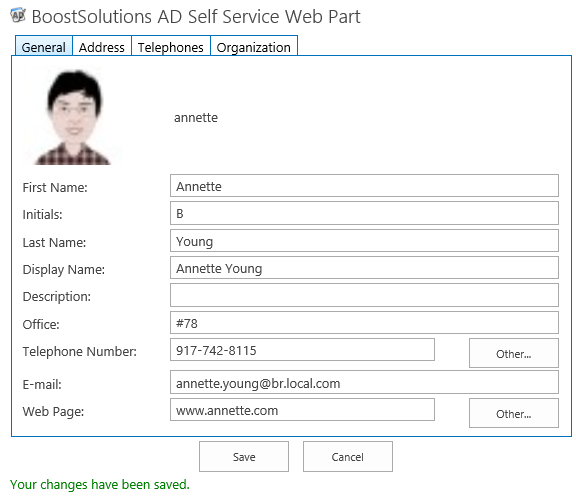
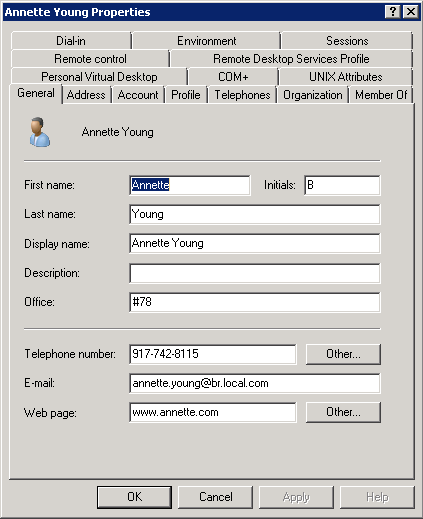
And in the Active Directory, the properties have now been modified.
The configurations in Central Administration include 5 parts, Exclude Users/Groups, Include Properties, AD Self Service E-Mail Confirmation, AD Property Change Log and Custom SMTP Server settings.
Please note that these settings are optional, even you do not configure these settings, you can use AD Self Service to change properties in a SharePoint site.
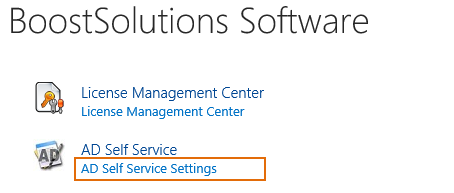
3.1 Enter AD Self Service Settings Page
In Central Administration, go to BoostSolutions Software page, then you will find AD Self Service. Clicking this link will direct you to the AD Self Service in Central Administration.
3.2 Exclude Groups and Users Settings
The Exclude Users/Groups section allows you to keep AD property changes more secure by excluding users like interns, contractors, freelancers or other short-term employees.
To exclude certain users or groups from accessing the AD Self Service Web Part, enter in the name here.

3.3 Add, Modify or Remove AD Properties
In Include Properties section, you can select which AD properties will be available in the web part.
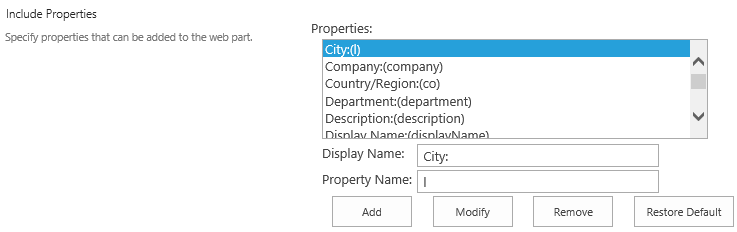
To add new properties, click the Add button. When Add New Property popup window appears, fill in Property Name and Display Name, and click OK button.
To modify the Display Name, select an AD property, enter a new Display Name or Property Name, and confirm by clicking Modify button.
To remove a property, select an AD property and click Remove button.
Restore default allows for AD property default configurations.
3.4 E-mail Notification Settings
If you need to send a notification email to administrator after users change their AD properties, please check the checkbox before AD Self Service E-Mail Confirmation.
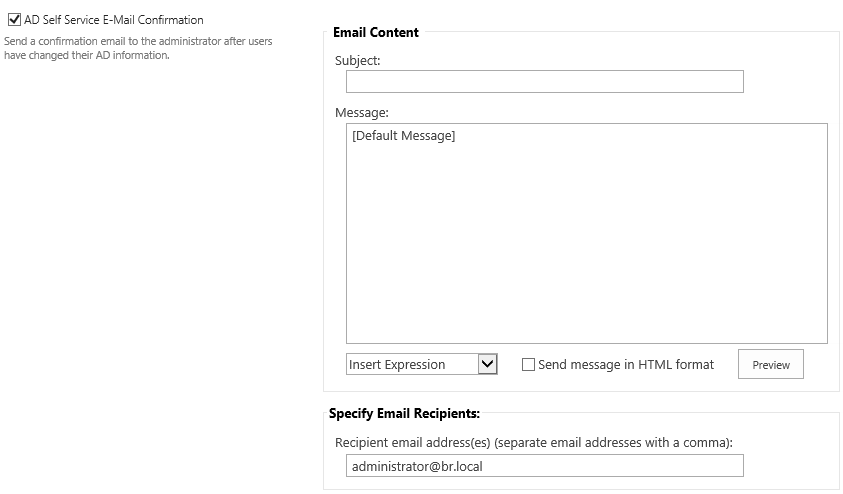
You can use the default message as above. Or customize the message as following.
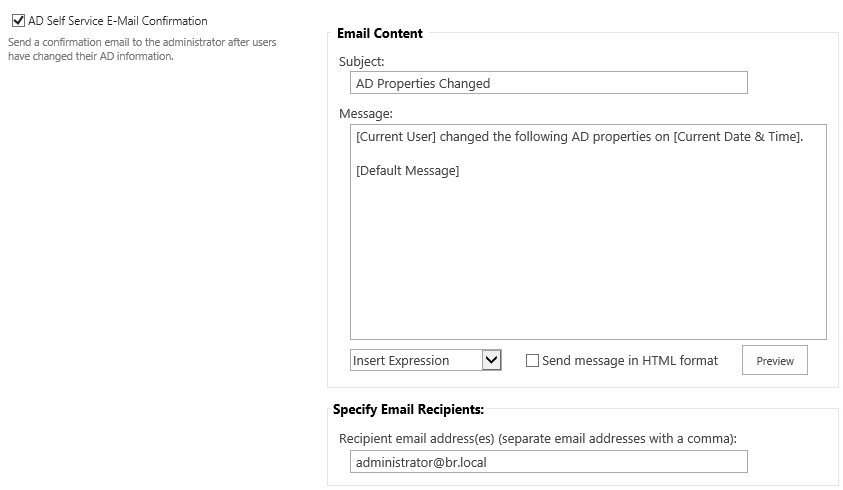
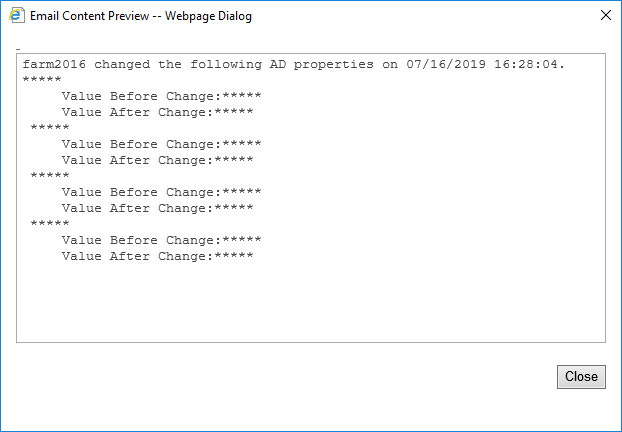
After setting the message as you want, you can check it by clicking the Preview button.
Finally, specify an e-mail address that the AD property change notifications will be sent to.
The AD Property Change Log section allows you to set AD Self Service log options.
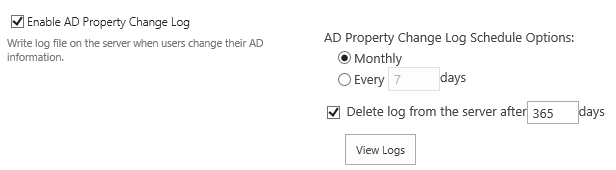
You can choose to how to record the log and when to delete them.
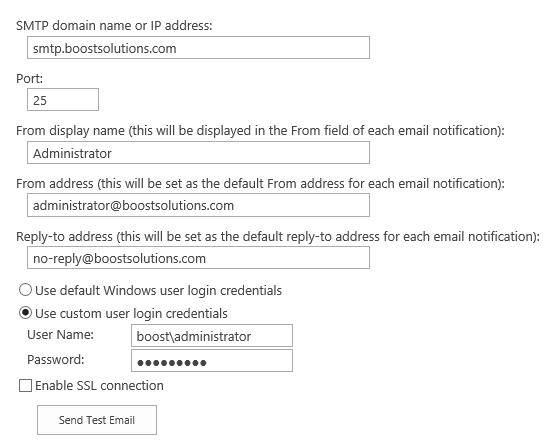
The administrator will need to change these settings when they want to specify customized settings for outgoing e-mails.
Note: There is no need to customize these settings if the Outgoing E-Mail Settings are already configured in SharePoint Central Administration.
On AD Self Service Web Part, you can change the properties settings and layout.
AD Self Service will provide four tabs, and include all default AD properties. You can add, modify or delete a tab.
To create new tabs, click Add New Tab. Enter a name for the new tab, and press enter to confirm.

To change a current Display Name of a tab, click on the name of the tab. The field will change into an editable field allowing for changing the name of the tab.

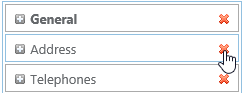
To remove a tab, click the delete icon on the right side of the tab.
AD Self Service supports allows drag and drop of tabs in Web Part settings for position change.

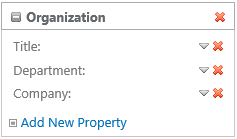
AD Self Service allows you to add, modify or delete AD properties on the Web Part.
Add New Property
To add new properties, click the Add New Property under one tab.
A new box will appear inside the tool pane allowing you to choose a property and what settings to apply.
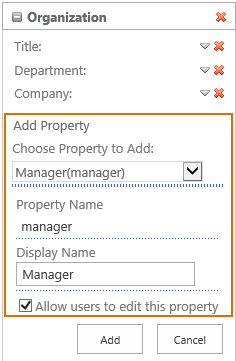
Note: The complete list of available properties can also be found in the Available Properties section of the web part (Includes all AD properties in AD Self Service Central Administration settings and AD properties previously deleted)
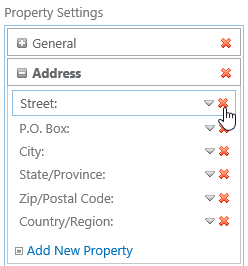
Delete a Property
To delete a property, click on the red "X" on the right side of the property.
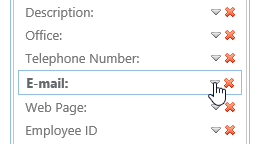
Change a Property
To change a property on Web Part, such as display name, click the arrow in the top right corner of the property.
And then change the display name or appearance.
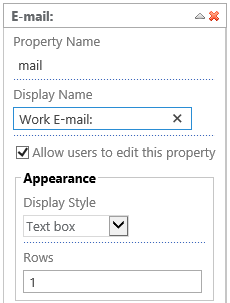
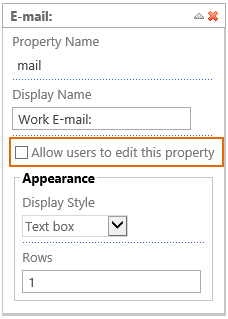
Set A Property as Read-Only
To set a property as read-only, uncheck the Allow users to edit this property checkbox. Then, the property will be displayed on the Web Part, and the end user would not be able to change this displayed property.