- BoostSolutions
-
Products
-
- Microsoft Teams
- HumanLike Alert Reminder
- View All Apps
- Pricing
- Support
- Company
SharePoint Classifier enables SharePoint users securely and efficiently control, identify, classify and organize your company's critical electronic content. This product has to be activated before it can be used. For further reference, please see our Product Installation Guide.
By default, the application's features are automatically activated once the product is installed. BoostSolutions Classifier contains the following group of features:
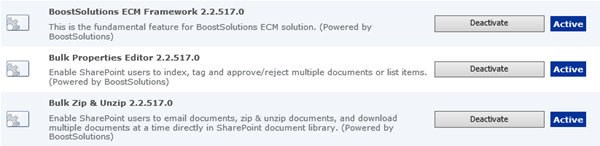


SharePoint Classifier is consist of six features, Bulk Properties Editor, List Transfer, Document Number Generator, Bulk Zip & Unzip, List Advanced Filter, and Item Audit Log.
Bulk Properties Editor: Enable SharePoint users to edit, tag and approve/reject multiple documents or list items.
List Transfer: Copy & move documents or items from one list to another list directly within SharePoint.
Document Number Generator: Enable SharePoint users to create document numbering schemes to uniquely identify and classify a document, making it easier for users to retrieve the right information.
Through Bulk Zip & Unzip module, SharePoint users can zip & unzip documents, and download multiple documents at a time directly, also can send documents as email attachment.
With List Advanced Filter, SharePoint users can quickly and easily find the information they need in SharePoint list or document library.
Based on the audit services provided by SharePoint, Item Audit Log enable users to review the detailed access history for SharePoint documents and list items.
2.1 Bulk Edit Documents Properties
This function allows you to bulk edit documents properties so documents can be quickly indexed.
Select the desired documents and click the Bulk Edit button in the Documents tab. You will see a dialog window as follows:
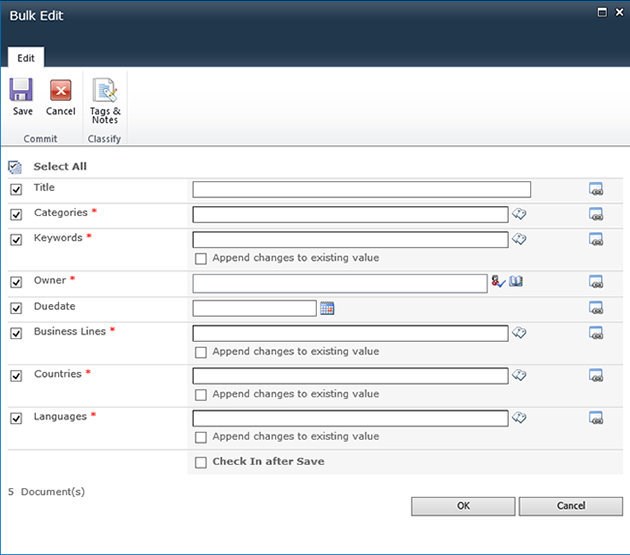
There is a checkbox along the left side of each field. The
 (red asterisk) indicates that this field is required and cannot be left empty once it
is checked.
(red asterisk) indicates that this field is required and cannot be left empty once it
is checked.
The
 icon on the right side of each field indicates the Field Mapping
function:
icon on the right side of each field indicates the Field Mapping
function:

Field Mapping is used to dynamically map and assign another field to
the current field. When you click this icon
you will bring up the Field Mapping window.

In the Map with dropdown menu you are able to select any available field. Please note that the availability of fields for each field type will vary.
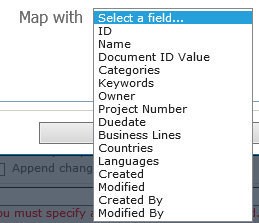
Select a field you desire to use and click OK. The Field Mappings
window will close and a new icon
 will appear on the right side of the field that you have set up field mapping replacing
the
icon.
will appear on the right side of the field that you have set up field mapping replacing
the
icon.

The icon
indicates the custom value that you set. If you click on that icon
, the field mapping will be lost and the metadata field will revert back to its
original state.
Append changes to the existing value option:

Check this option if you want to append changes to existing value for a respective field.
Note: This option is only available for multiple-value [Person and Group] and [Managed Metadata] fields.
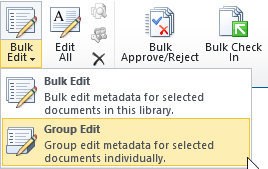
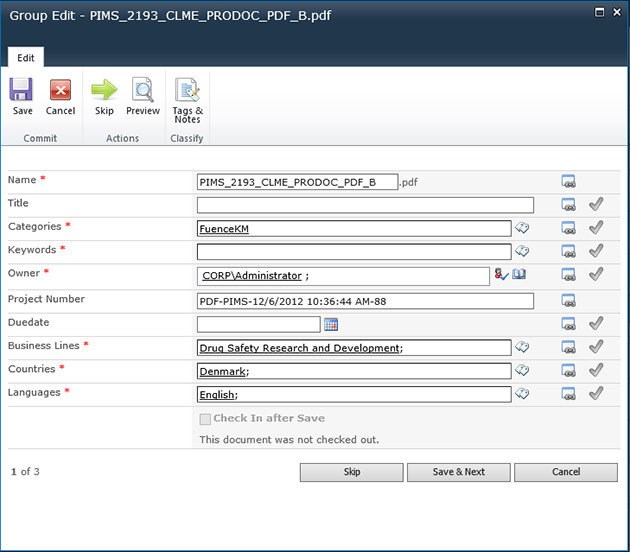
2.2 Edit Documents Properties Individually
This option gives you the ability to index multiple documents individually. Click the Group Edit button on the ribbon menu to open the Group Edit window:
The icon button
 on the right side of the field is set as a default value for the next document/list
item. When clicked the icon will change to a green checkmark as shown below:
on the right side of the field is set as a default value for the next document/list
item. When clicked the icon will change to a green checkmark as shown below:
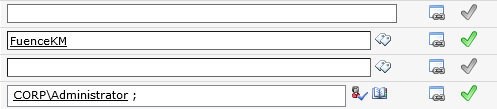
The respective field value will be kept for next document or list item until you manually modify it. This can save you a lot of time, especially if most fields are exactly the same or similar and when only a few items need to be changed.
If you need to preview the document when entering metadata, simply click the Preview button on the ribbon menu and a new window will open.

Note: Currently only PDF documents and images are supported. Click the x on the upper right-hand corner of the window to close the document preview window.
2.3 Bulk Approve/Reject Documents
With SharePoint Classifier, you can approve or reject multiple documents/list items in bulk.
First, select several documents or list items which have been published (i.e. the Approval Status is Pending). Then click the Bulk Approve/Reject button in the Documents tab.
You will see the following dialog window:
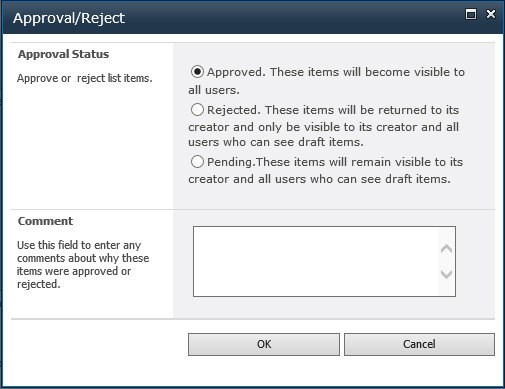
Select the approval status that you want to apply and then click OK and the Approval Status for all documents or list items will be changed.
This function allows you to add tags & notes for multiple documents or list items in bulk. Click the Tags & Notes button in the Documents tab. The following dialog window will open.

In the text field, you are able to enter tags. Click Save and the changes will be saved to the selected documents or list items.
Append changes to existing tags: With this option enabled, the original tags will not be overwritten when you click Save and all tags entered in this field will be appended to the existing values.
This function allows you to import multiple documents into the SharePoint document library and index them by entering metadata information.
Click the icon to open an Import Documents dialog window.

Browse files on your computer or drag and drop files directly into this window. Click OK and files will be ready to upload.
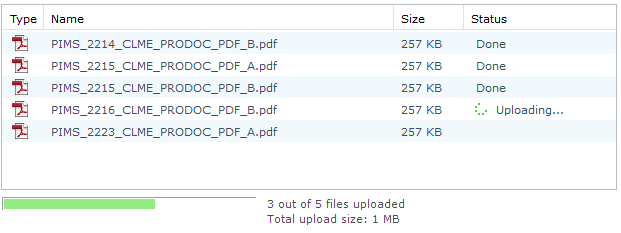
Once the files are uploaded you will be redirected to a new window:
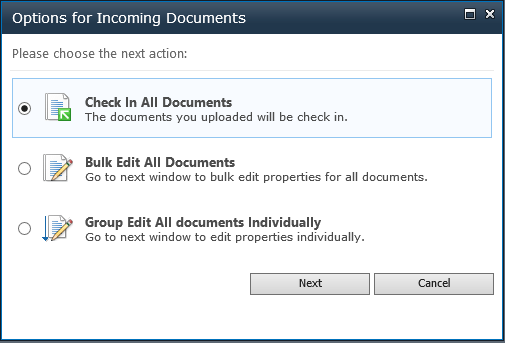
There are 3 options you can use for the documents which you have just uploaded:
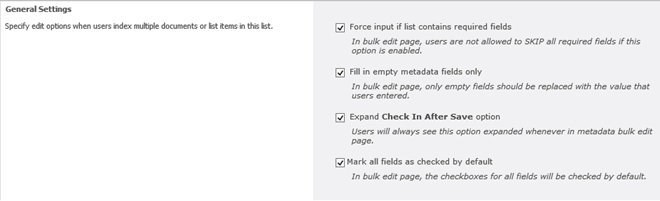
2.6 Bulk Properties Editor Settings
Go to the Document Library Settings ' Bulk Properties Editor Settings page to configure and edit options when users index multiple documents or list items.
Go to the Document Library Settings - Auto Complete Settings page to configure the options.

Select the desired column you want to see the relevant records when editing properties.
List Transfer provides the functions to migrate documents or list items between folders, document libraries/lists, and different sites/site collections.
In the Documents tab on the ribbon menu, users select one or more document(s) and click the Copy Documents button. The following window will be displayed:
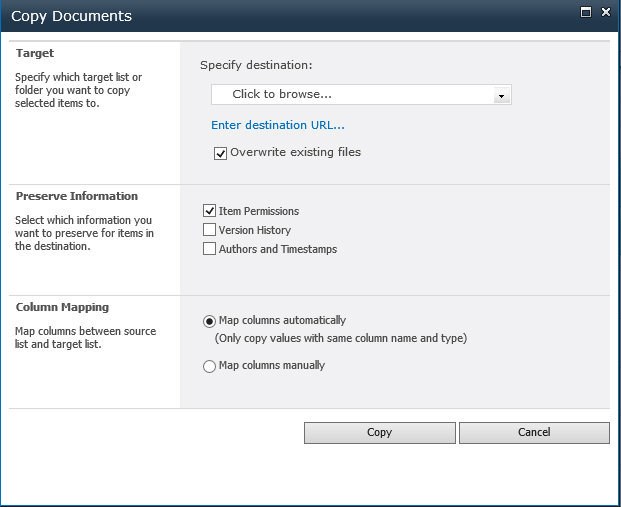
In the Target section users can browse and select the target list or folder to copy selected documents to.
The option Overwrite existing files determines whether the original documents in the target should be overwritten by the selected documents.
The option Enter destination URL... is used to specify the target location within another site collection. Click the link and you will see a text field where you can enter a list or folder URL:

Enter a valid URL and hit Check. If everything is OK then the URL will be replaced by an underlined address.

In the Preserve Information section, there are three options available for you to decide whether to preserve specific information.

Item Permissions: To preserve individual item permissions.
Version History: To preserve version history.
Authors and Timestamps: To preserve the creation and modification information (created, created by, modified and modified by)
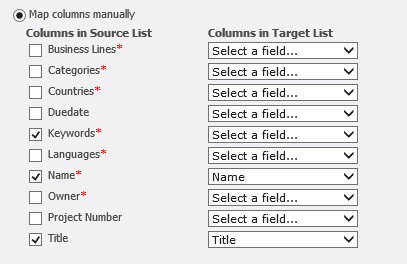
In the Column Mapping section there are two options to map columns when migrating documents:
Map columns automatically
By default, the columns with the same column name and type, will be mapped automatically.

Map column manually
You can still map columns manually by selecting the Map columns manually option.
This function allows you to move documents or list items to another location. Click the Move Documents button to open the following dialog window.
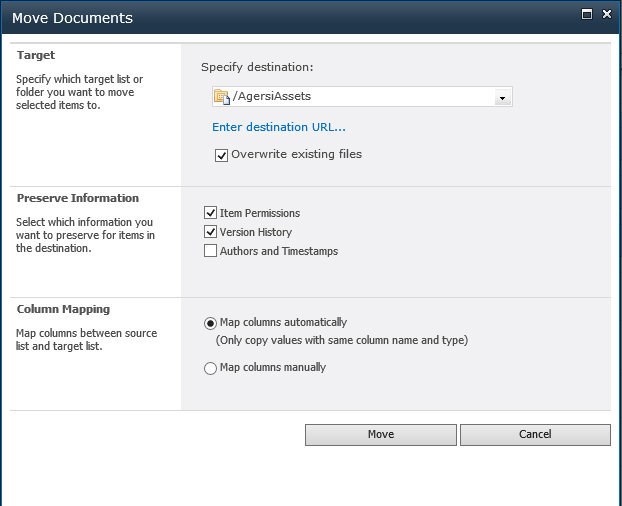
The options are exactly the same as those found in the Copy Documents page.
You can also copy or move documents using the virtual clipboard function. The source fields and the destination fields will be mapped automatically.
The following shortcuts are supported:
There following notification will appear at the top right of your browser.
 Or
Or

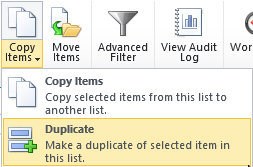
You can quickly create a new item by duplicating an item through the Duplicate Item function.
You can access this function by clicking Duplicate under the Copy Items menu.
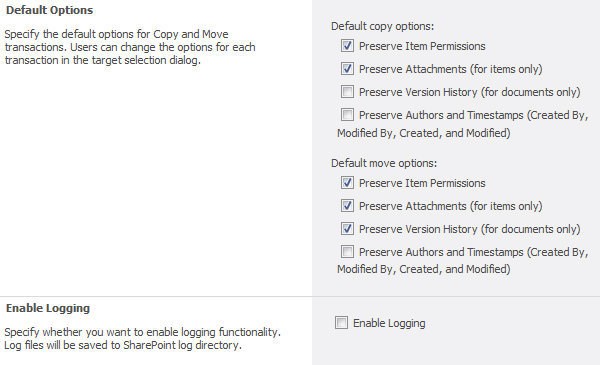
Go to Site Actions ' BoostSolutions Software ' List Transfer Settings. Here you can configure the default options for Copy and Move functions on a specific site.
SharePoint Classifier enables SharePoint administrators to define a document numbering scheme for documents according to their company policy. A document numbering scheme can uniquely identify and classify a document making it easier for users to retrieve the right information.
4.1 Add Document Numbering Scheme
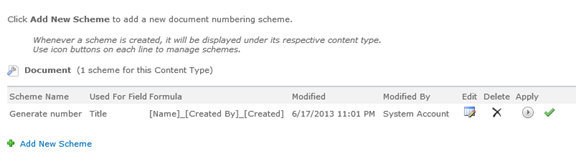
Click Add New Scheme to add a new document numbering scheme. You will see a new dialog window.
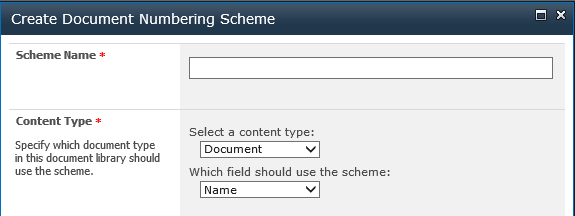
Scheme Name: Enter a name for this scheme.
Content Type: Specify which field should use this scheme. Note, you need to select content type first to determine the specific field.
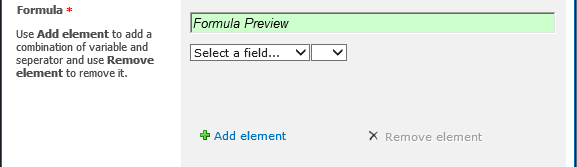
Formula: In this section you can use Add element to add a combination of variables and separators and use Remove element to remove them.
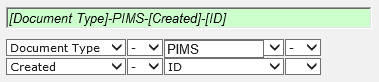
You can select Custom Text and enter anything you want. If any invalid characters are detected then the background color of this field will be changed to indicate if that there are errors.

Date Format: In this section you can specify which date format you want to use.
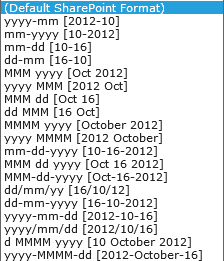
Note that this option is useful only when you add at least one [Date and Time] type column in the Formula.
Regenerate: This option determines whether you want to regenerate the document numbering scheme when the specific document is edited, saved or checked in.
Note: When this option is enabled the column valued user entered in the SharePoint item edit form will be overwritten automatically.
Once a document numbering scheme is successfully created, the specific scheme will be shown under its respective content type.
Use the icon
 to edit the
scheme.
to edit the
scheme.
Use the icon to delete the scheme.
Use the icon
 to apply this
scheme to all documents stored in the current document library.
to apply this
scheme to all documents stored in the current document library.
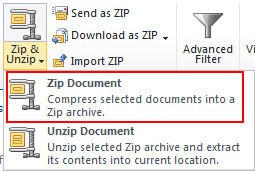
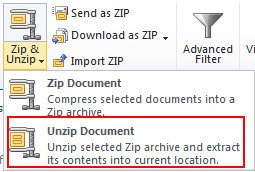
This function enables users to compress documents as a zip file in the document library.
Enter a document library, select the desired documents and click Zip Document under the Documents tab.
A dialog window will appear as follows:
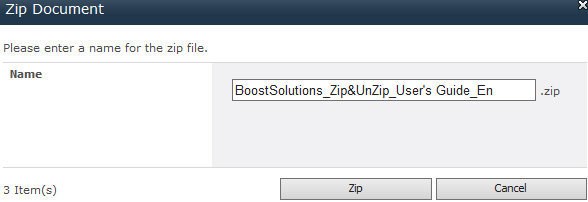
Enter a name for the zip file and click the Zip button.
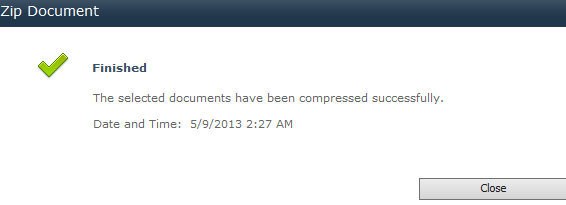
Wait for the operation to complete. You will see the following message:
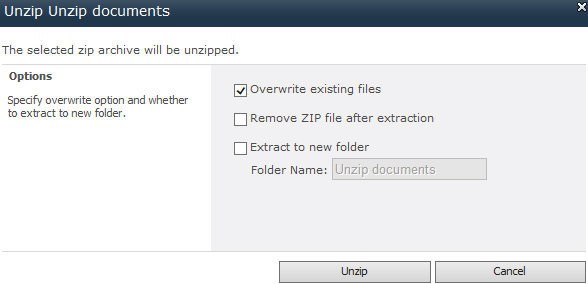
Extract any document or file from the zip file directly in the SharePoint document library.
Select a Zip file from your document library and click Unzip Document.
A dialog window will appear as follows:
This function helps users to upload documents or files from a zip file to a document library.
Click the Import ZIP button in the ribbon and a dialog window will appear as follows:
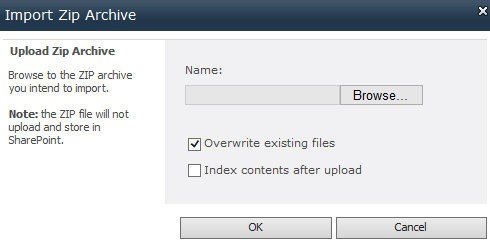
Select a zip file from your local computer and click OK.
5.4 Send Documents as attachment
Bulk Zip & Unzip enables users to send documents as an email attachment.
Select the documents in a document library and click the Send as Attachment button.
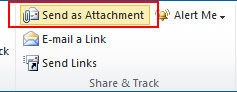
The document will be attached in an email. Compose your email and send it.
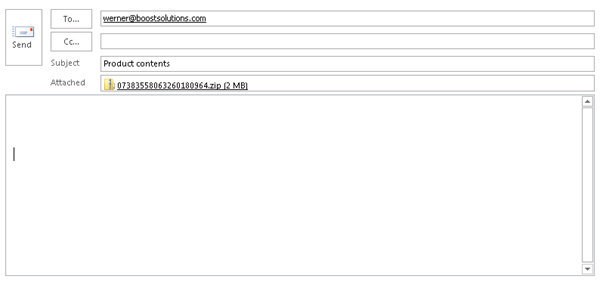
5.5 Send Documents as a zip file
This feature will compress your documents as a zip file and then attach it to an e-mail.
Select your documents in the document library and click the Send as ZIP button.
The zip file will be attached in an email.
With this function, it is easy to share any document with your colleagues or customers.
Select your documents in the document library and then click the Send Links button in the Documents tab.
An email message window will pop-up with all your documents links in the body of the message. Compose the email and send it.
List Advanced Filter allows each user to set up the filter panel in the list or document library, instead of adding the web part and connecting to the list or document library one by one.
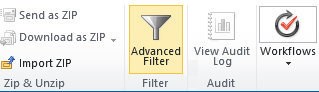
Access the list or document library from which you want to filter information. Click Advanced Filter under the Items or Documents tab.

If you are using List Advanced Filter for the first time, then a Configure Filter Panel window will open.
Criteria Settings: Specify from which fields or columns you want to use to filter on the list or document library. You can specify the field position by selecting a number.
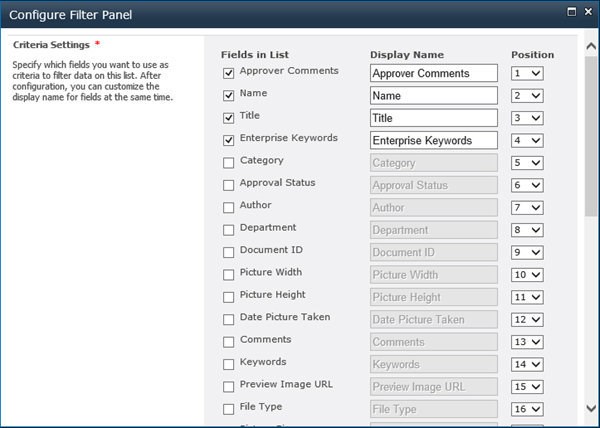
Match Rules: Specify the match rules for selected criteria.


After configuring the above settings, click the Save button.
After setting up the filter panel, users can find any information by assigning filters.
Enter the list or document library and click Advanced Filter in Document tab.
Depending on how the filter is configured, select the comparison operator and type a value for each criterion.
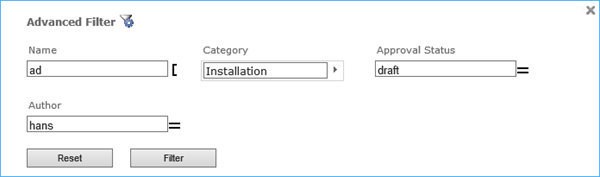
Click the Filter button and the results will be shown in the list or document library.
To clear the filters click the
 button.
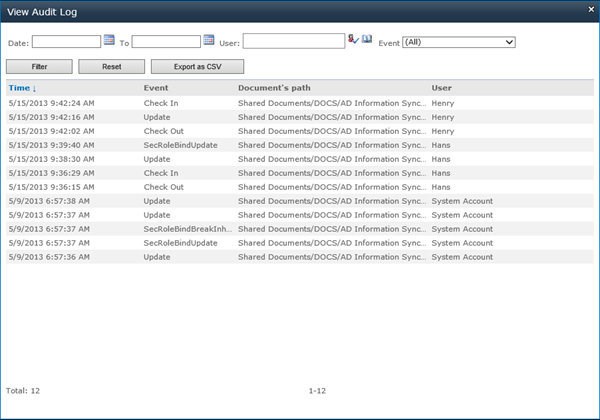
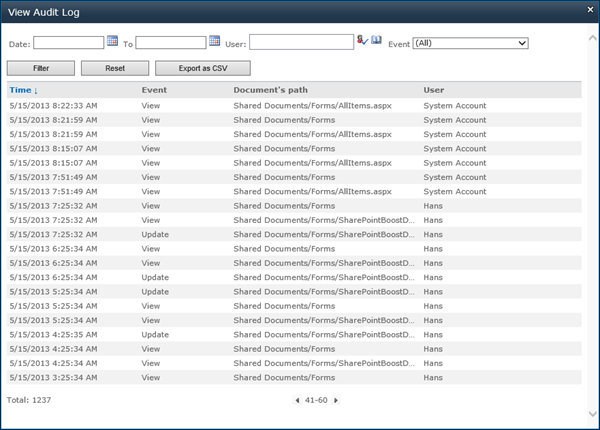
7.1 View list or library audit log
Enter the list or library which you want to view the audit logs for. Find View Audit Log under List or Library tab.

Click View Audit Log button. An audit log window will open as follows:
7.2 View item or document audit log
Enter the list or library and select an item or document which you want to view audit logs for. Find View Audit Log under Items or Documents tab.

You can also find View Audit Log in the context menu.

Click View Audit Log button. An audit log window will open as follows: