The Bulk Zip & Unzip App from BoostSolutions offers a simple way to upload and extract ZIP files into a document library, as well as download multiple documents as a ZIP file.
This tutorial provides step-by-step instructions on how to zip or unzip documents in a SharePoint Online document library.
2. Zip Documents within the Document Library
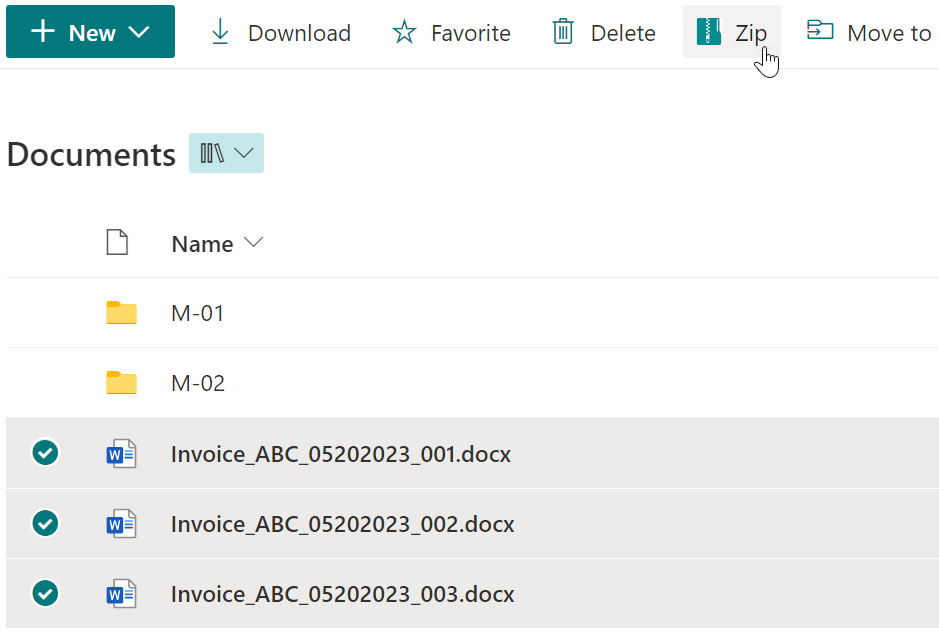
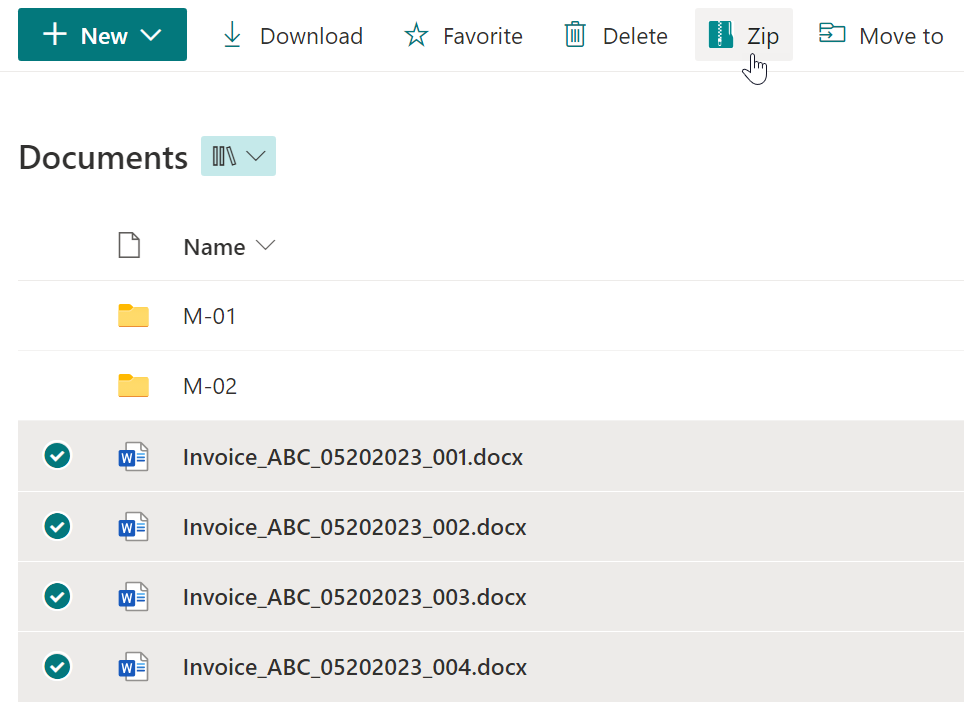
a. In the Documents library, select multiple documents and click on Zip in the top action bar. (Please note that the Zip or Unzip features are only available in SharePoint modern experience.)
b. A Zip dialog window will appear as shown below:

c. Provide a unique name for the ZIP file, such as Invoices.
d. Specify a destination where you want to store the ZIP file. If no destination is specified, the ZIP file will be stored in the current location. If there are folders in the document library, you can choose a folder or subfolder for storing the ZIP file.
In this example, we select the folder M-01.
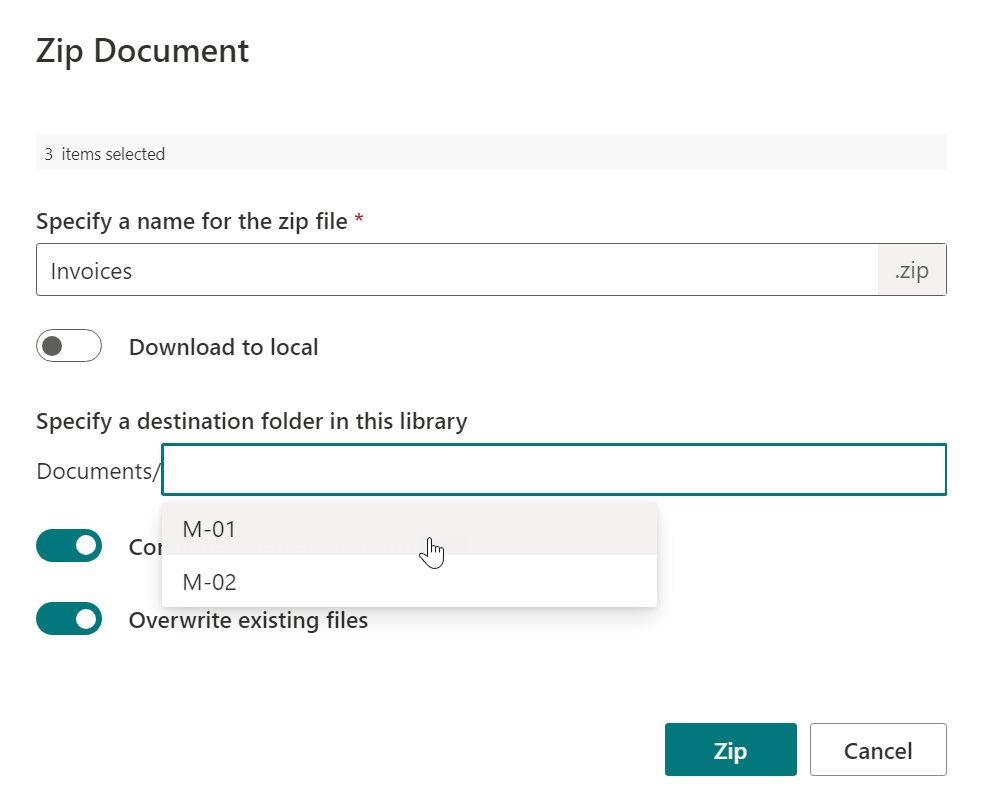
Overwrite existing files: Choose whether to overwrite existing files in the current location if files with the same name already exist.
Continue when error occurred: Enable this feature to continue zipping even if an error occurs during the process. If disabled, the zipping process will stop when an error occurs.
e. Click on Zip.

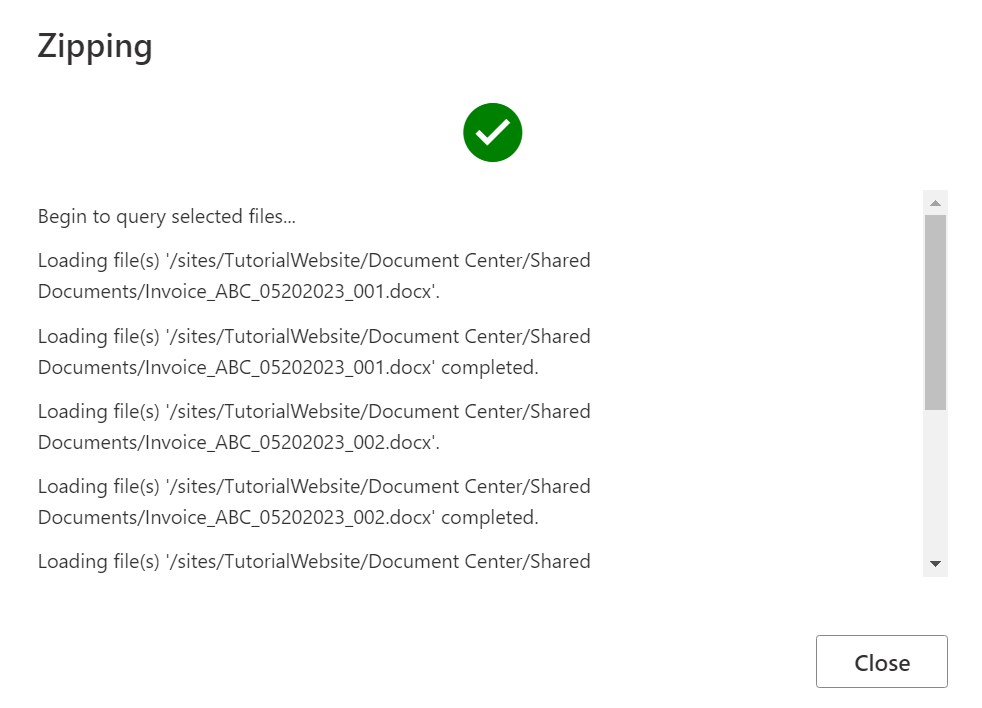
f. Wait for the zip operation to finish. The ZIP file will be stored in the M-01 folder as shown below:
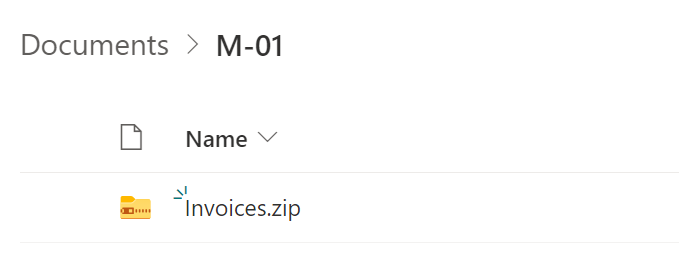
You can track the compression process and check for any errors with the detailed messages provided.
a. In the Documents library, select multiple documents and click on Zip in the top action bar. (Please note that the Zip or Unzip features are only available in SharePoint modern experience.)
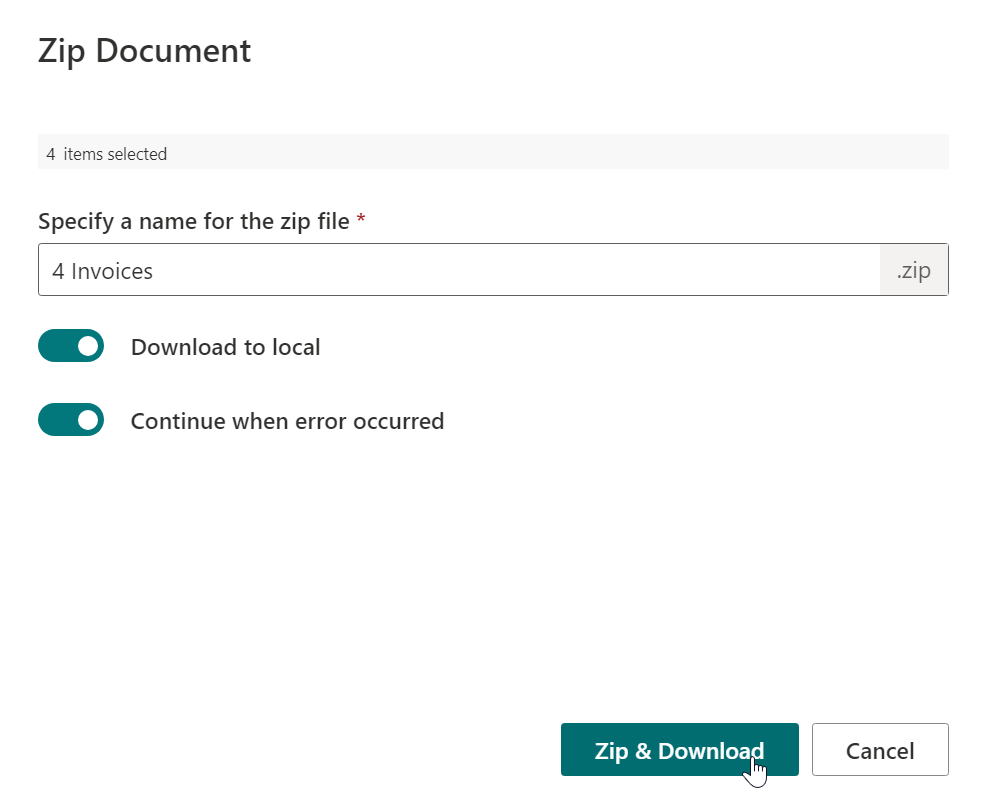
b. A Zip dialog window will appear. Provide a unique name for the ZIP file, such as 4 Invoices.
c. Turn on Download to local, leave the other settings as default and click on Zip & Download.
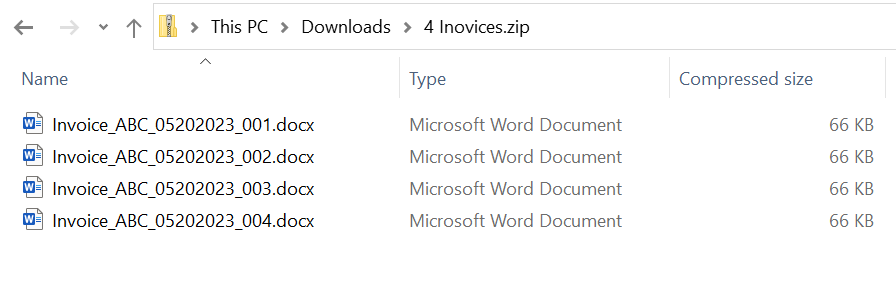
d. Wait for the operation to finish. The ZIP file will be available for download, typically saved in the "/downloads" folder.
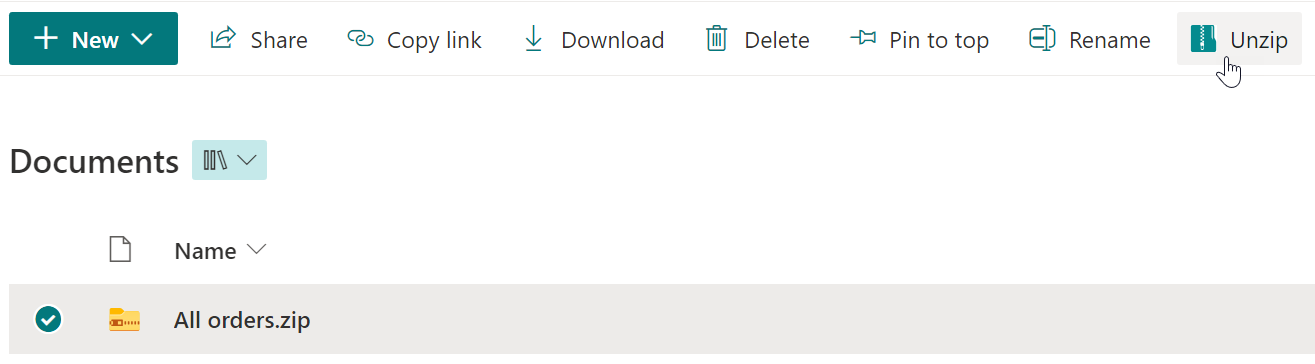
a. In the document library, select a ZIP file containing five Excel files, and click on Unzip in the top action bar.
b. An Unzip dialog window will appear as follows. Specify a destination for storing the extracted files or folders. In this example, we select the "M-02" folder.
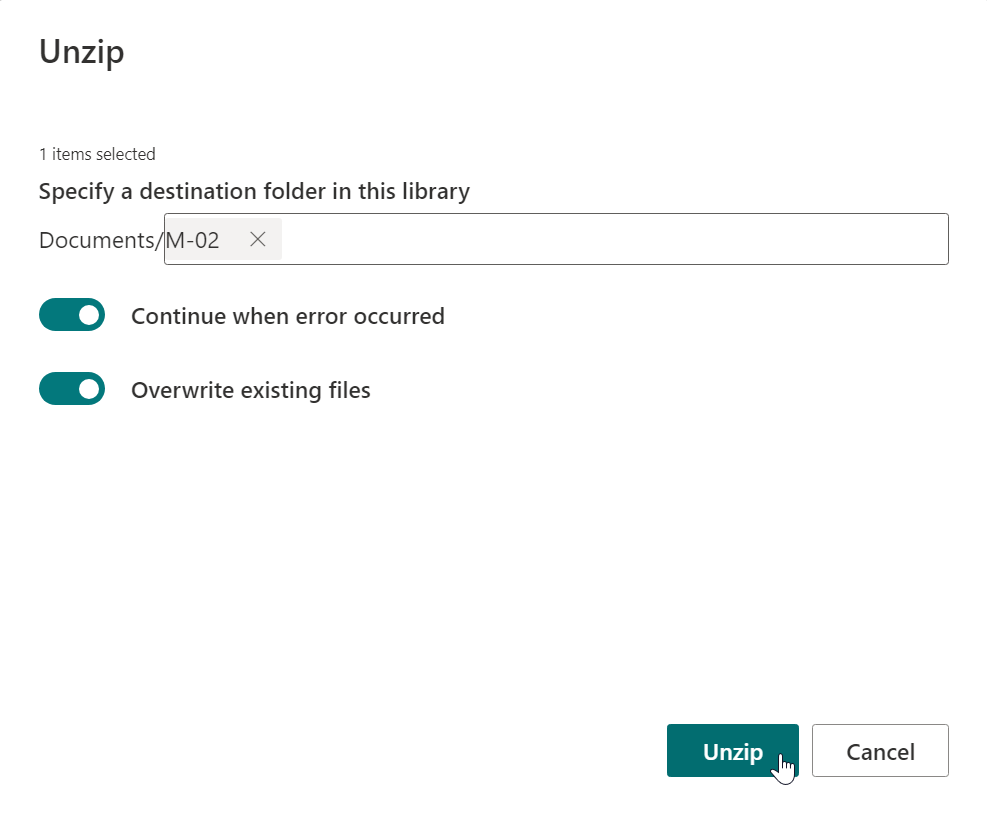
Overwrite existing files: Choose whether to overwrite existing files in the current location if files with the same name already exist.
Continue when error occurred: Enable this feature to continue zipping even if an error occurs during the process. If disabled, the zipping process will stop when an error occurs.
c. And click on Unzip.
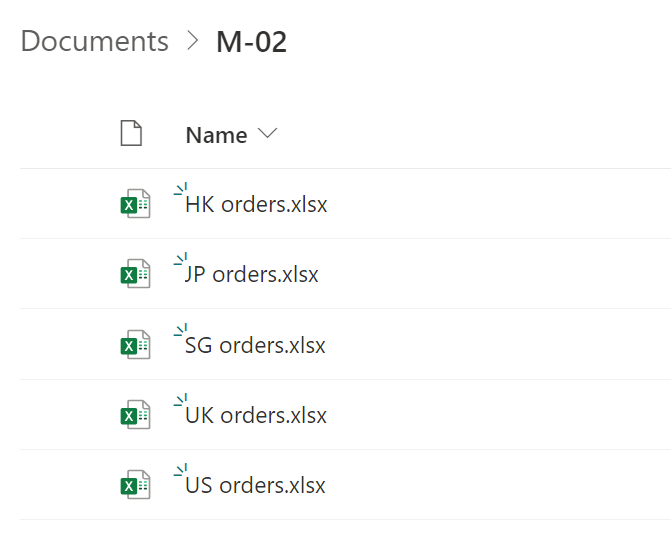
d. Open the “M-02” folder, and you will find the five Excel files extracted from the ZIP file and stored there.
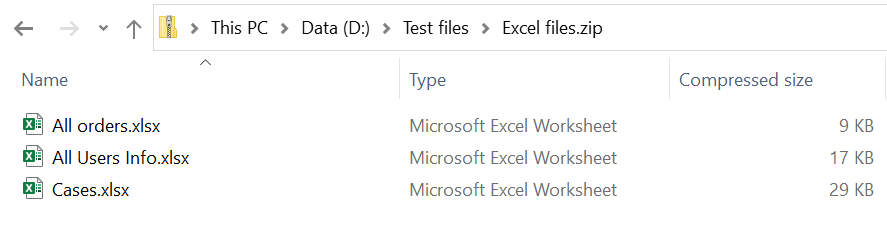
Assuming there is a ZIP archive named “Excel files” containing 3 Excel files.
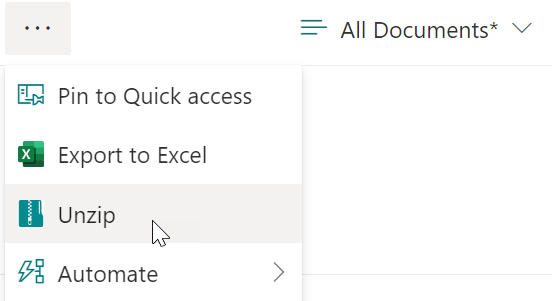
a. In the document library, unselect any documents and click on Unzip in the top action bar.
b. In the Unzip dialog, upload the ZIP file “Excel files”.
To upload a ZIP file, you have two options:
Click on “Drag and drop one zip file here, or click to select one” to open the file chooser and select a ZIP file.
Directly drag and drop the ZIP file onto the Unzip dialog.
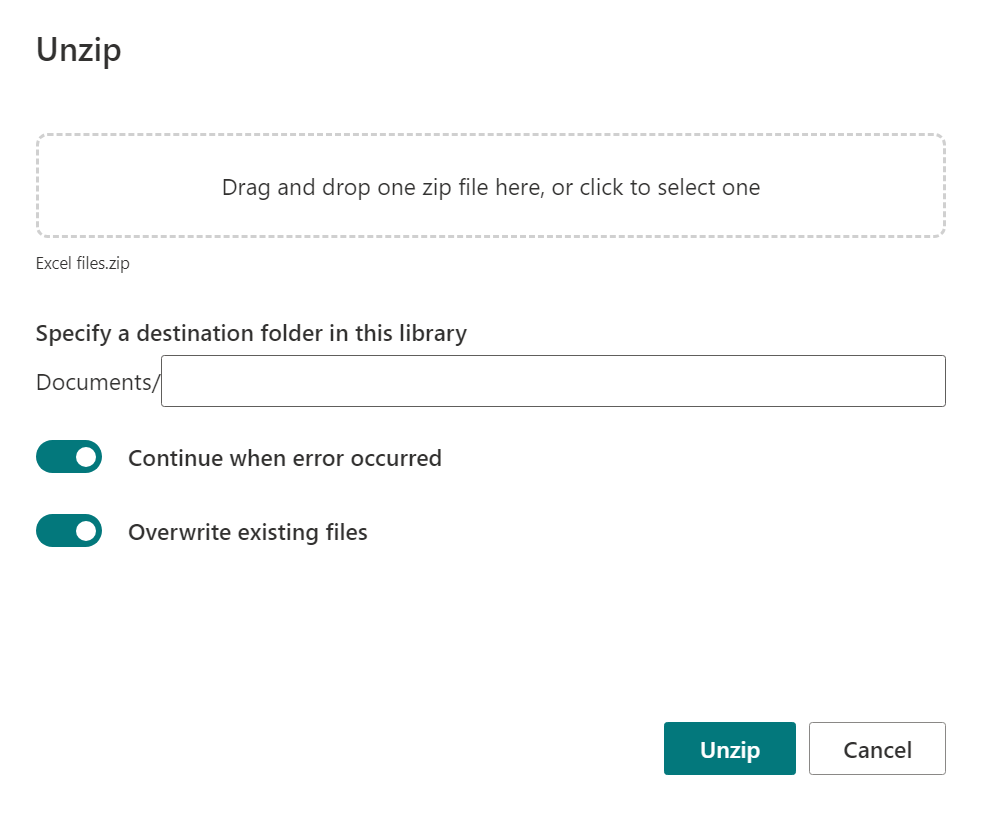
c. Specify a destination for storing the extracted files or folders. In this example, we do not select a folder, which means all files will be stored in the current location.
d. Keep the other settings as default and click on Unzip.
e. Wait for the operation to finish. The documents in the ZIP file will be extracted and uploaded into the destination folder as follows.