- BoostSolutions
-
Products
-
- Microsoft Teams
- HumanLike Alert Reminder
- View All Apps
- Pricing
- Support
- Company
When you sync data from SQL server, MySQL or Oracle database to a SharePoint list, you can select and sync data from a table, also you can sync data from a database view.
In this article, we will demonstrate how to sync data from a database view to a SharePoint list with the help of Data Connector.
Sync data from a database view to SharePoint list
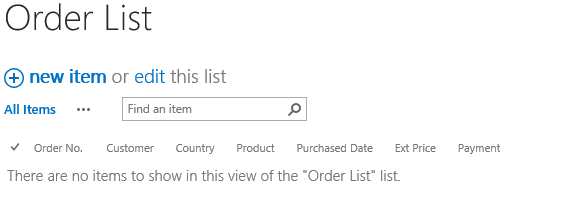
Create a list named as Order List from the custom list template on a SharePoint site, the list contains the same columns as that in the Purchase Orders view.
Download the trial version of Data Connector and install it to your SharePoint server.
Navigate to the site in which the Order List is located.
In the upper right corner, click Settings and then click Site Settings.
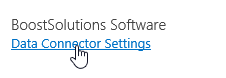
On the Site Settings page, click Data Connector Settings under BoostSolutions Software section in the bottom right corner of the page.
On the Data Connector Settings page, click Create Job.
After clicking Create Job, you will enter the Edit Job page.
In the Job Name section, specify a unique name for the job, such as job-1.
In the Direction section, specify the direction for the data connection. Select From external data to list option which means we will sync data from the external data source to this SharePoint list.

In the
List section, specify a SharePoint list or Document Library to which you want to sync data
from the external data source. Select
Choose an existing list option. Click
 to browse and select the
Order List from the drop-down list.
to browse and select the
Order List from the drop-down list.

In the External Data and Authentication section, configure the settings as following. Specify the external data type and database authentication. (Ensure the user account you specify has the appropriate permissions to access the external data source.)
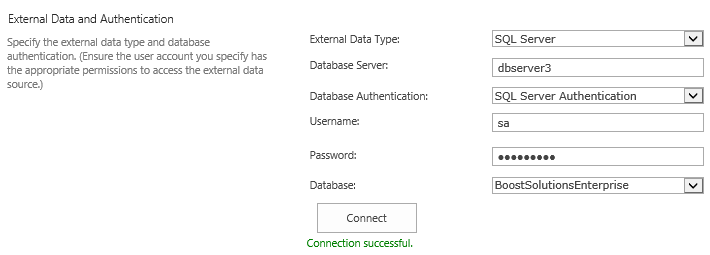
External Data Type: Select SQL Server as the external data type.
Database Server: Enter the SQL server’s name or its IP address.
Database Authentication: There are two types of authentication, Windows Authentication and SQL Server Authentication.
Windows Authentication: Select this authentication if you want to use the application pool account to access the SQL database. You need to enable Windows Authentication as the Authentication Mode in SQL Server in order to access the database successfully.
SQL Server Authentication: If you select this authentication, you need to enter a SQL user name and password to access the database.
Here we select the SQL Server Authentication.
Username: Enter a SQL user name. The user should have Write permission to the database.
Password: Enter the user’s password.
Click Connect to connect the SQL Server we specified (the dbserver3 in our case). If everything goes right, it will show Connection successful below the Connect button. And the databases existed on the specified SQL server will be populated to the dropdown list as shown in the picture above.
Database: Select a database, here we select BoostSolutionsEnterprise.
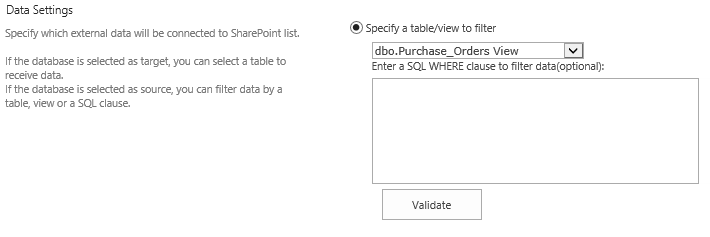
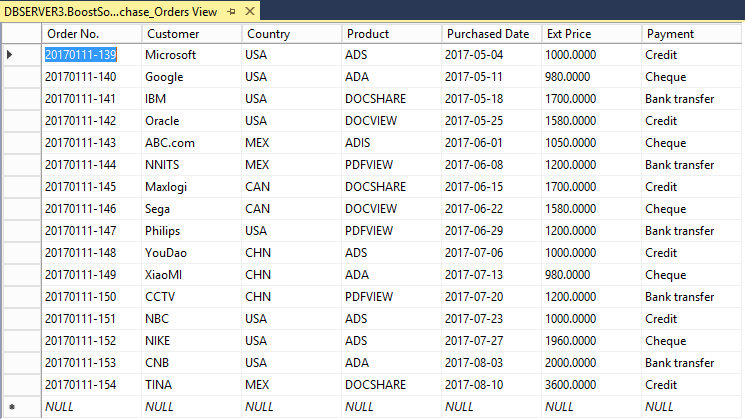
In the Data Settings section, specify which external data will be connected to the SharePoint list. Select Specify a table/view to filter option, and select dbo.Purchase_Orders View (the view Purchase_Orders stored in the BoostSolutionsEnterprise database as we described in the sample data section) from the drop-down list as following.
Here we take SQL server database as example, you can also select a MySQL database view or Oracle database view in the same way.
In the Column Mapping section, map the fields in the external database to the columns in the SharePoint list as following.
By default, the database fields which have the same name and type with that of the columns in the SharePoint list will be automatically mapped.
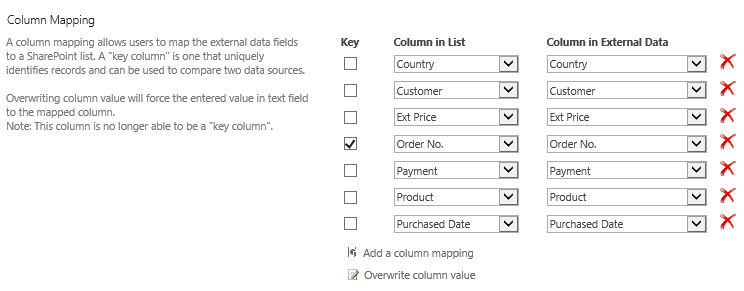
And then select Order No. as the key. A “key column” is one that uniquely identifies records and can be used to compare data sources.
If the columns name or type are different between SharePoint list and external data source, you have to map the columns manually by clicking Add a column mapping link.
Keep other settings as default and click Save to save the settings.
And then you will find that the job has been created on the Data Connector Settings page, the job-1.

Click the Run button for the job-1 and waiting for the job to be run completely.
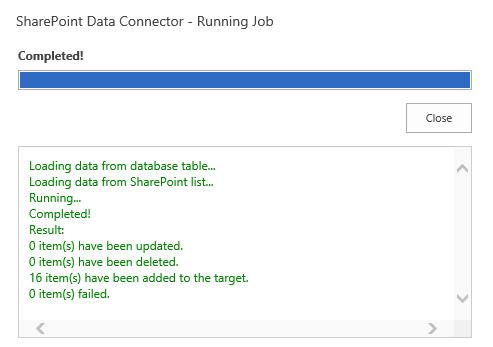
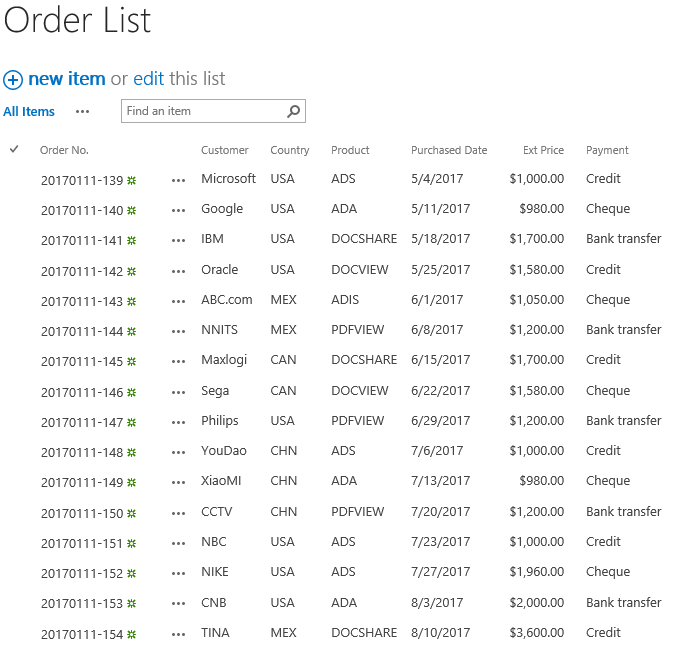
After the job run completely, click Close. And navigate to the Order List, and you will find that the data stored in the view “Purchase_Orders” in the SQL Server database “BoostSolutionsEnterprise” have been synced to the SharePoint list successfully as following.