- BoostSolutions
-
Products
-
- Microsoft Teams
- HumanLike Alert Reminder
- View All Apps
- Pricing
- Support
- Company
This guide provides step-by-step instructions for requesting the Cascaded Lookup App from the SharePoint Store and adding it to your SharePoint Online site. Note: To request and add an app, you must have at least Full Control permission for the site or be a member of the site owner group. While requesting an app typically doesn't require these permissions, they are necessary for actually adding the app to the site.
1. Sign in to your Microsoft 365 account.
2. Navigate to the SharePoint Online site where you want to use the Cascaded Lookup App.
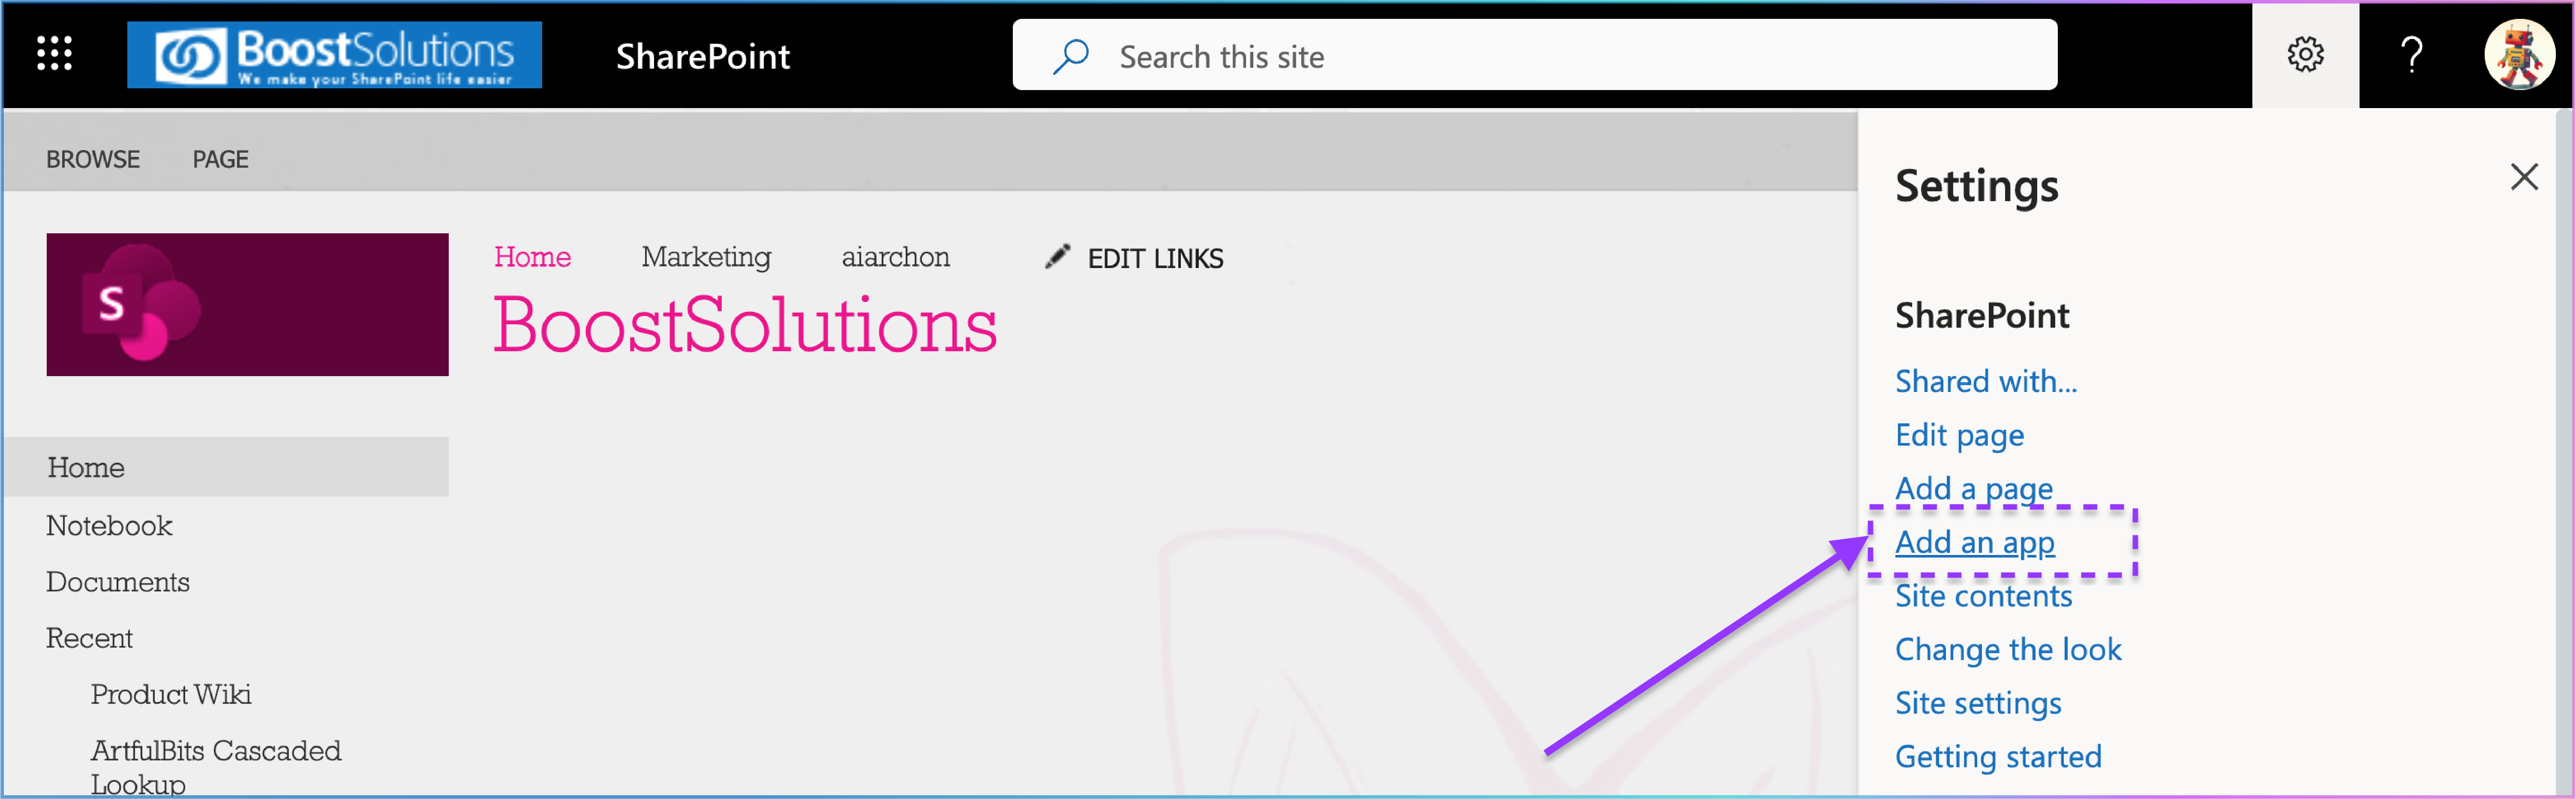
1. On your site's homepage, click the Settings icon  (gear icon) in the upper right corner.
2. Select Add an app from the dropdown menu.
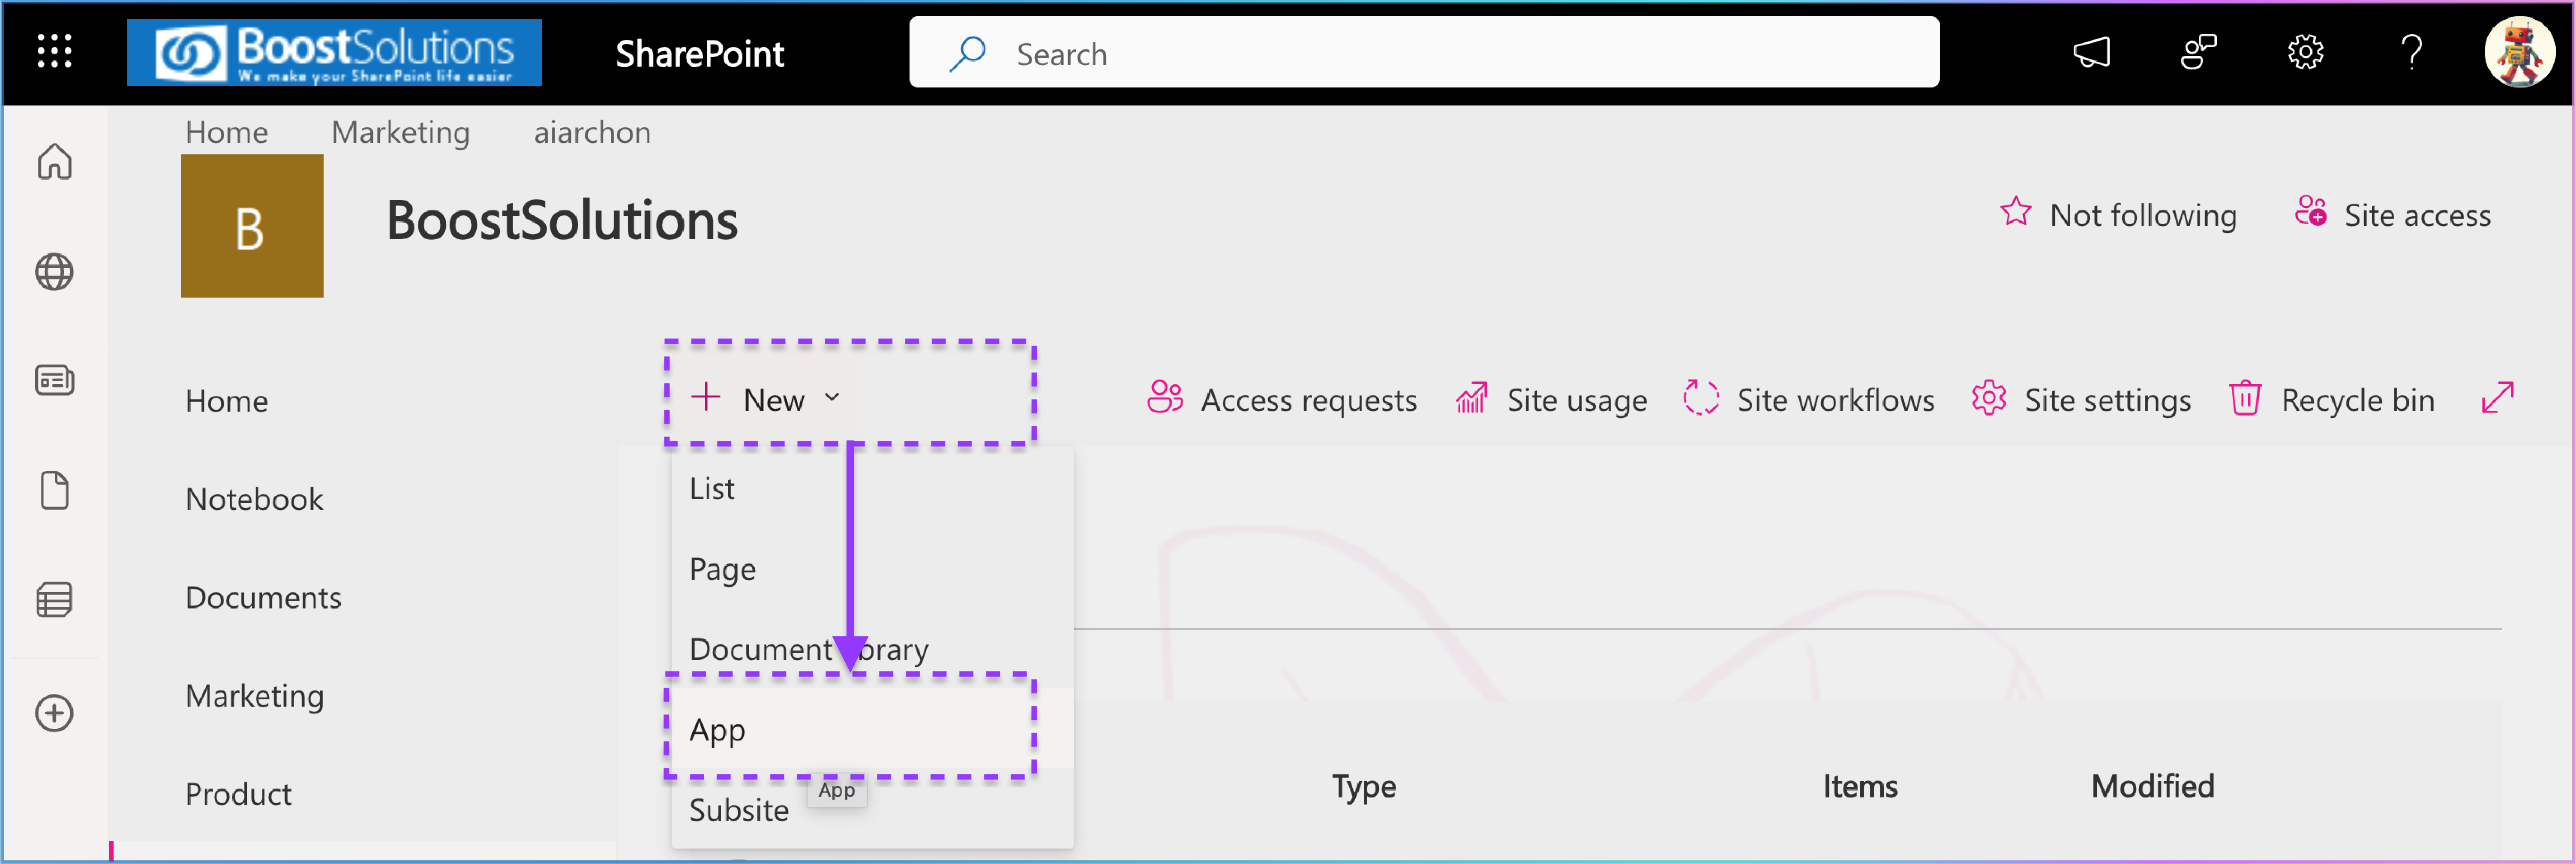
1. Click the Settings icon , then select Site contents from the dropdown menu.
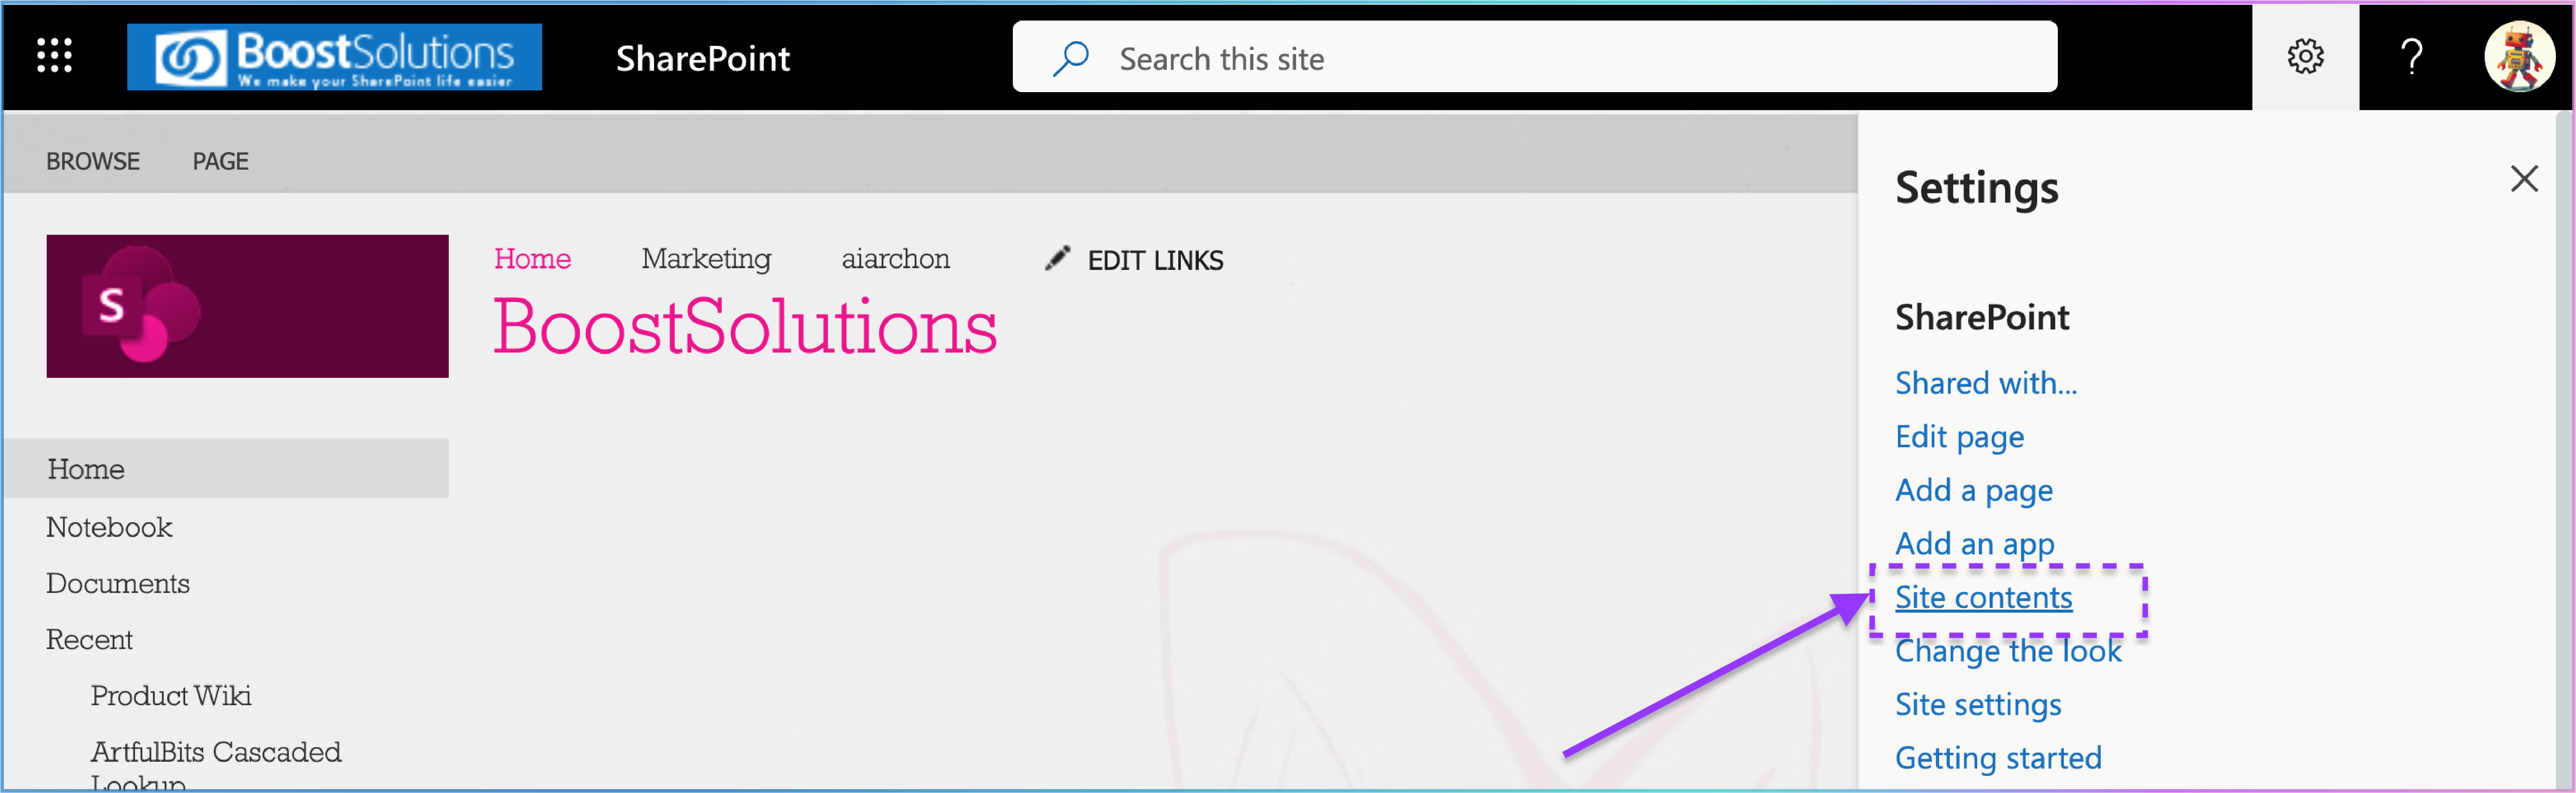
2. On the Site contents page, click the + New button and select App from the dropdown menu.
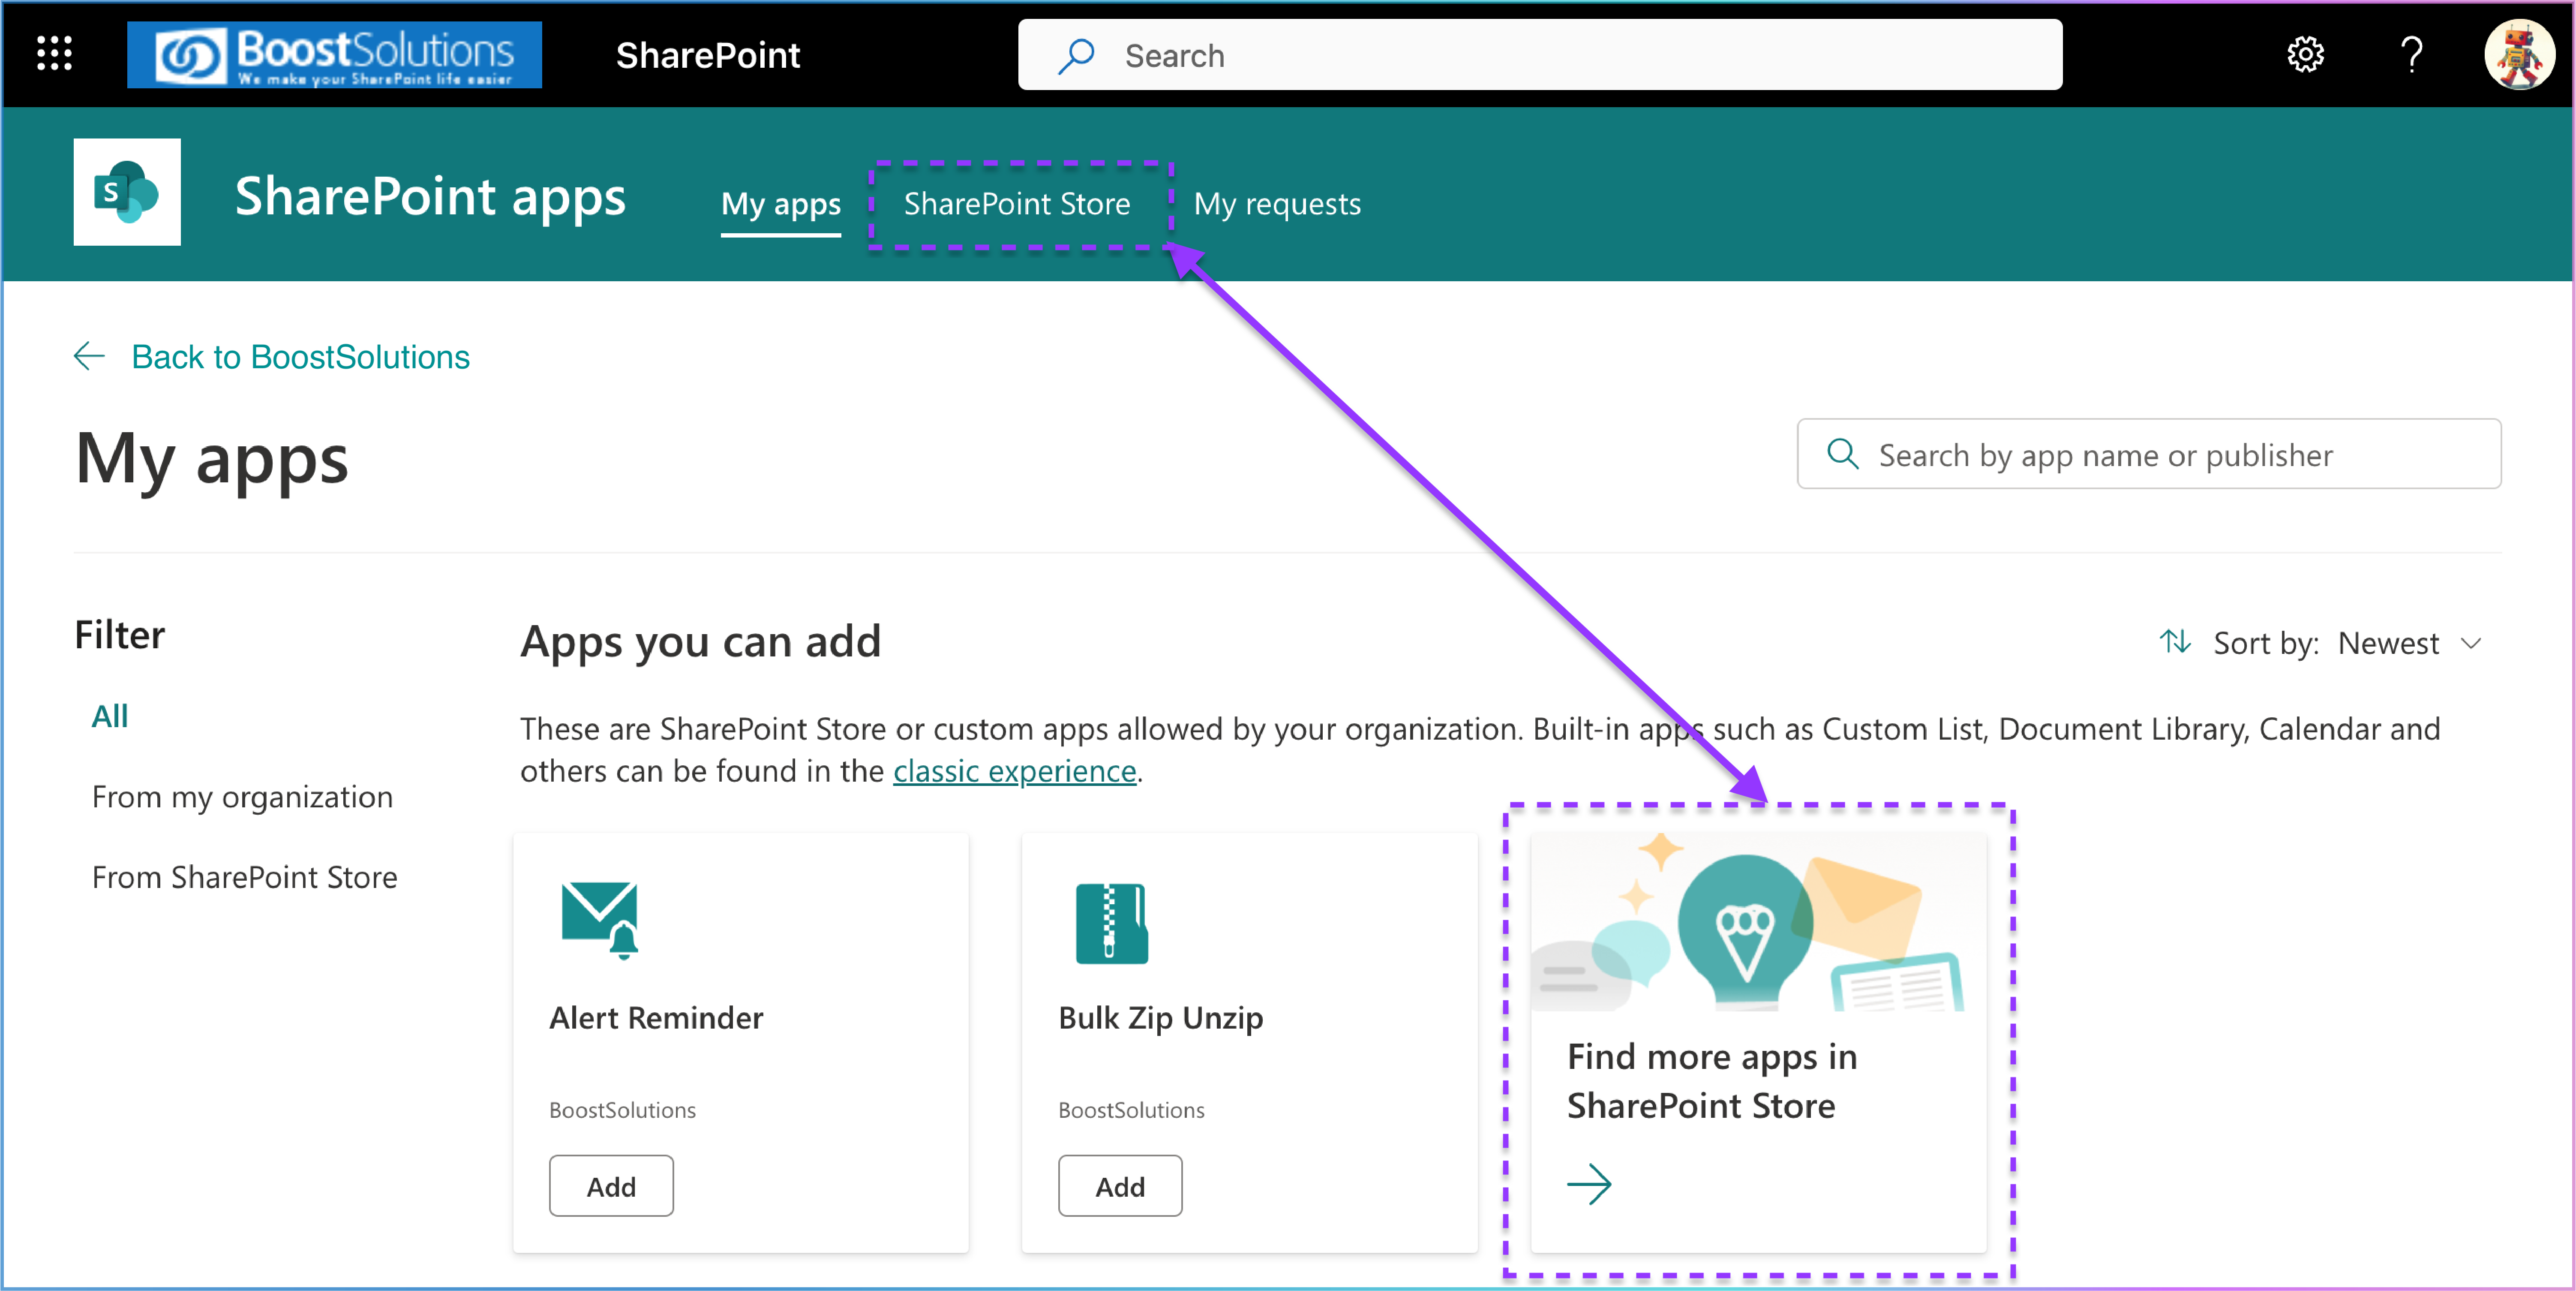
1. Both methods will redirect you to the My Apps page, which lists SharePoint Store or custom apps approved by your organization.
2. Click Find more apps in SharePoint Store or SharePoint Store in the top navigation bar to access the SharePoint Store.
1. In the SharePoint Store, type Cascaded Lookup in the search bar located in the top right corner.
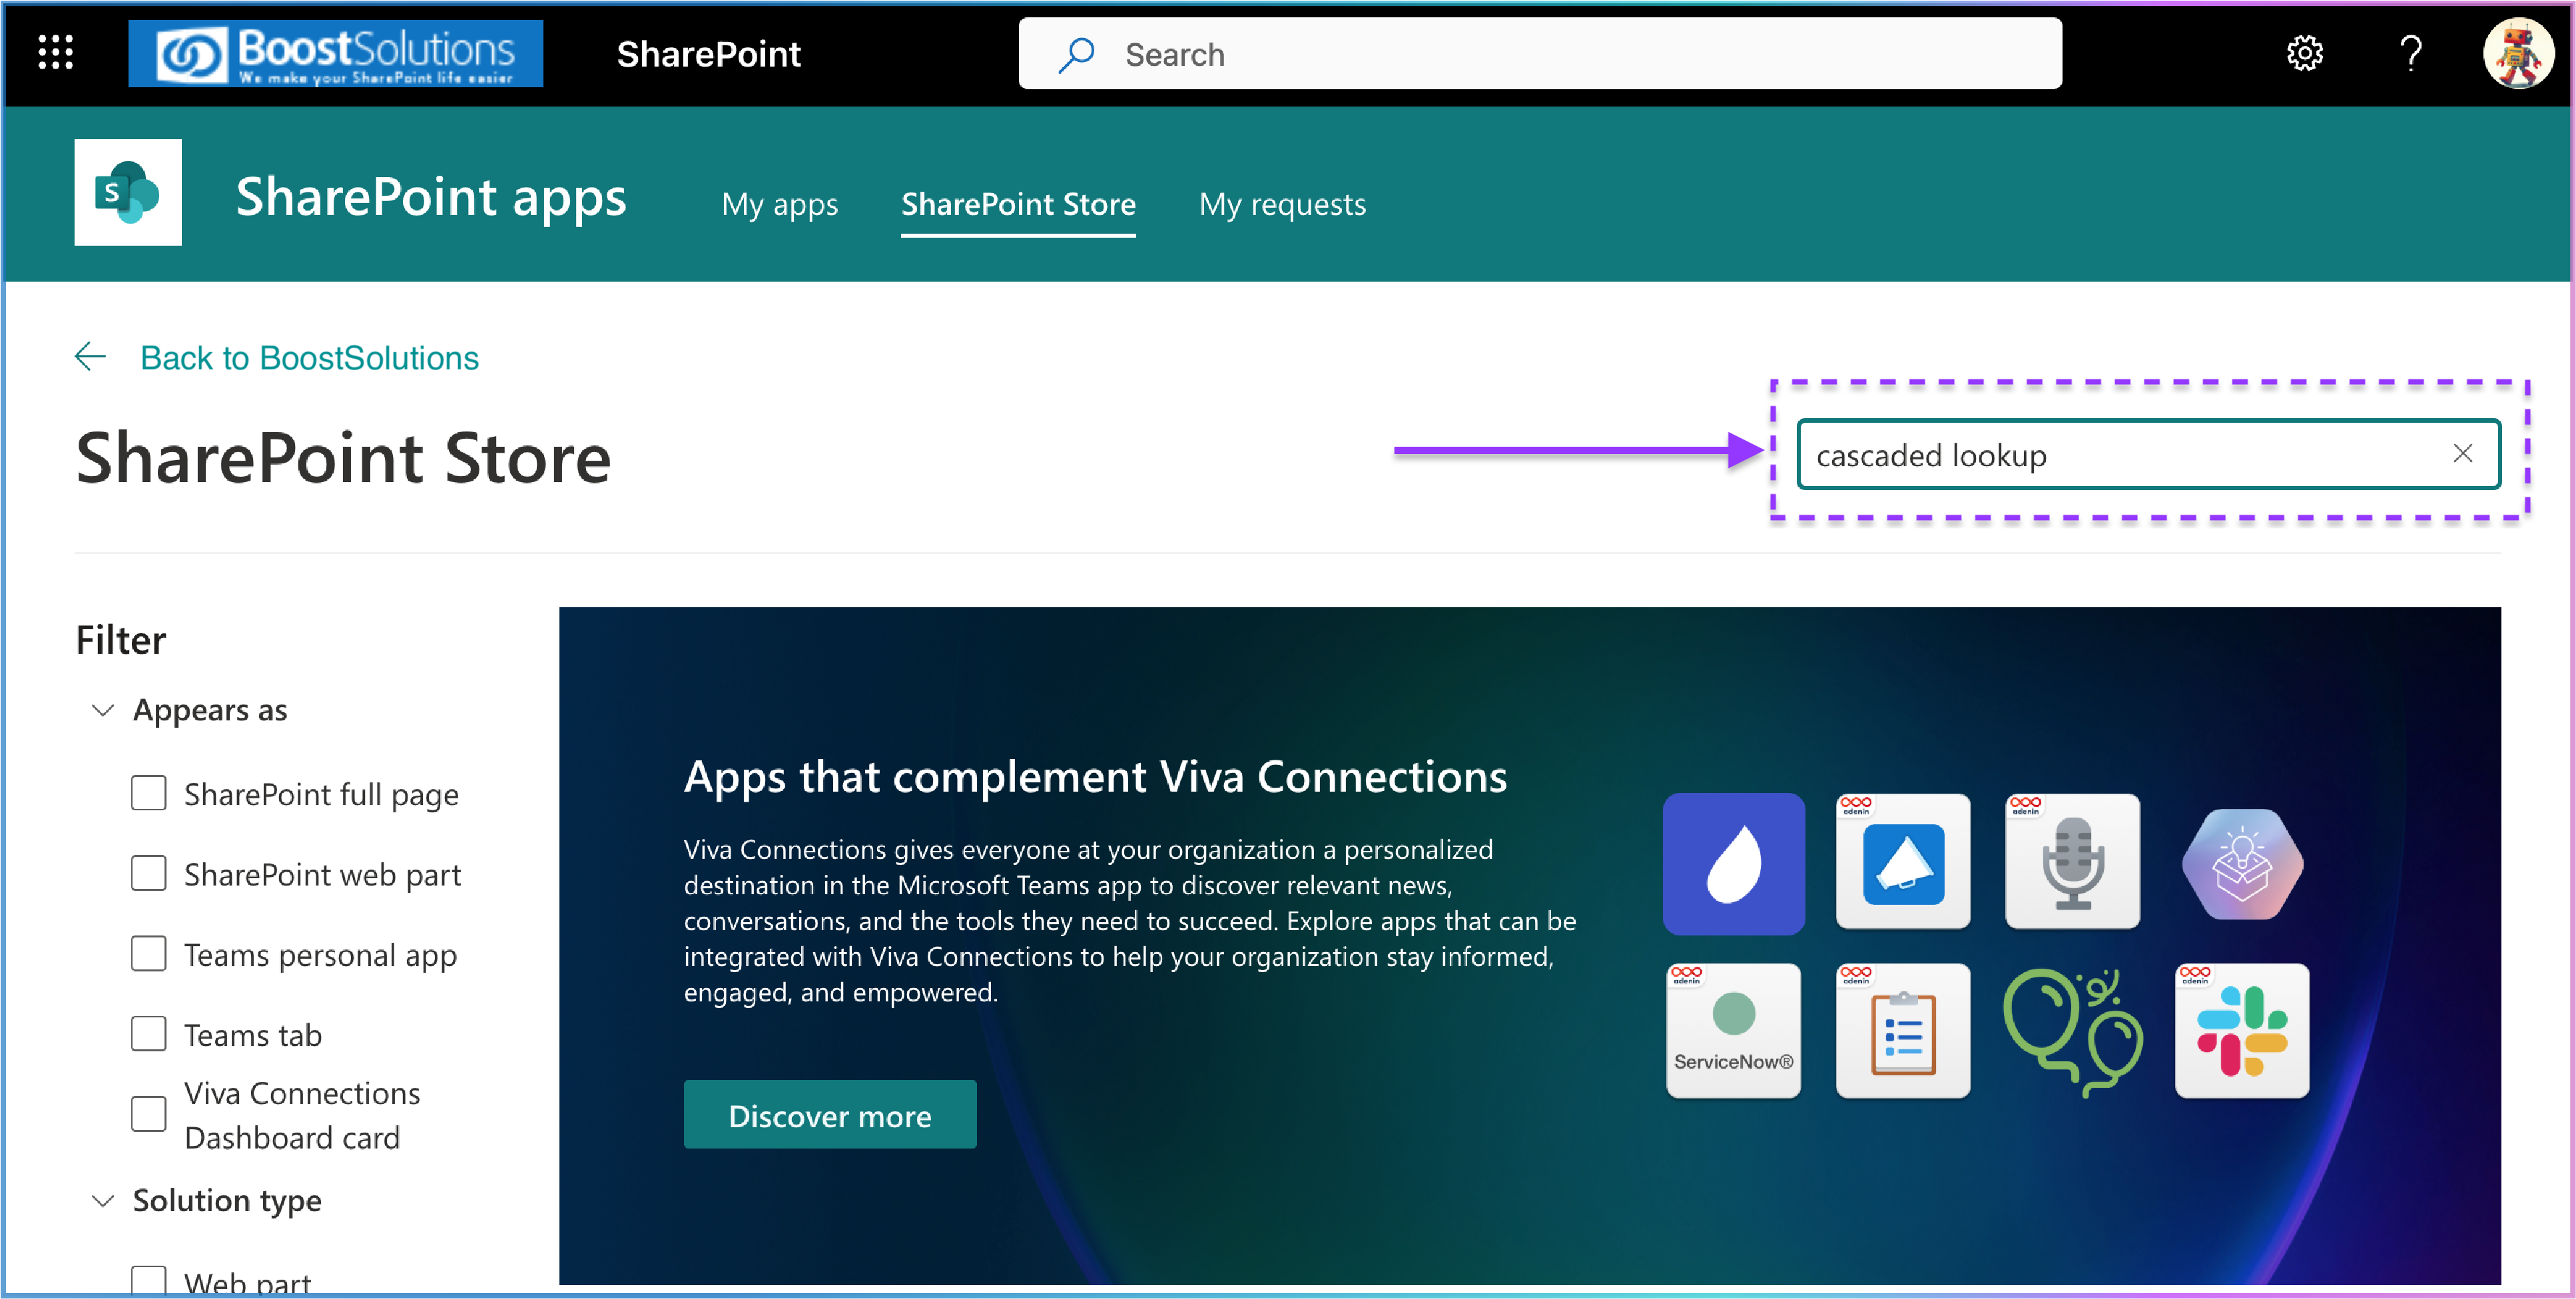
2. Browse the search results and locate the Cascaded Lookup App by BoostSolutions.

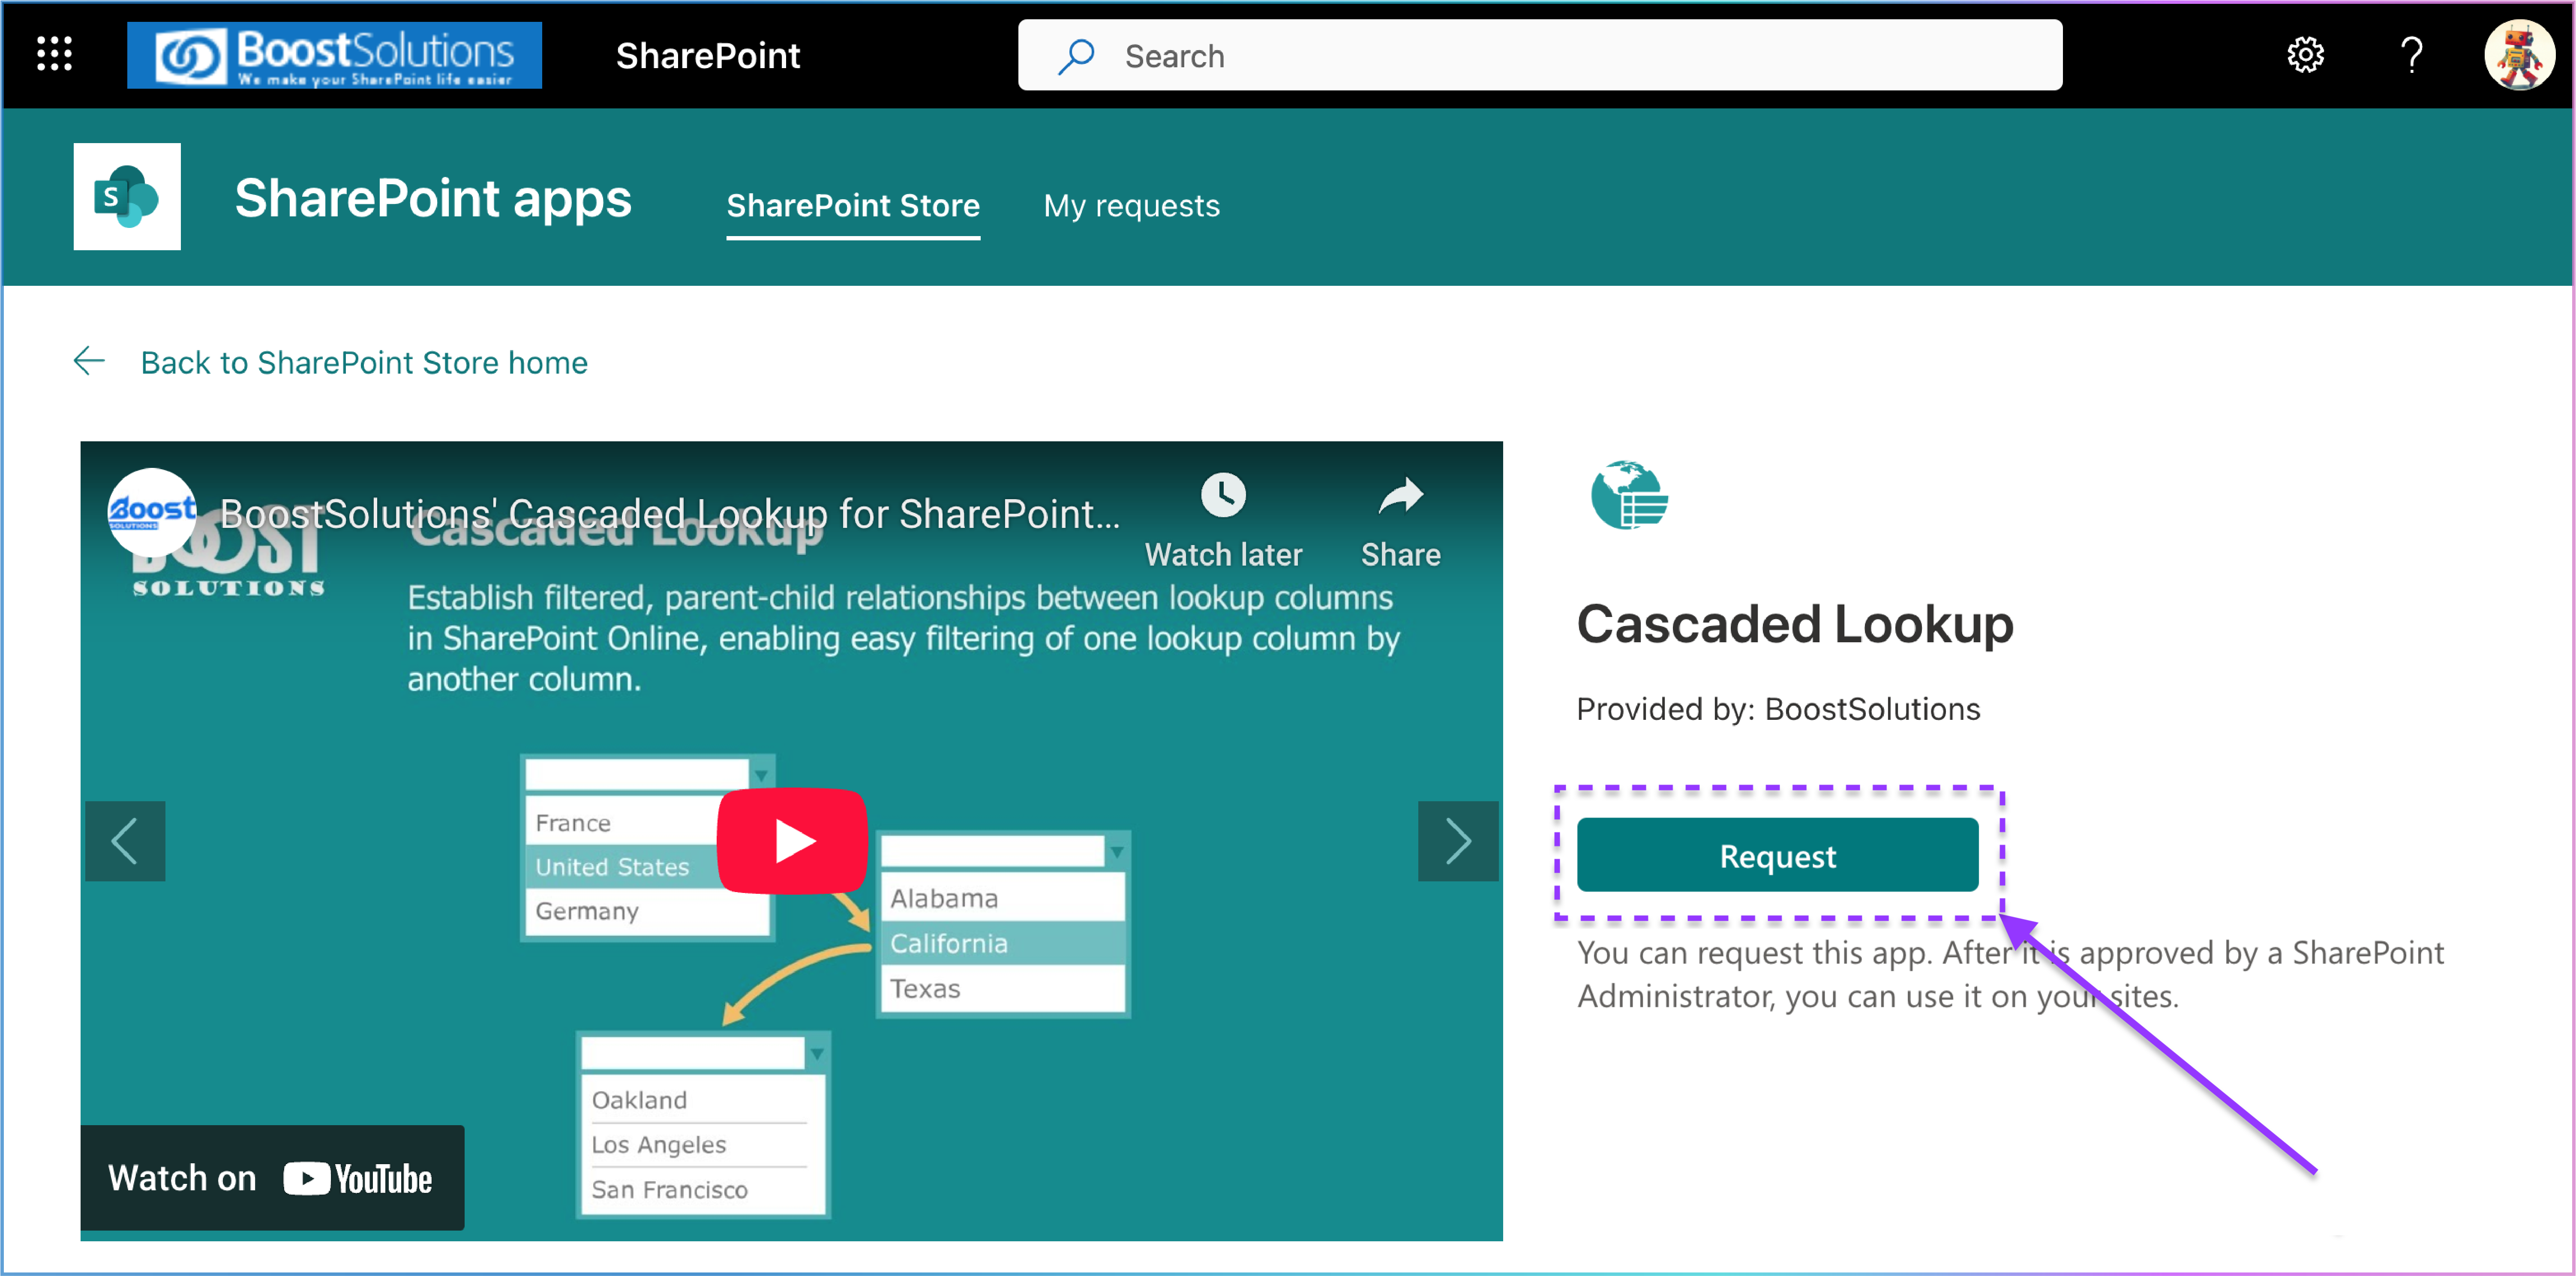
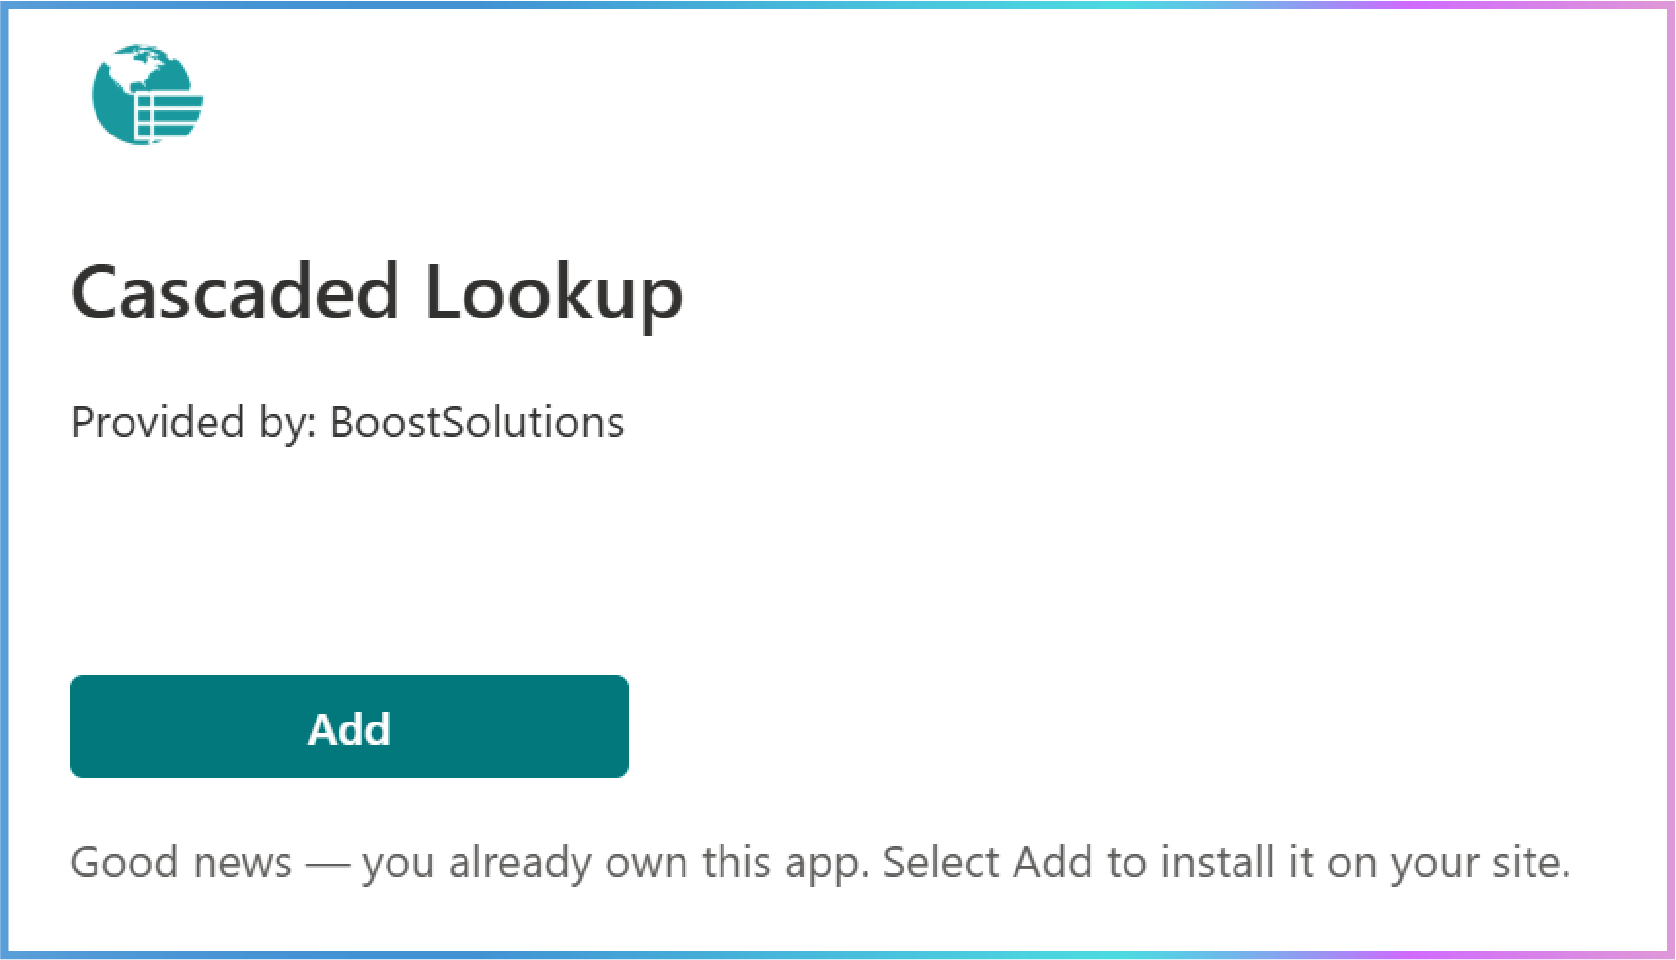
1. Click on the app tile to view its details.
2. Click the Request button to submit a request for the app.
Note: The app must be approved by your SharePoint Administrator before it can be used.
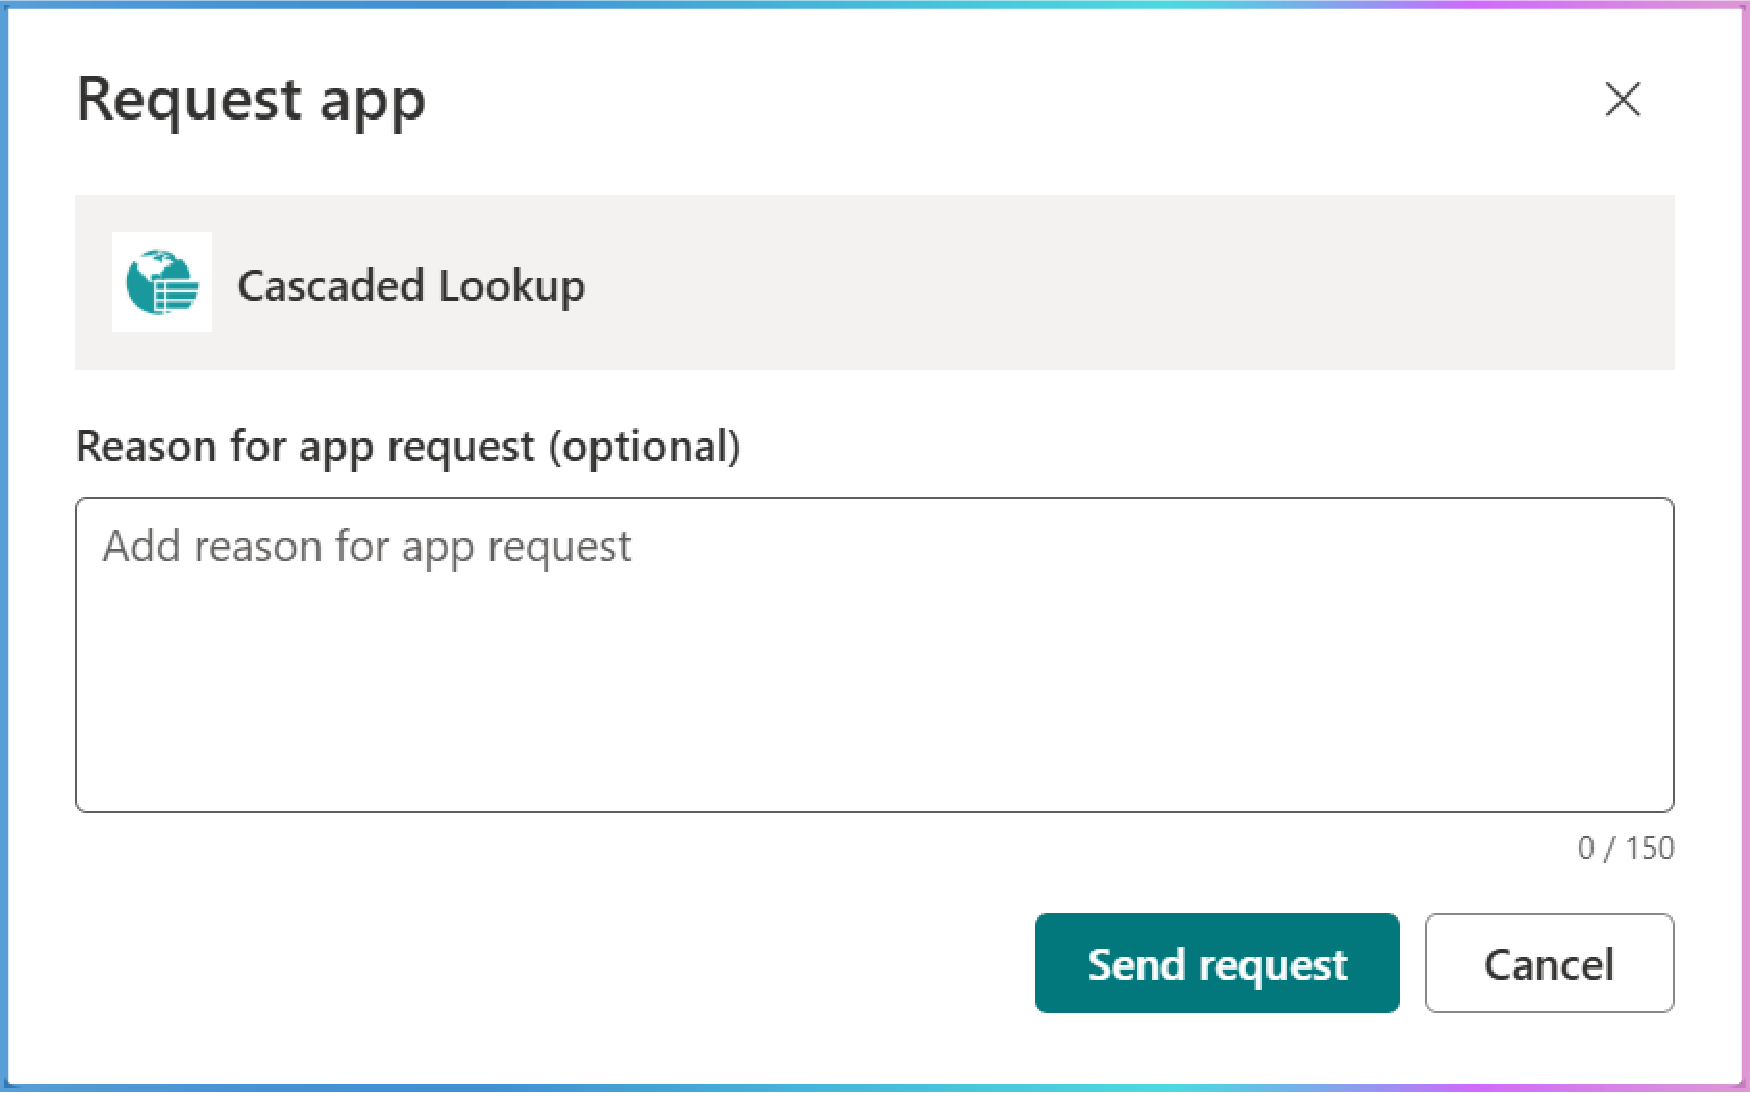
1. Optionally, add a reason for your request in the provided field.
2. Click Send request to submit your request.
1. To track your request status, click on My Requests in the top navigation bar.
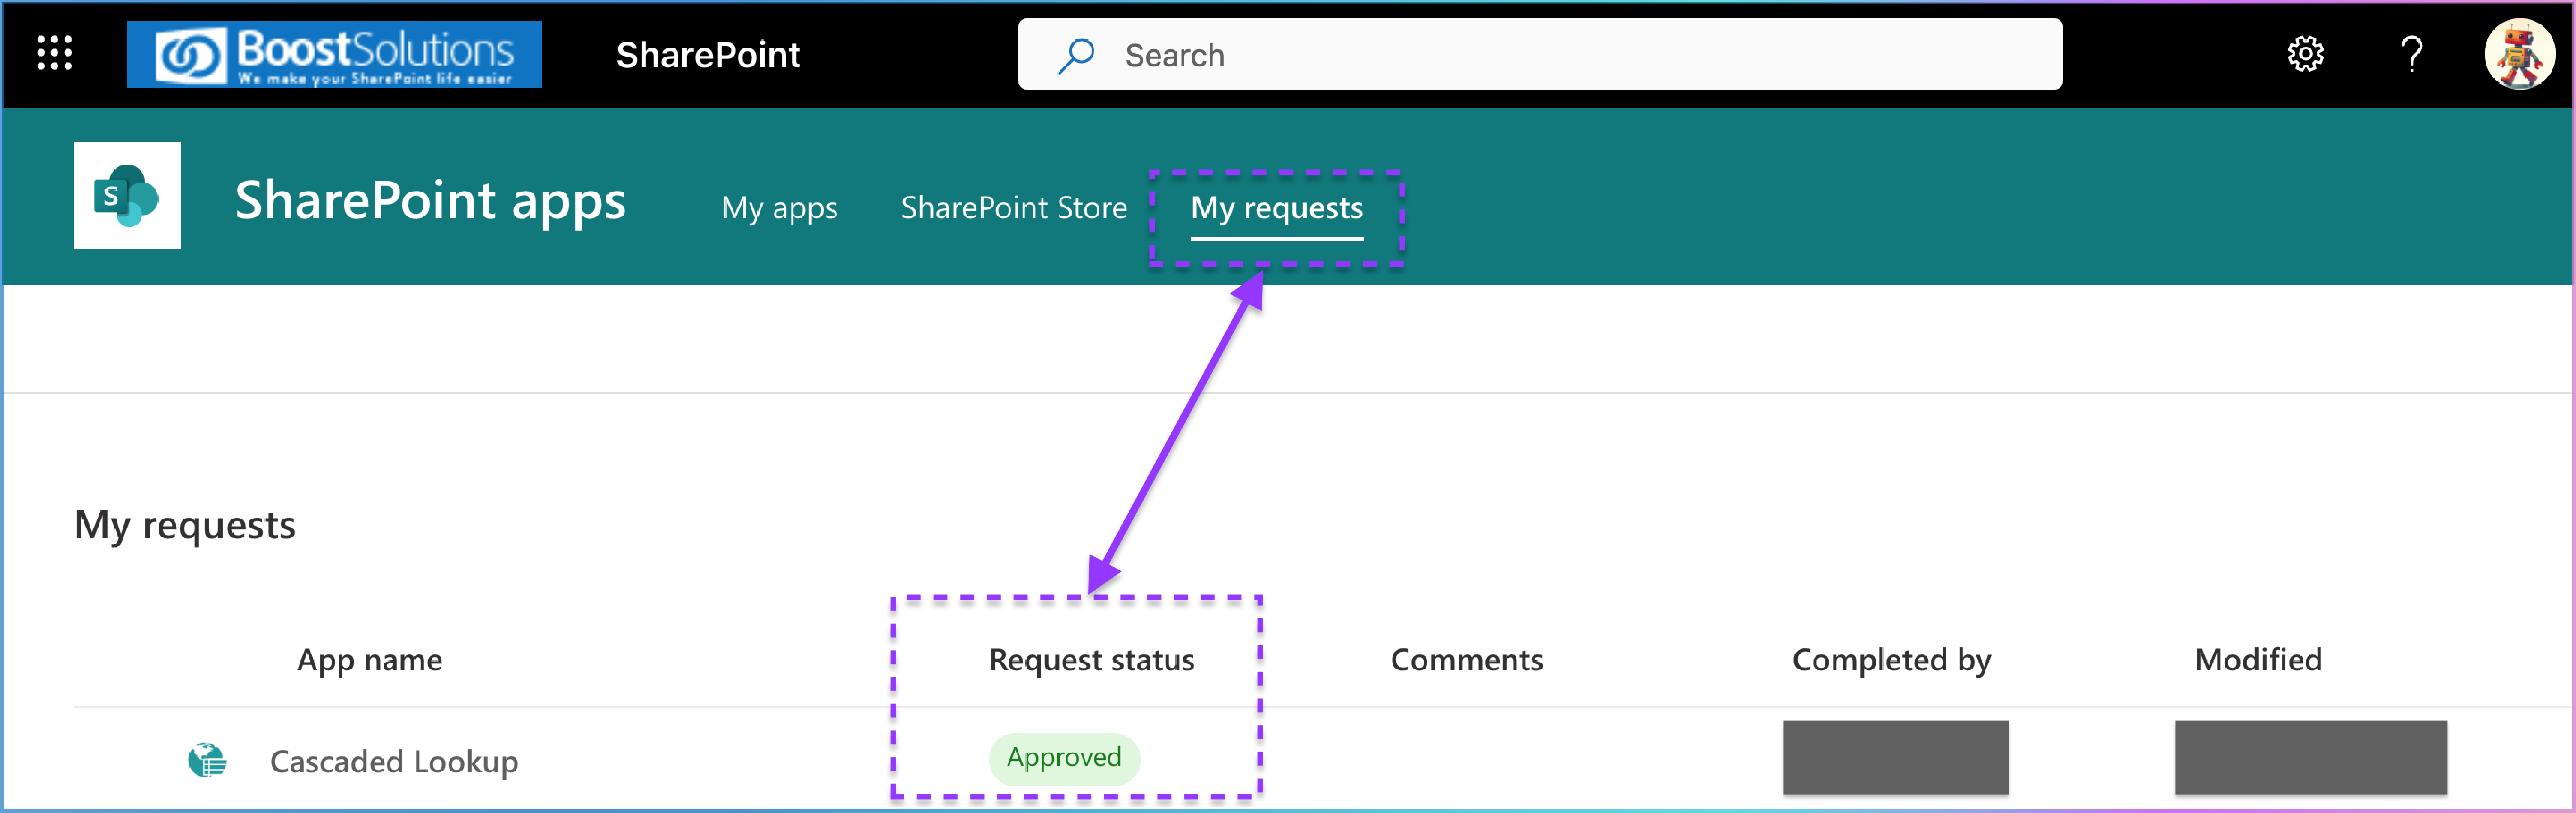
2. The status will indicate whether your request is Pending or Approved.
Note: A SharePoint Administrator within your organization must approve the app before it can be used. This ensures only approved and secure apps are used in your SharePoint environment.
1. Once your request is approved, the Request Status will update to Approved.
2. The app will then be listed in My Apps and ready for use.
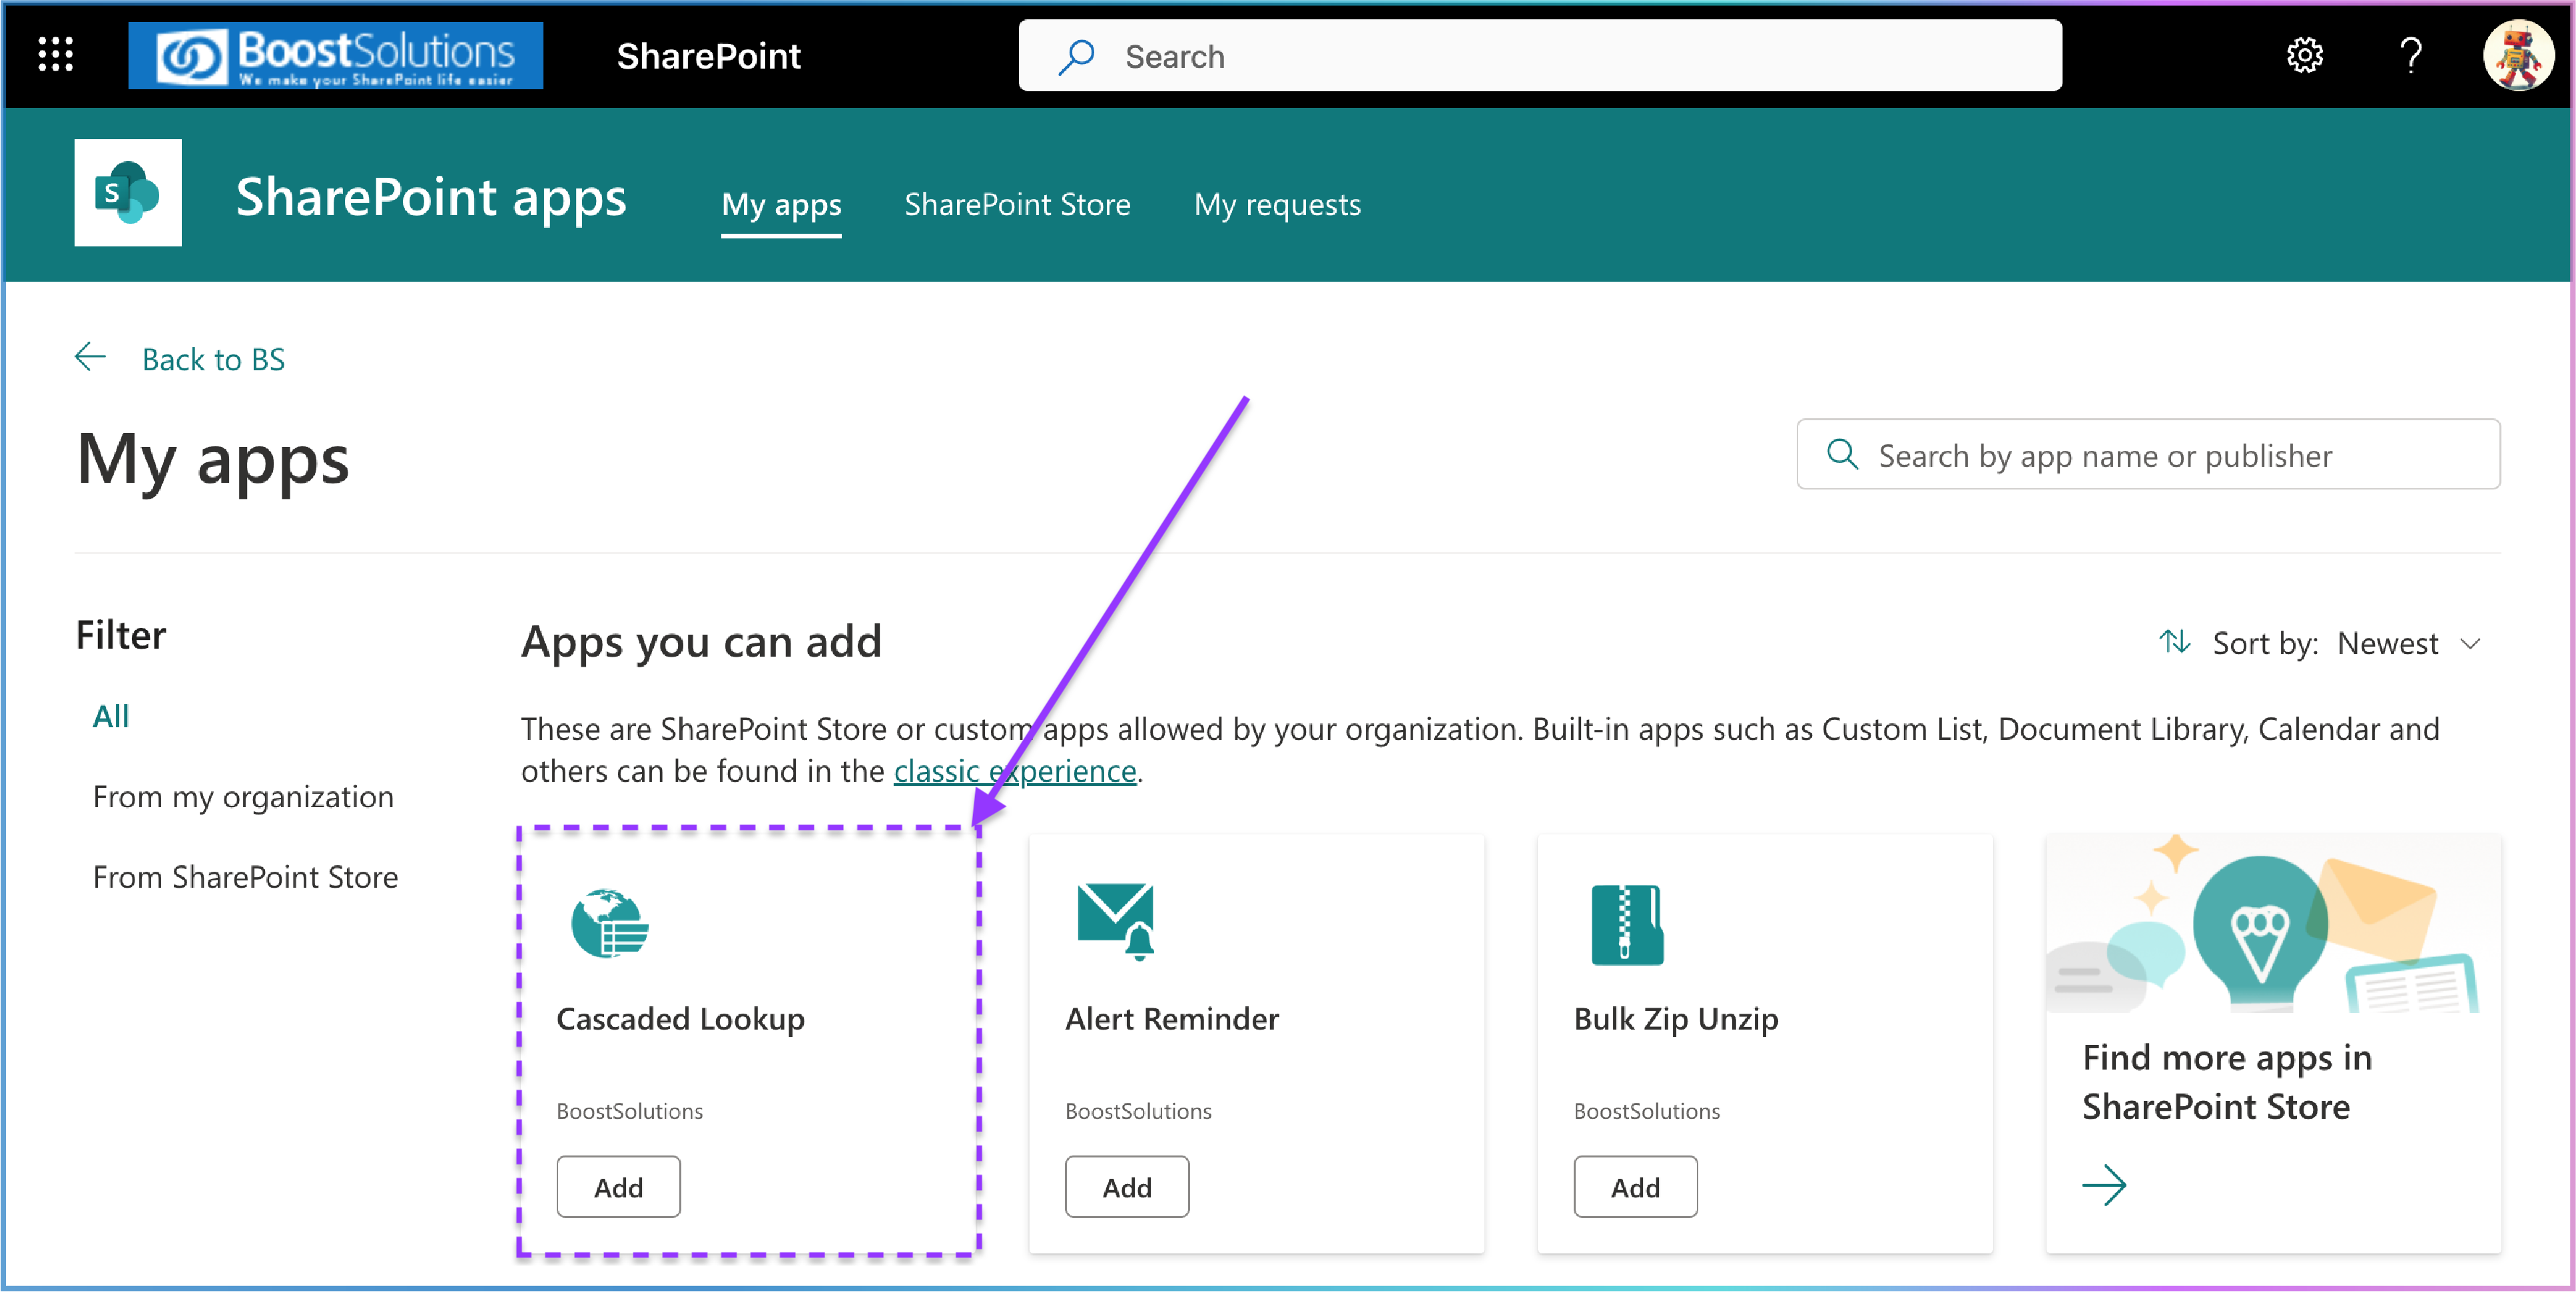
3. Locate the Cascaded Lookup App and click the Add button beneath it to add it to your site.
By following these steps, you can successfully request the Cascaded Lookup App from the SharePoint Store and add it to your SharePoint Online site after approval. If you encounter any issues, contact your SharePoint Administrator for assistance.
This guide provides step-by-step instructions for acquiring the Cascaded Lookup App from Microsoft AppSource and installing it on your SharePoint Online site.
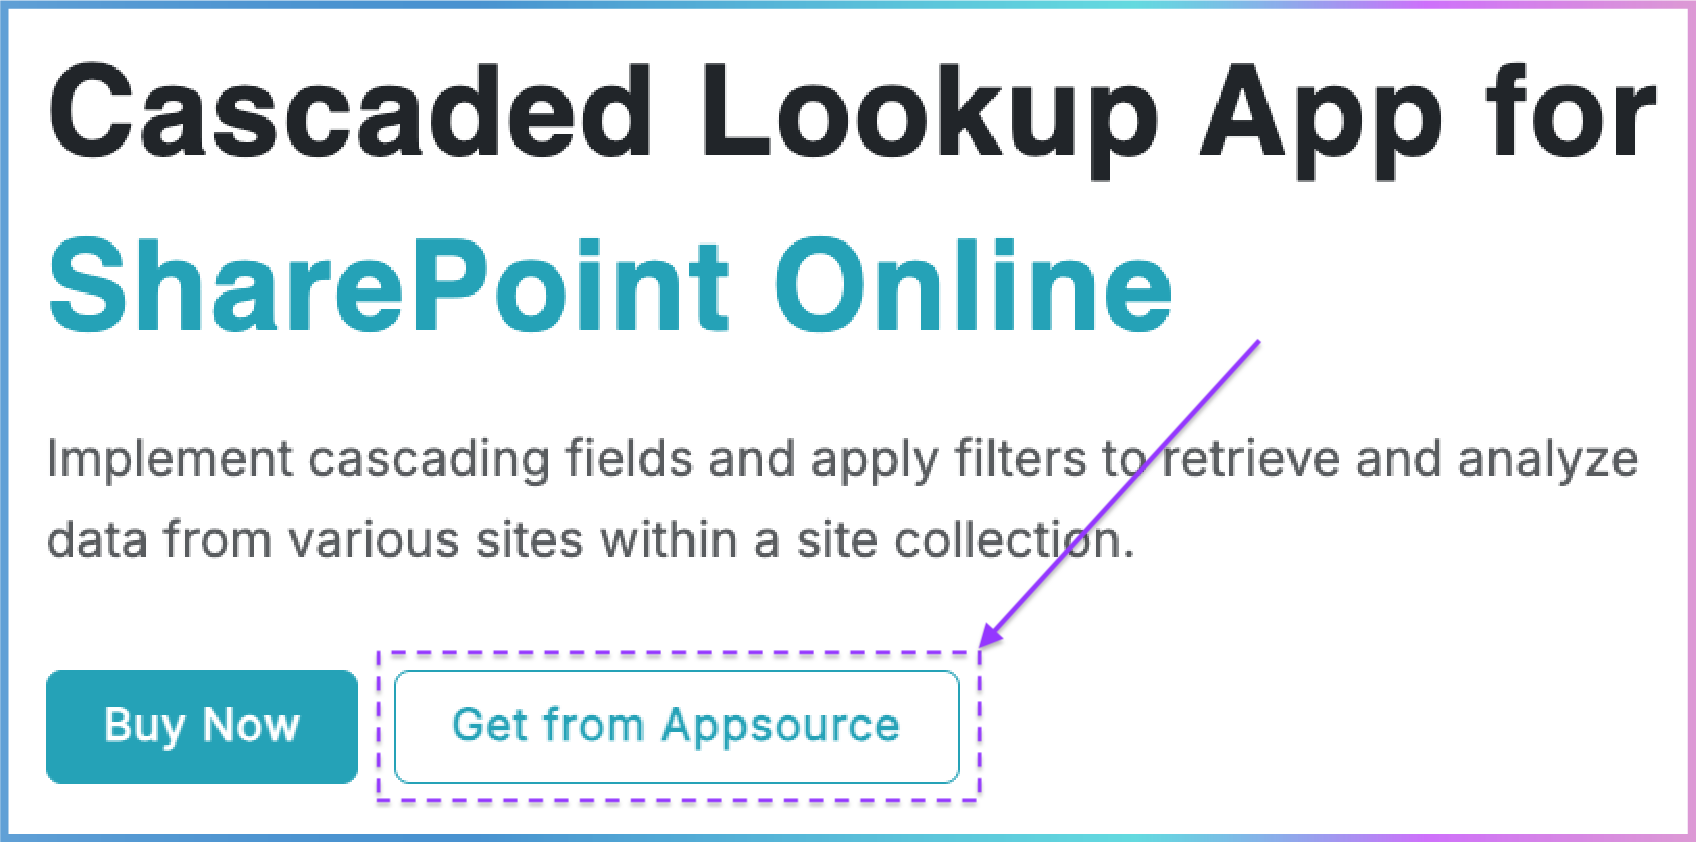
1. Open your web browser and go to the BoostSolutions product page for the Cascaded Lookup App for SharePoint Online https://www.boostsolutions.com/cascaded-lookup-app-for-office-365.html.
2. Click the Get from AppSource button to proceed.
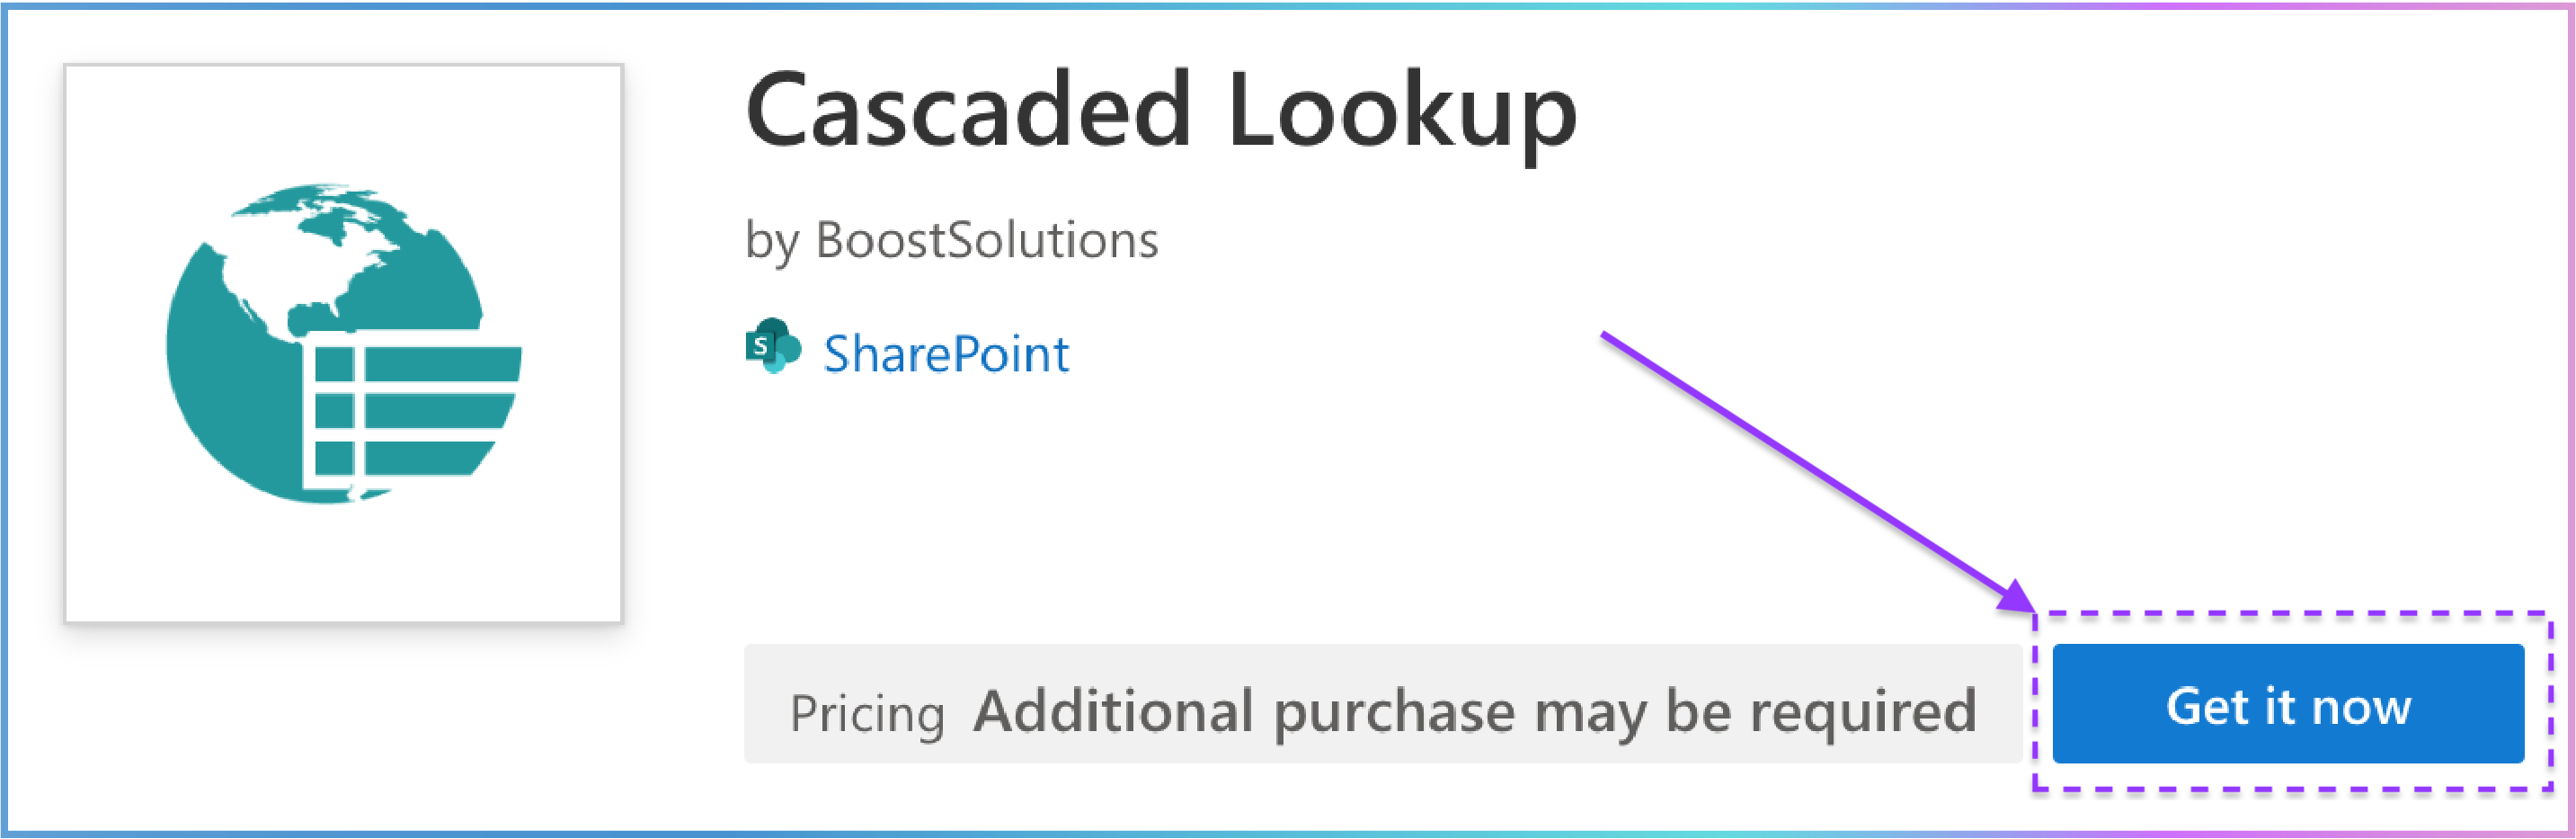
1. You will be redirected to the Microsoft AppSource product page for the Cascaded Lookup App for SharePoint Online https://appsource.microsoft.com/en-us/product/office/WA200005573.
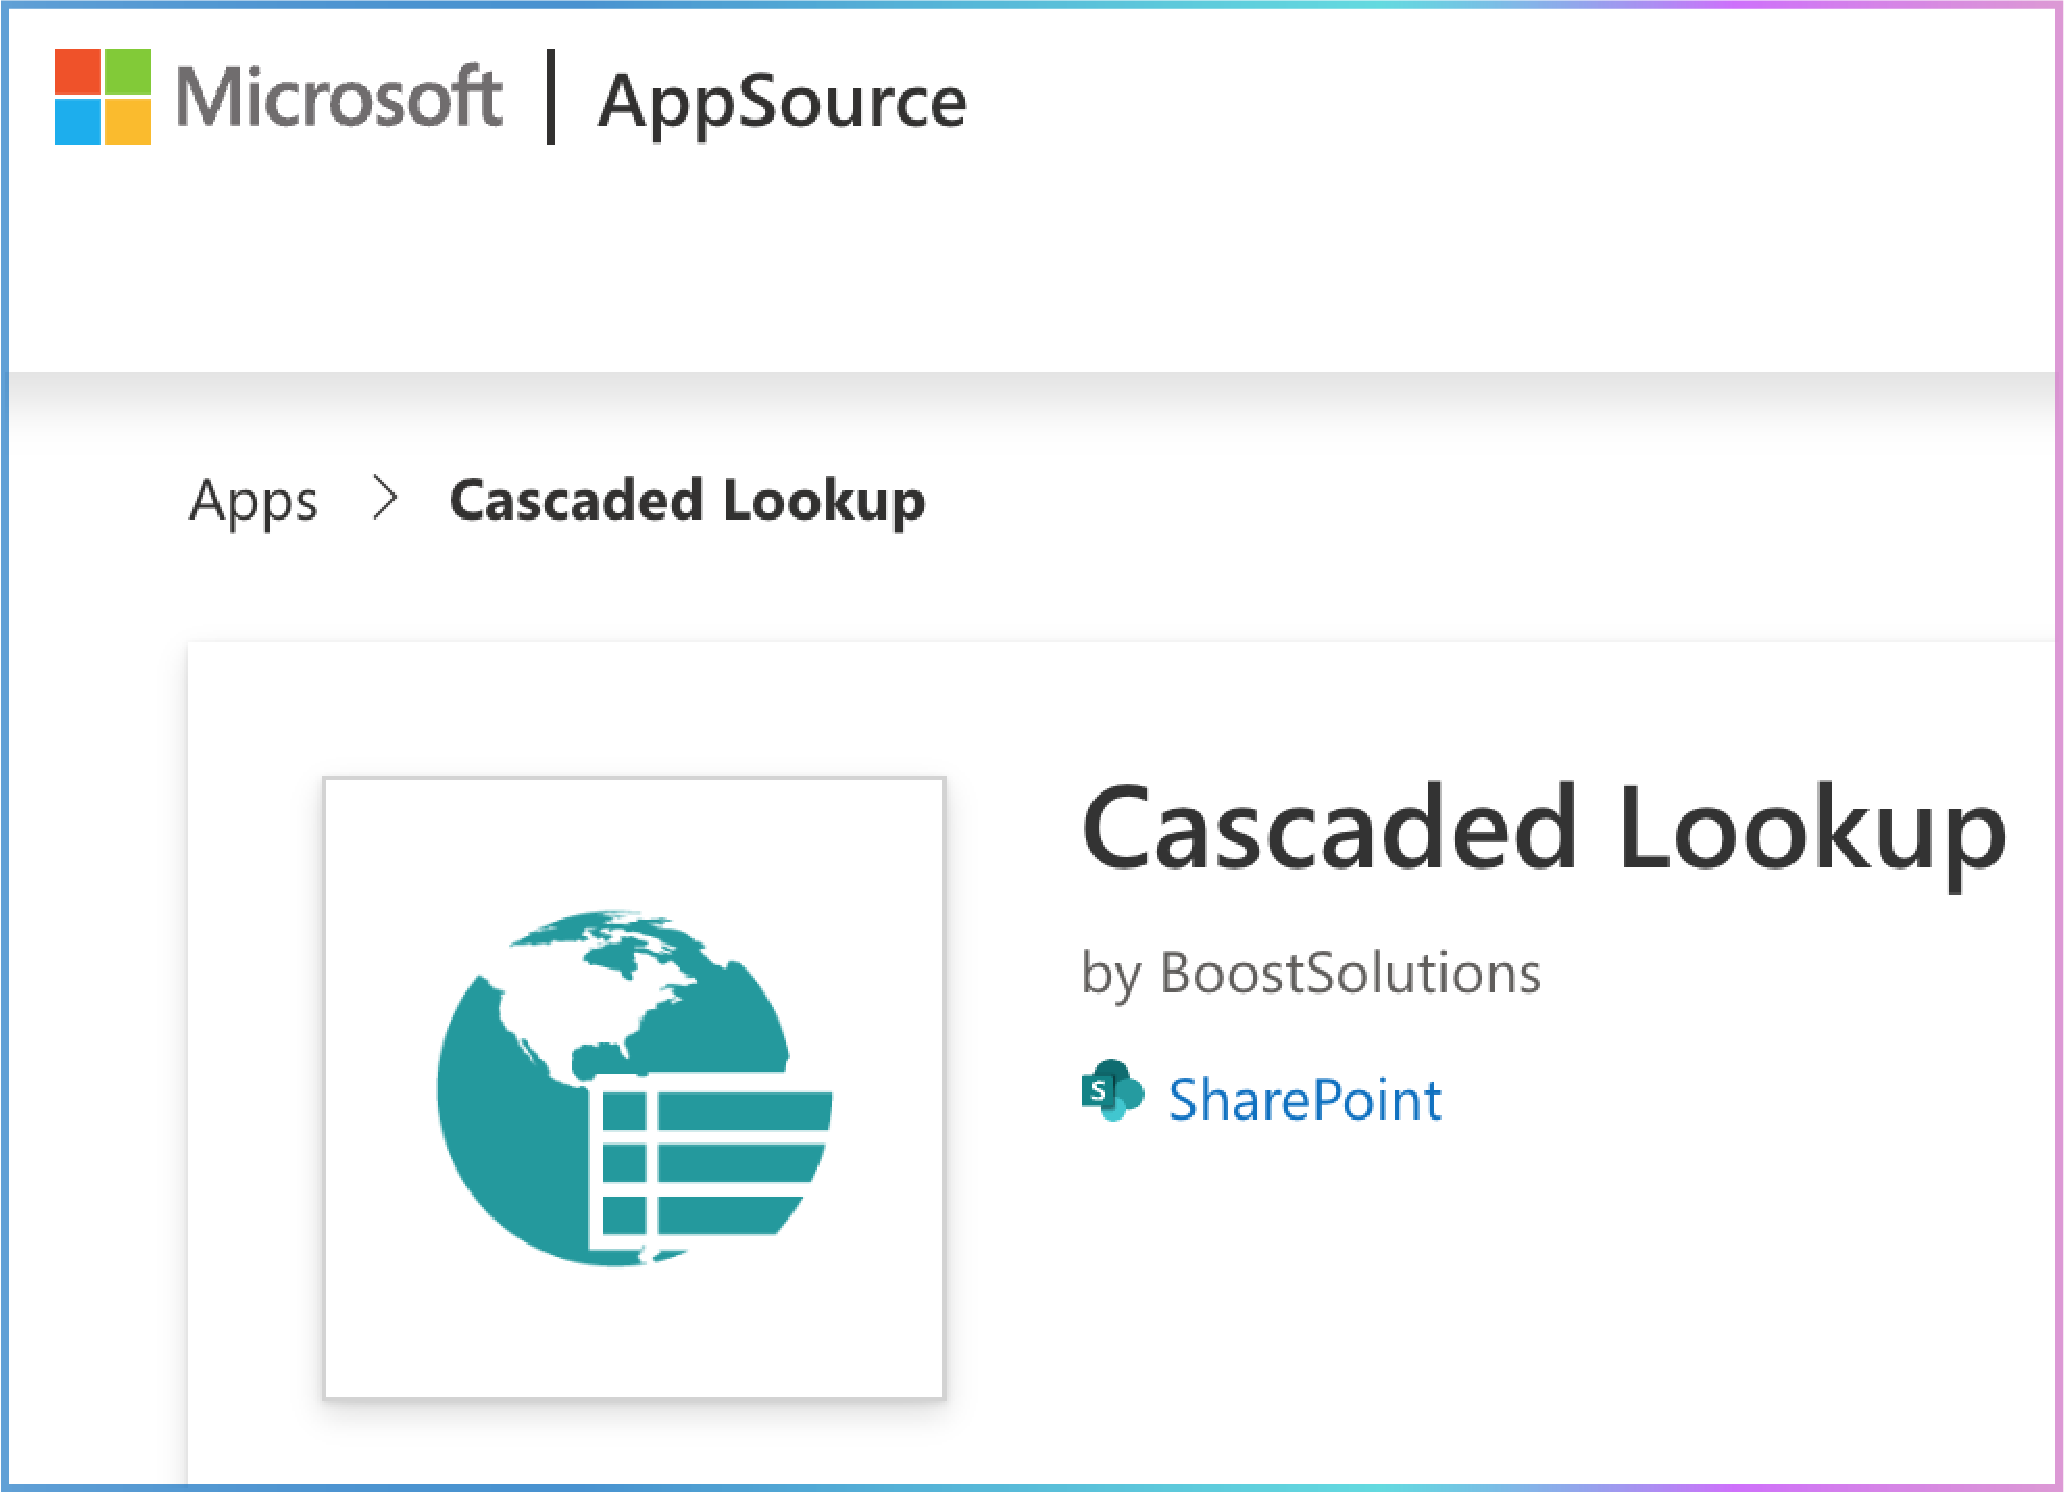
1. On the AppSource product page, click the Get it now button to start the acquisition process.
1. A window will appear, prompting you to sign in to Microsoft AppSource.
2. Enter the address associated with the administrator account you'll use to acquire apps on AppSource.
Note: The Cascaded Lookup App requires a work or school account. Personal Microsoft accounts are not supported.
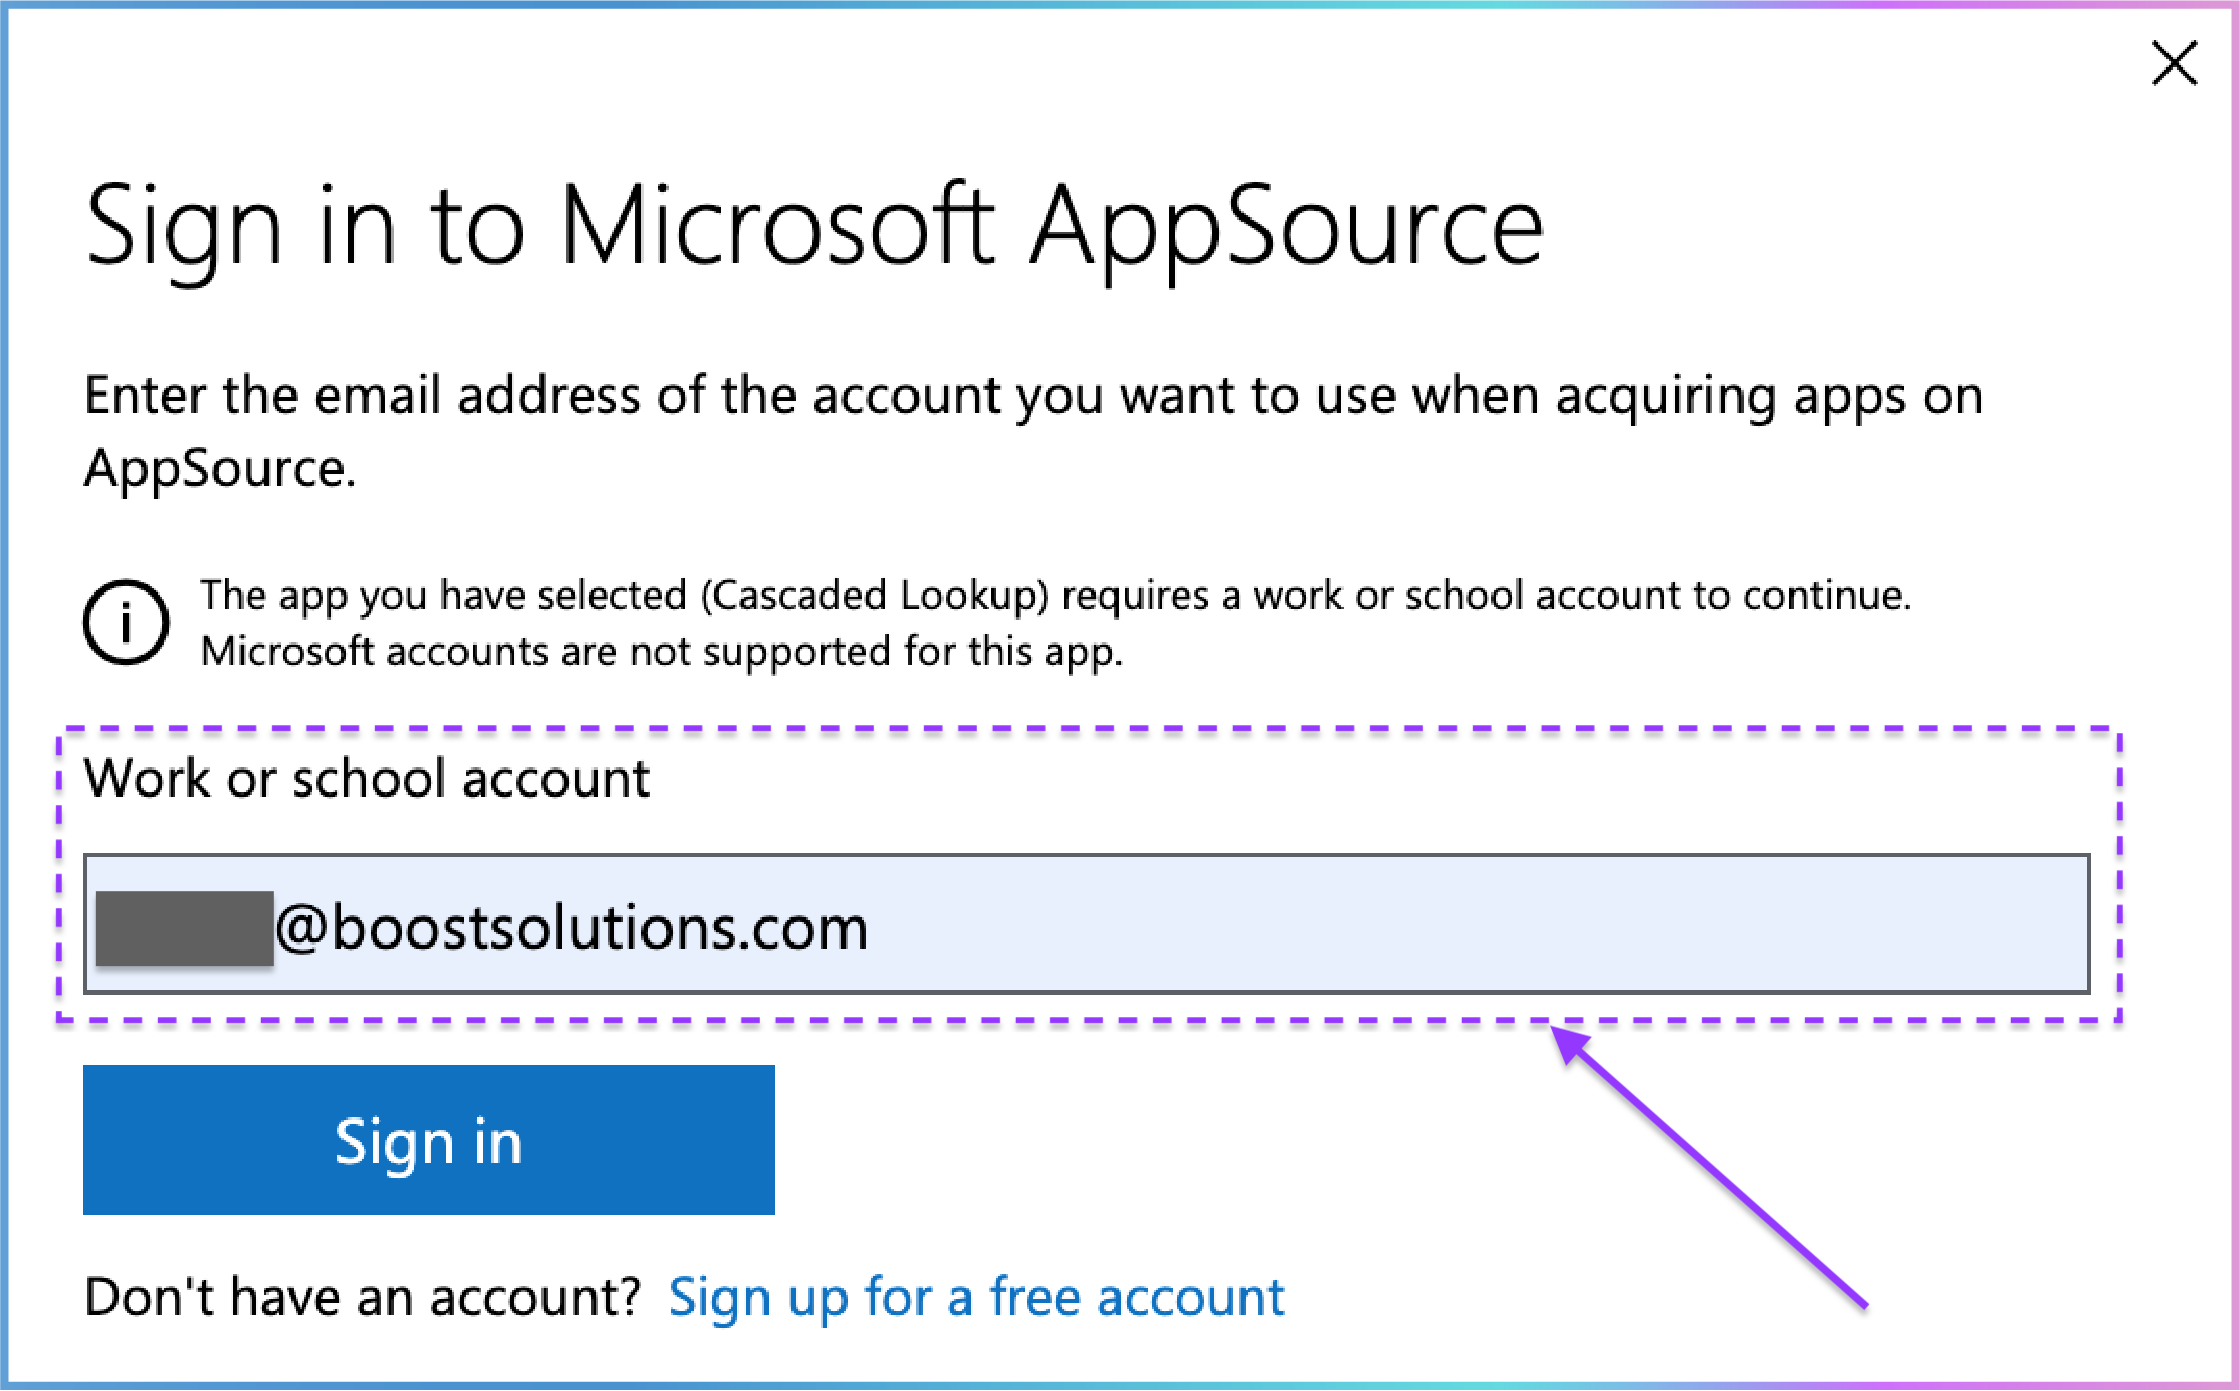
1. Click Sign in to proceed.
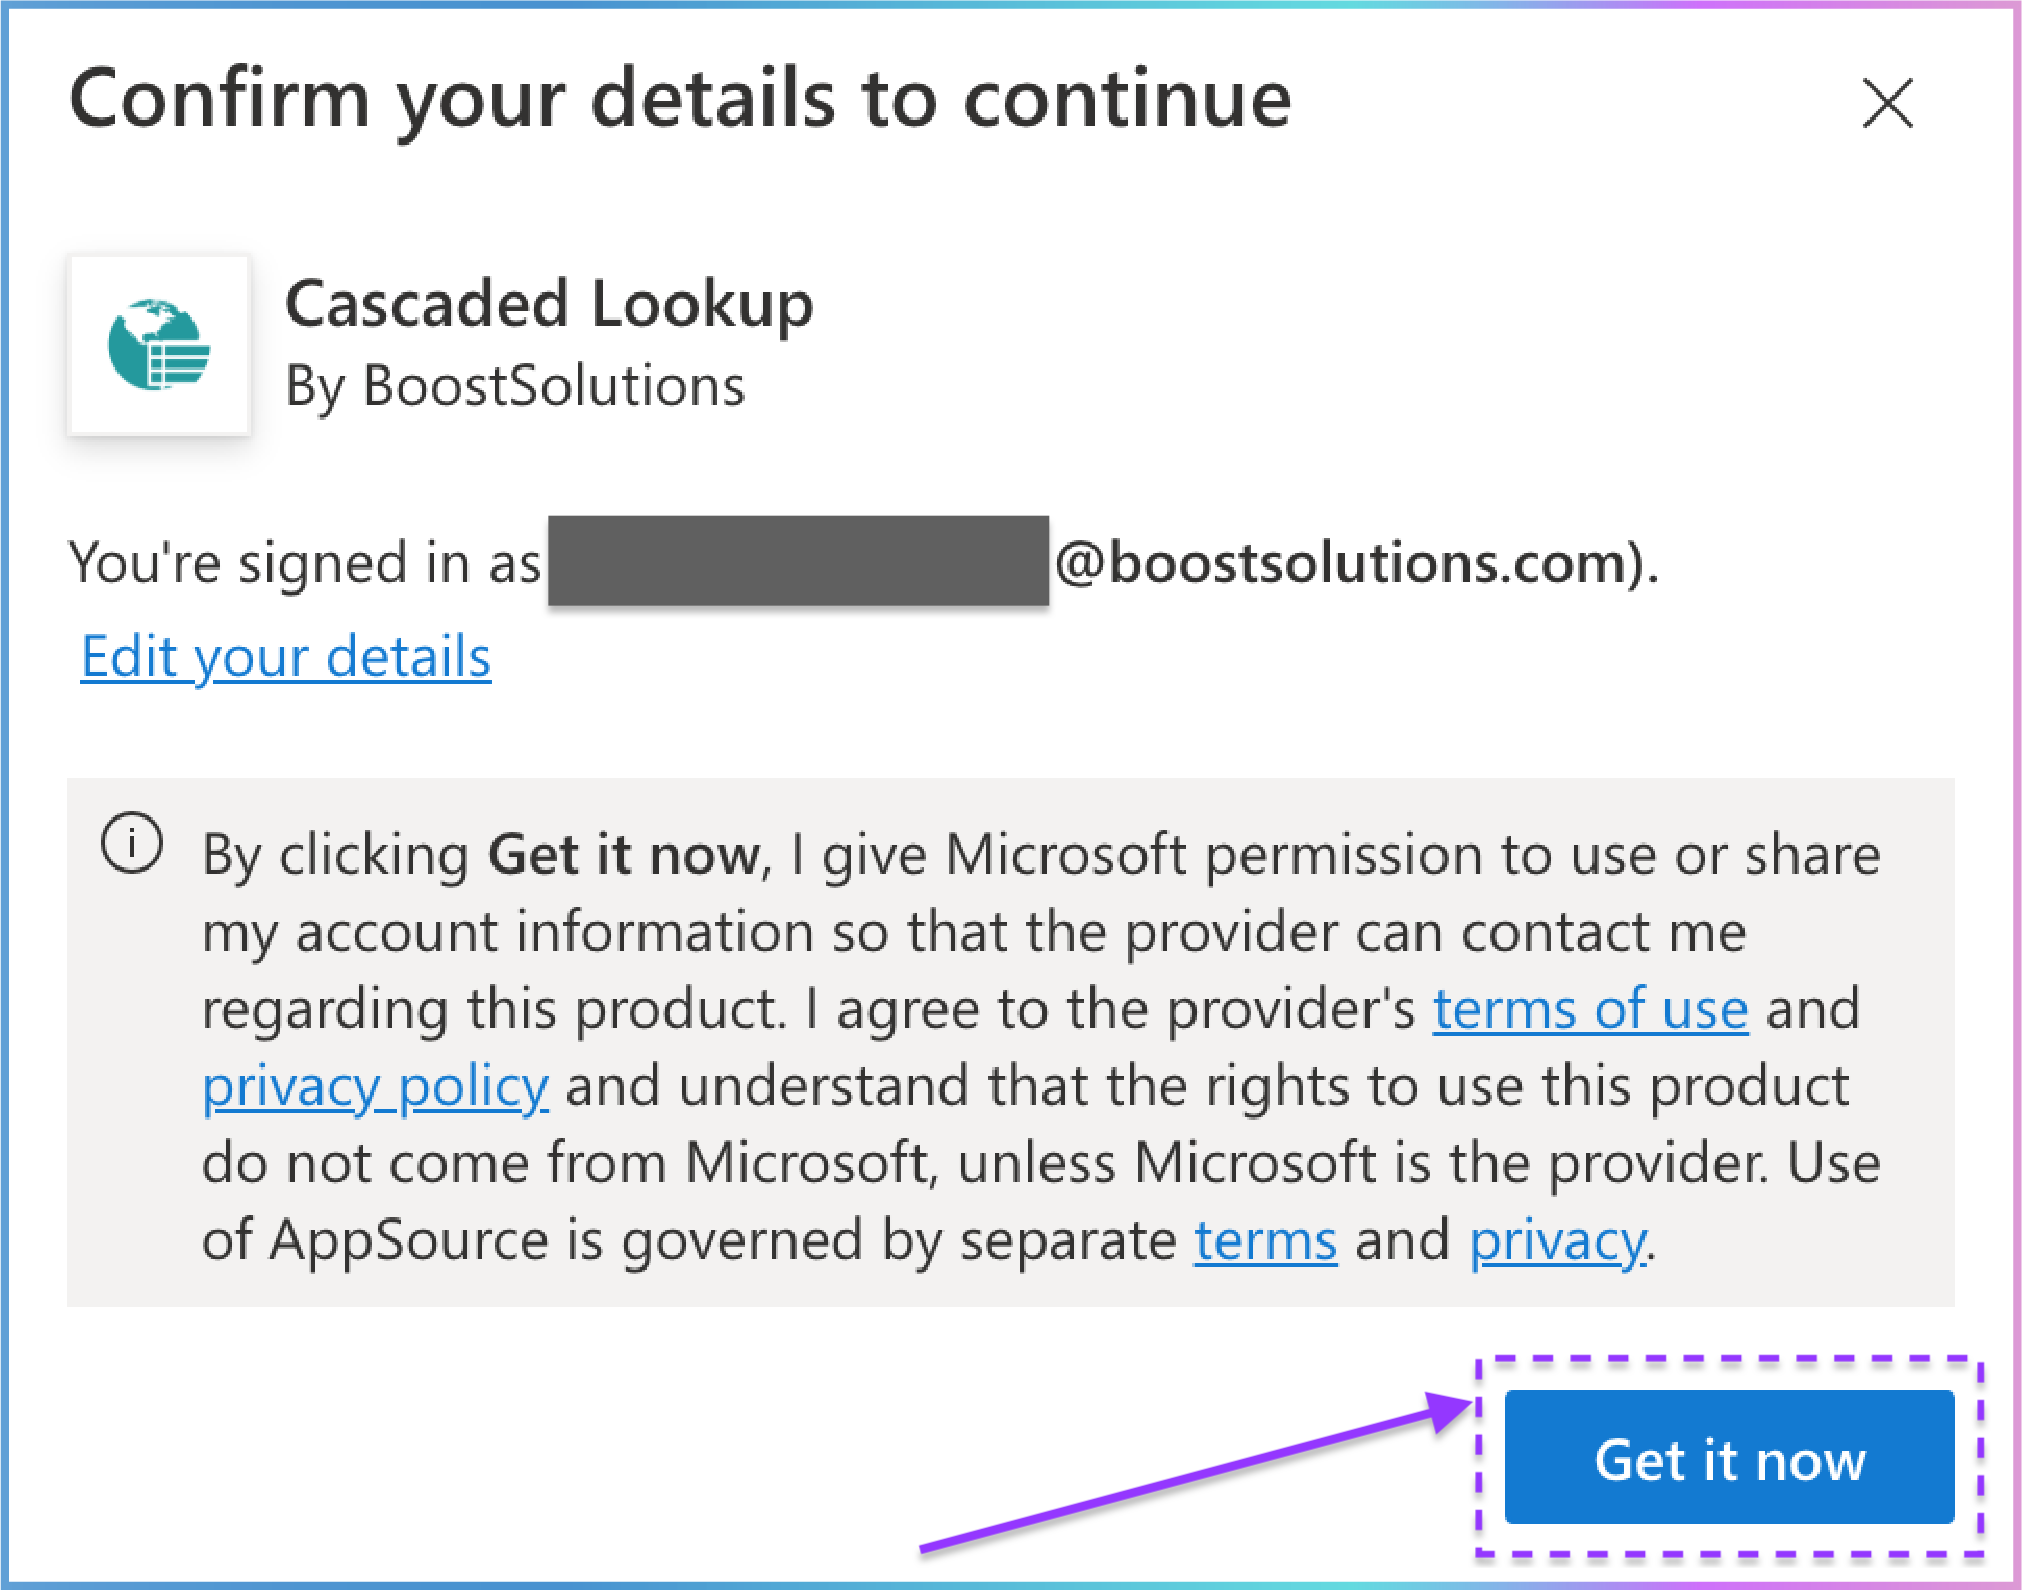
2. A new window will appear, asking you to verify your details.
3. Click Get it now to validate your information and continue.
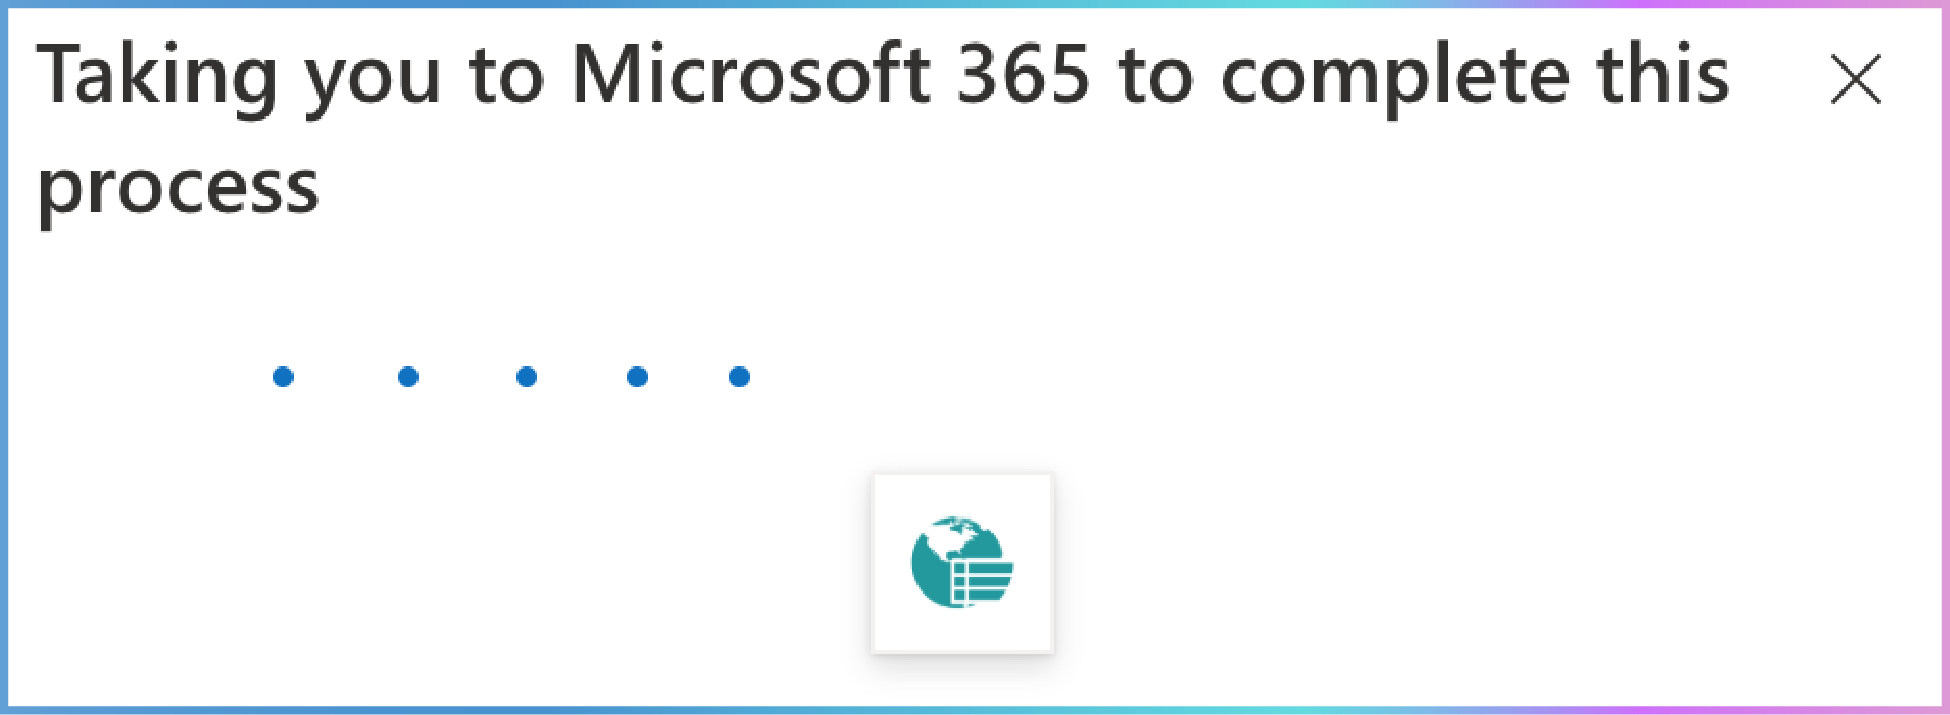
1. Wait while the system processes your request.
2. You will be redirected to Microsoft 365 to finalize the process.
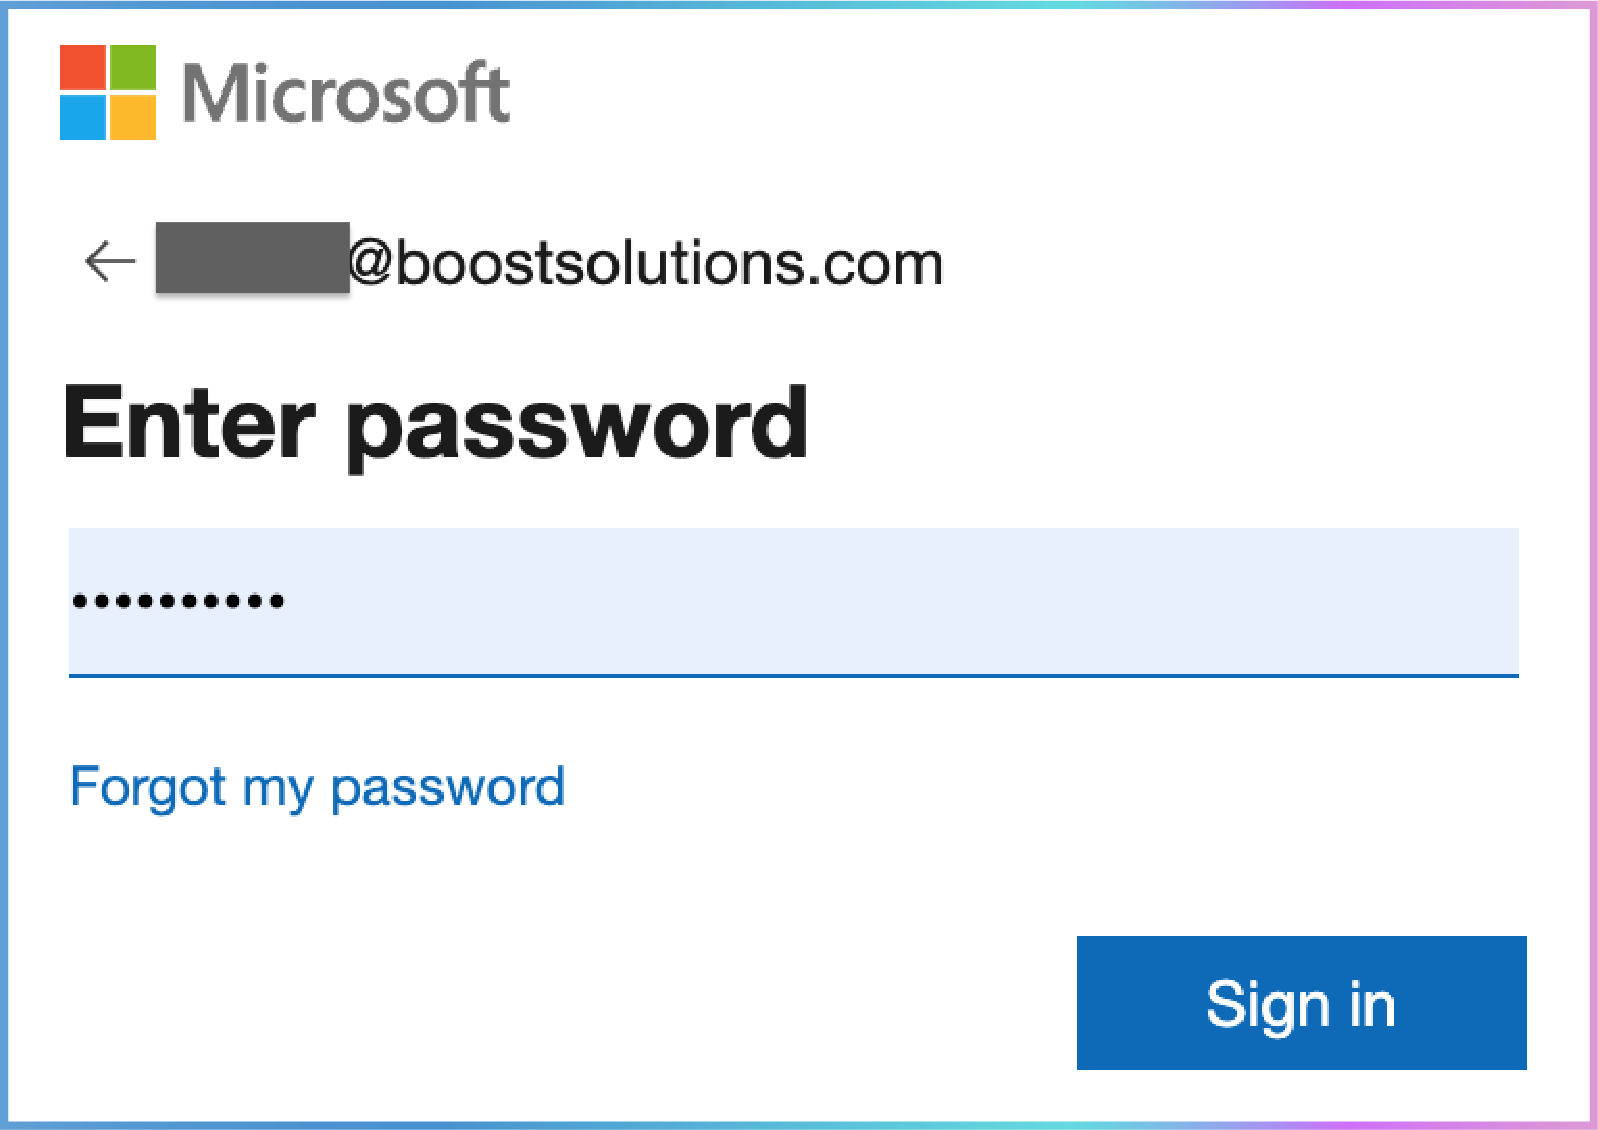
1. In Microsoft 365, select the work or school account you used to sign in to Microsoft AppSource.

2. Enter your password to access Microsoft 365.
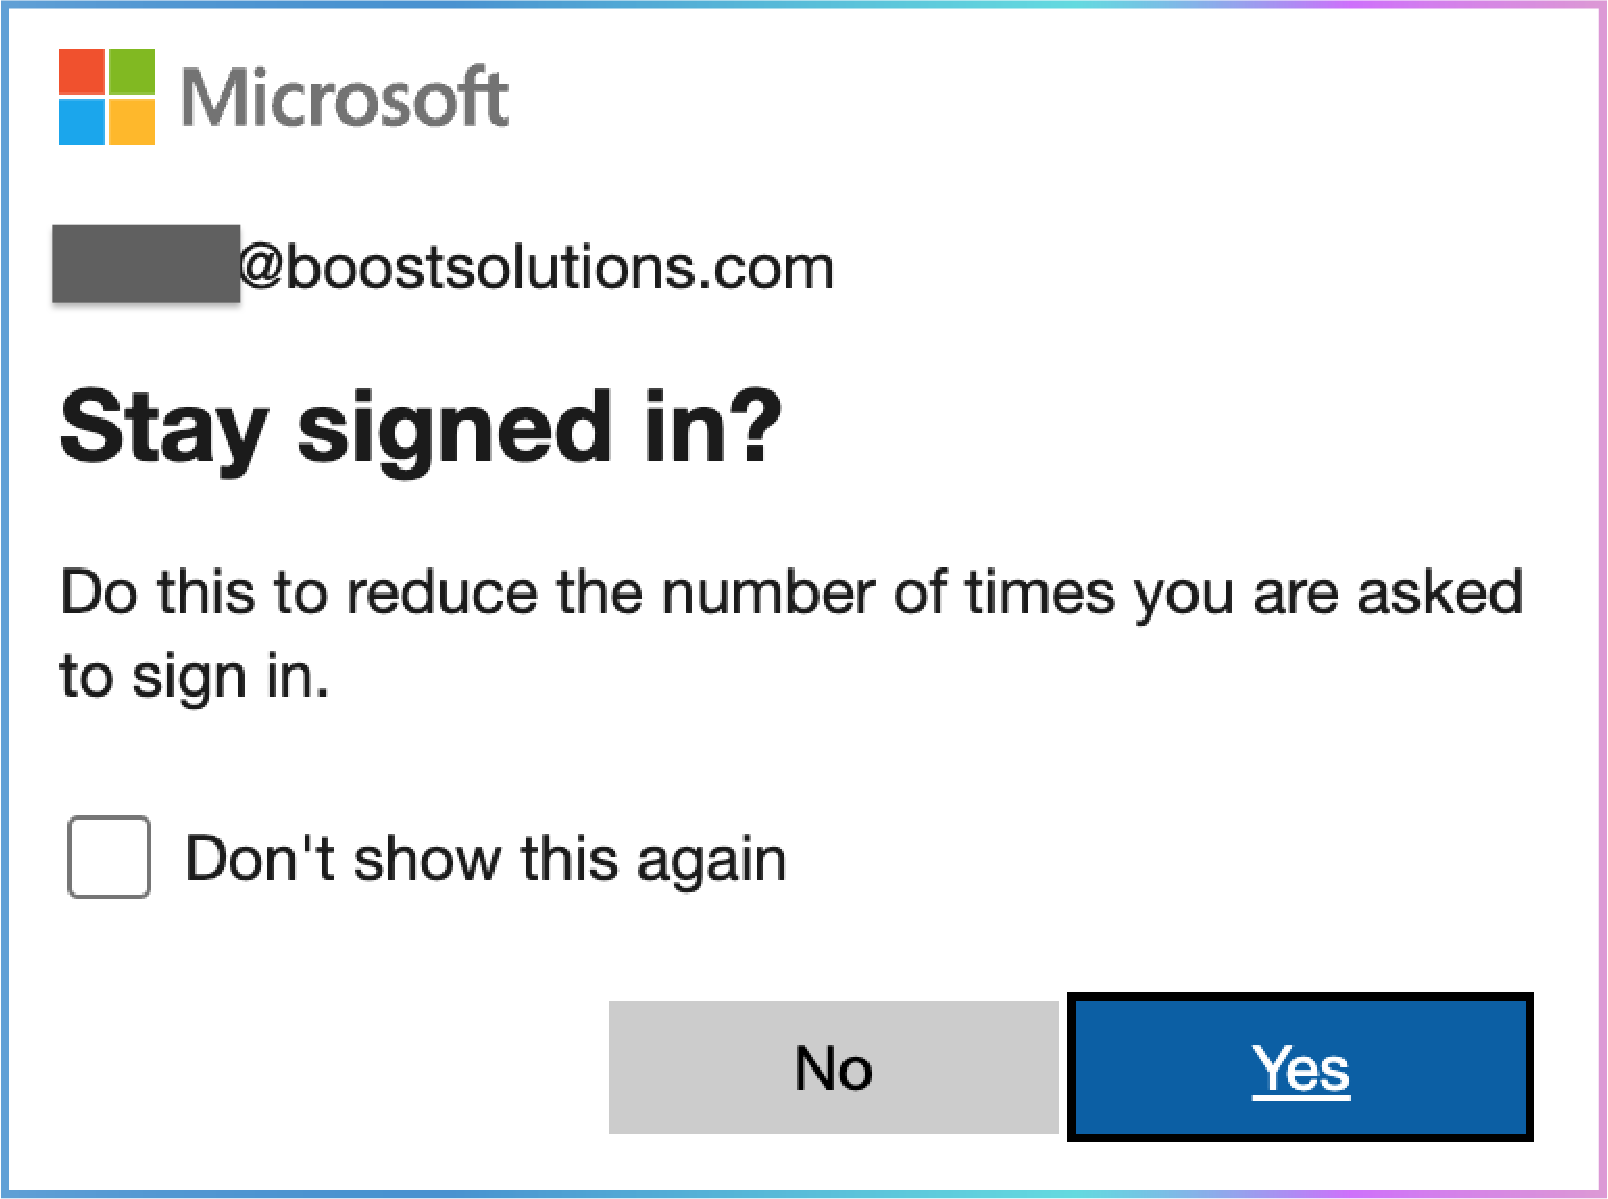
1. You will be given the option to stay signed in. Choose according to your preference.
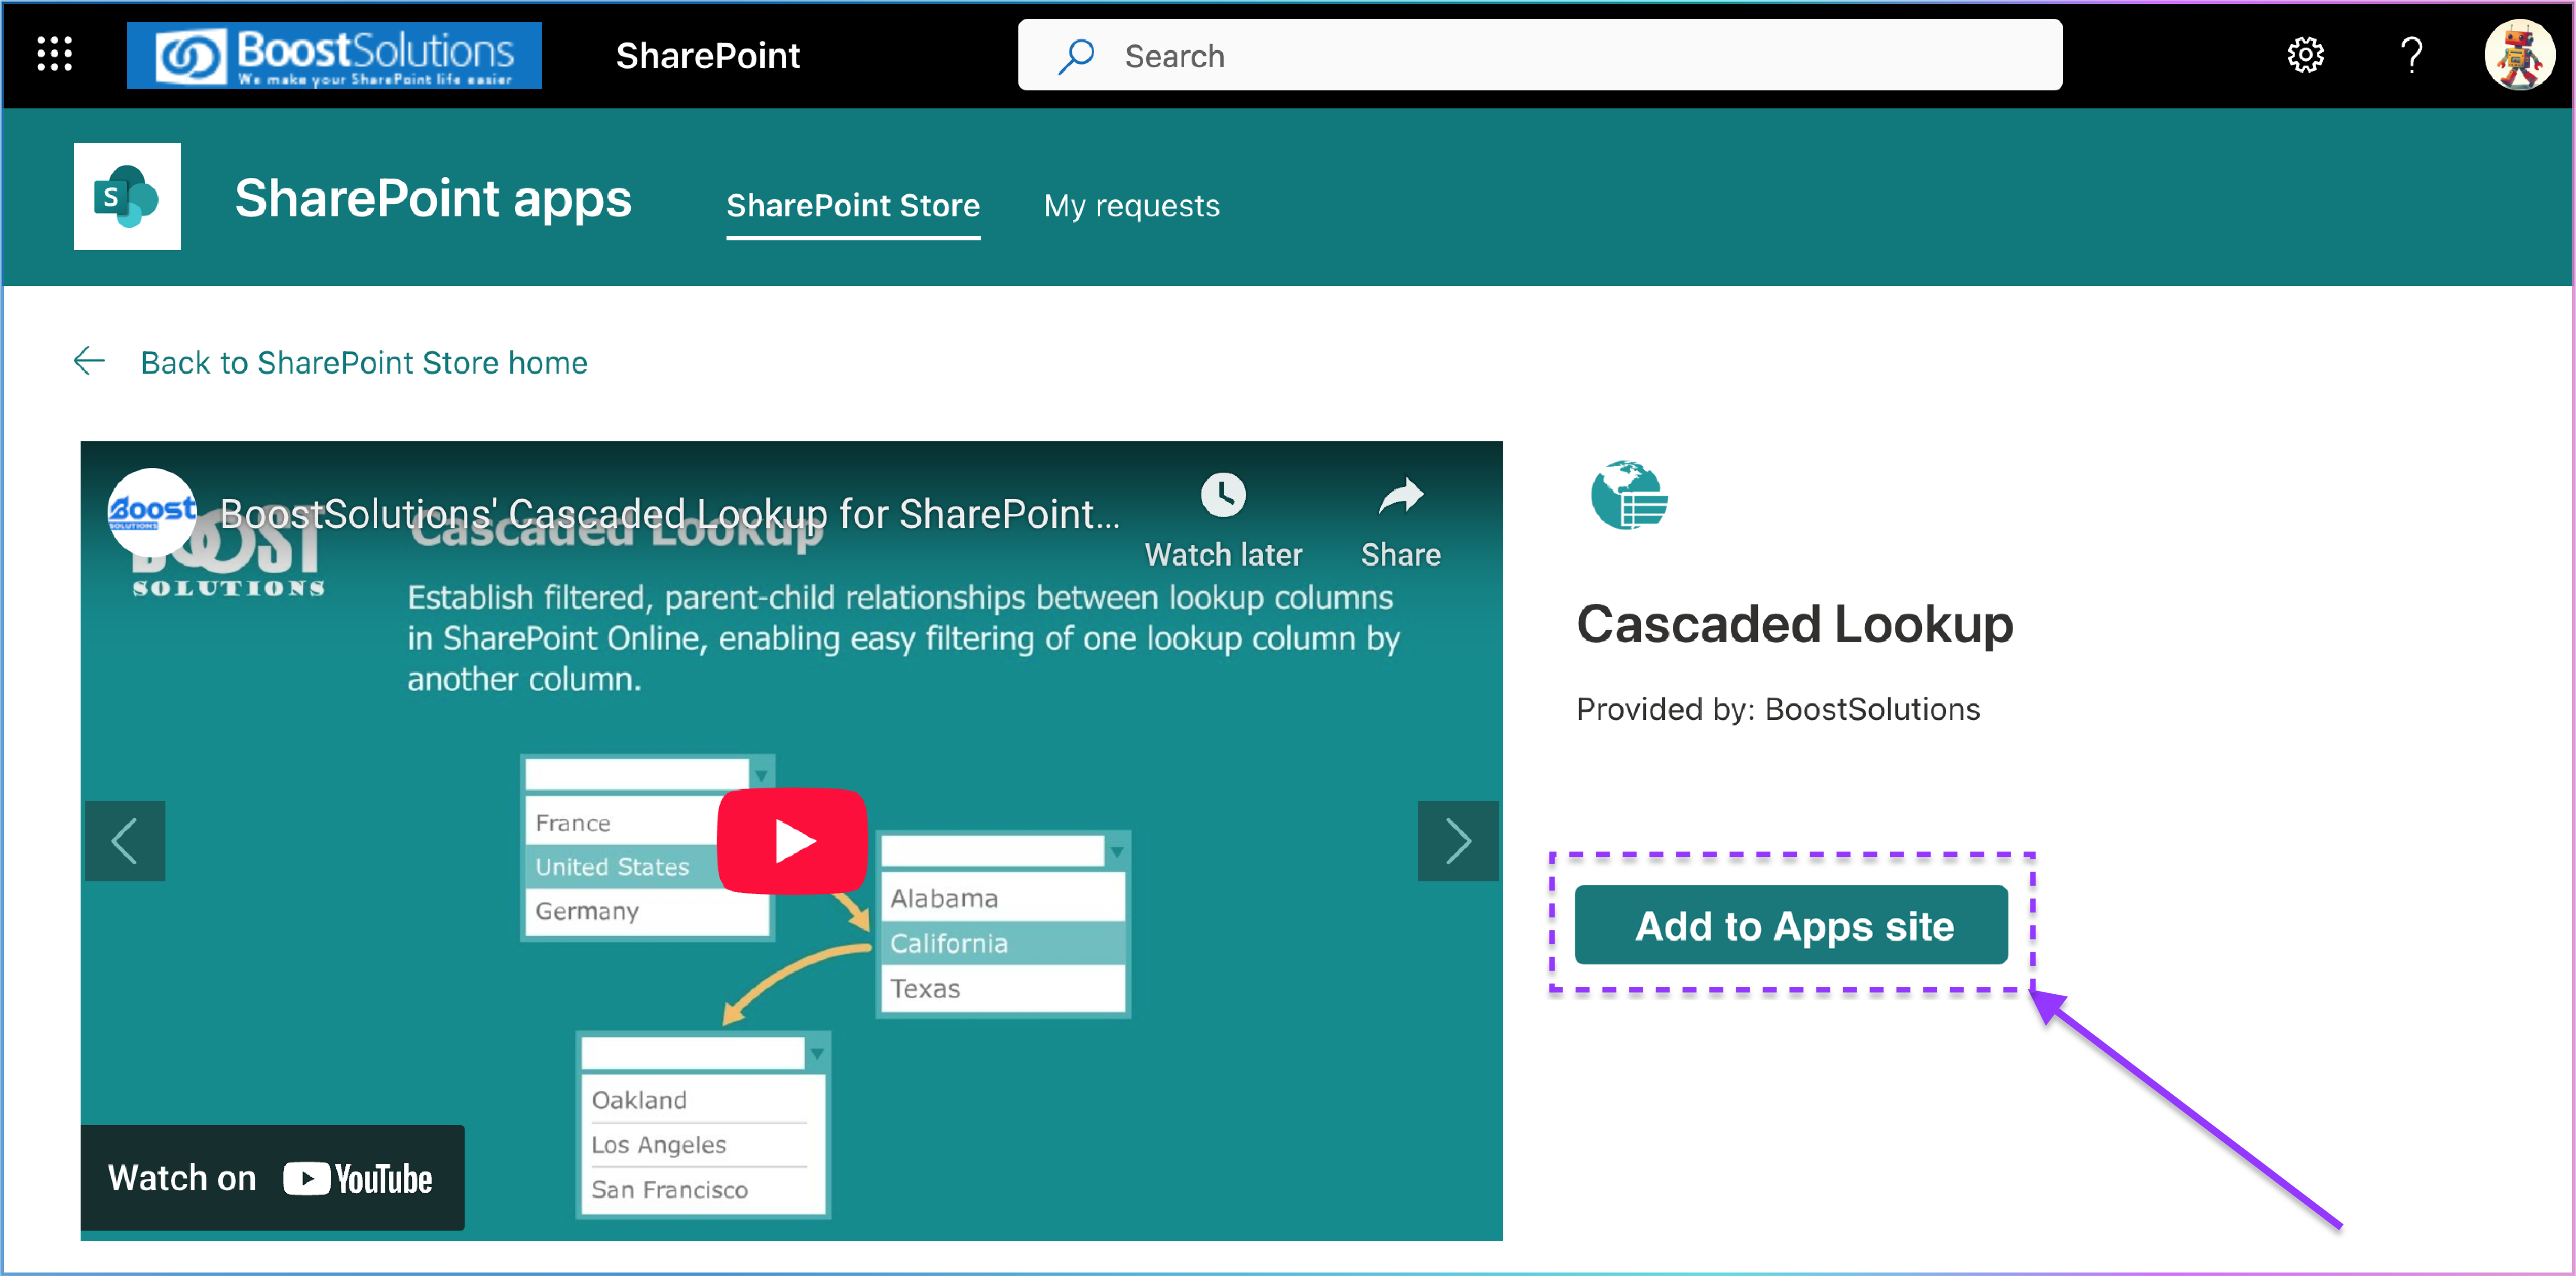
1. After signing in, you will be redirected to the SharePoint Store.

1. On the Cascaded Lookup App's page in the SharePoint Store, click the Add to Apps site button to add the app to your organization's SharePoint Apps Catalog Site.
1. You will be presented with two options:
Option 1: Enable and Add to All Sites
Click Enable this app and add it to all sites to approve and automatically add the app to all sites. This allows you to find the app in the list command bar.
Option 2: Only Enable the App
Click Only enable this app to enable it without automatic addition. If you choose this option, follow the steps below to manually add it to a specific site.
1. Navigate to the SharePoint site where you want to use the Cascaded Lookup App.
1. On your site's homepage, click the Settings icon (gear icon) in the upper right corner.
2. Select Add an app from the dropdown menu.

1. Alternatively, click the Settings icon , then select Site contents from the dropdown menu.

2. On the Site contents page, click the + New button and select App from the dropdown menu.

1. Both methods will redirect you to the My Apps page, which lists SharePoint Store or custom apps approved by your organization.
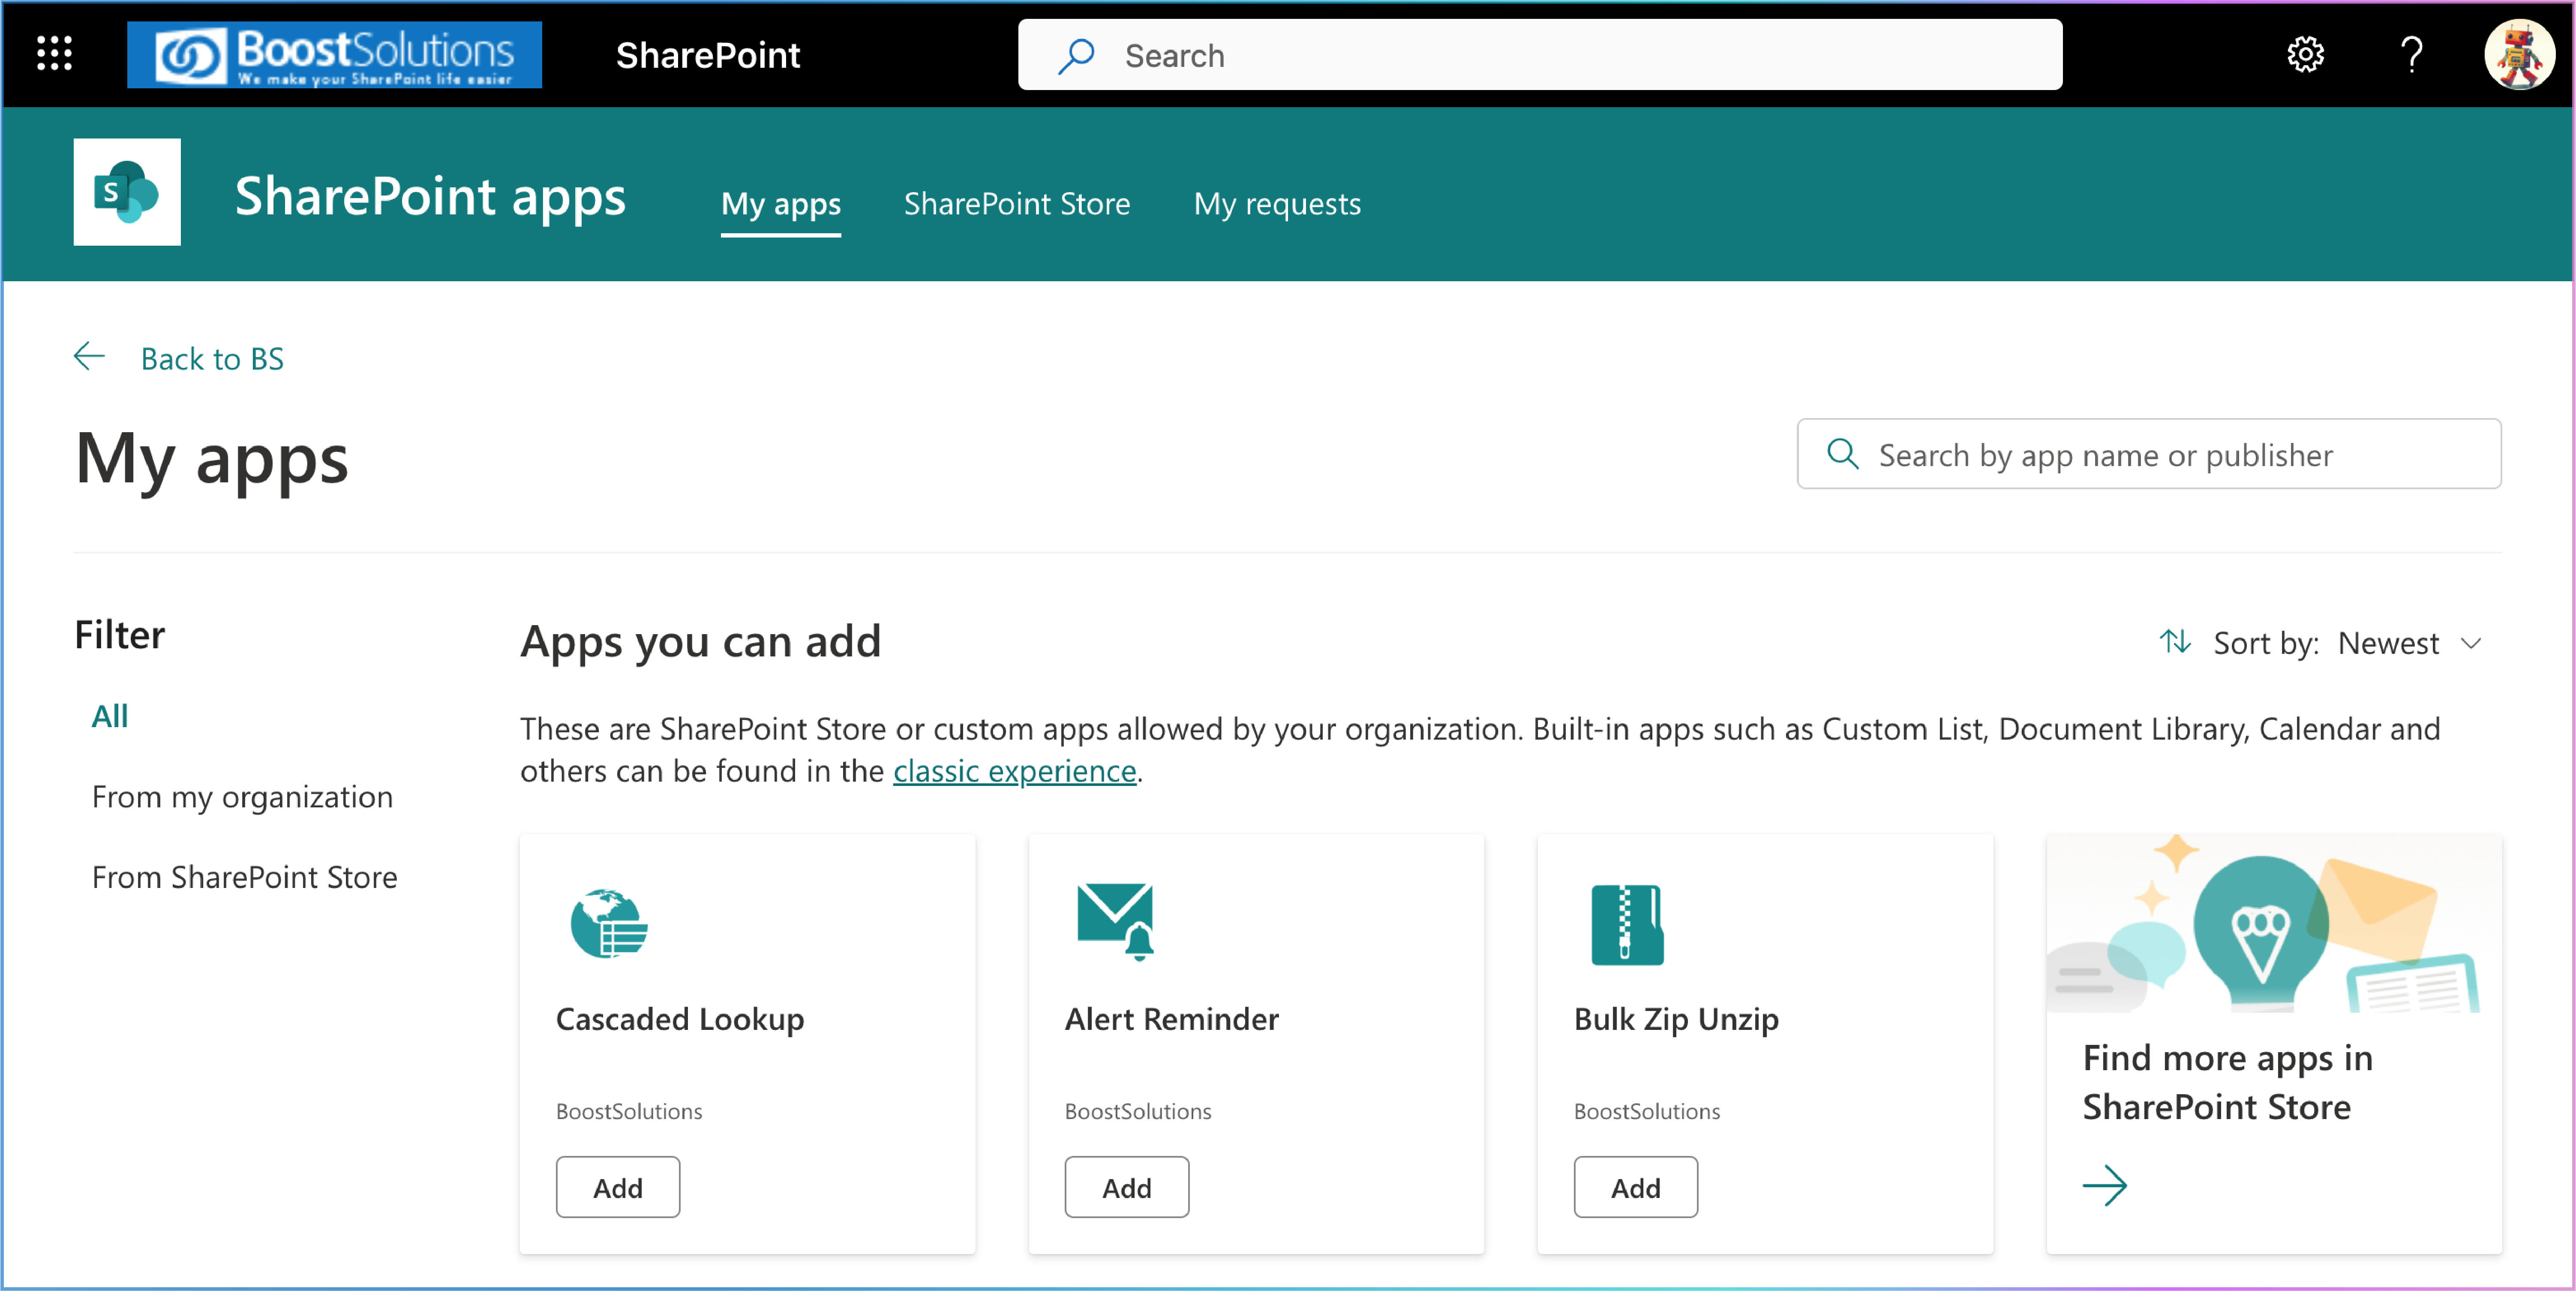
2. Locate the Cascaded Lookup App and click the Add button beneath it to add it to your desired site.

By following these steps, you can successfully acquire the Cascaded Lookup App from Microsoft AppSource and install it on your SharePoint Online site. If you encounter any issues, contact your SharePoint administrator or BoostSolutions support support@boostsolutions.com for assistance.
