- BoostSolutions
-
Products
-
- Microsoft Teams
- HumanLike Alert Reminder
- View All Apps
- Pricing
- Support
- Company
SharePoint List Collection is a Web Part which can collect lists from different sites to display in a single grid view. It can also create different views in list collection web part as in lists.
View SharePoint List Collection 3.0 performance benchmark.
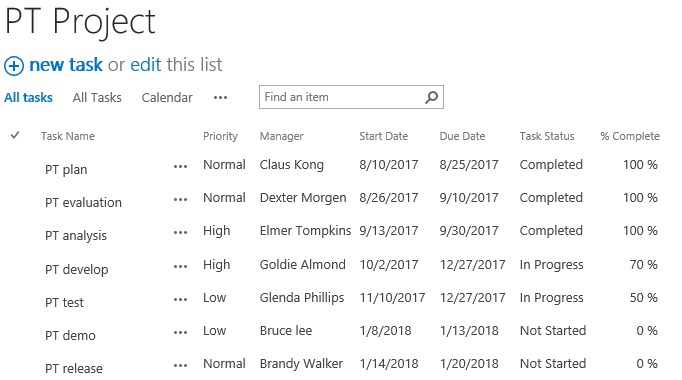
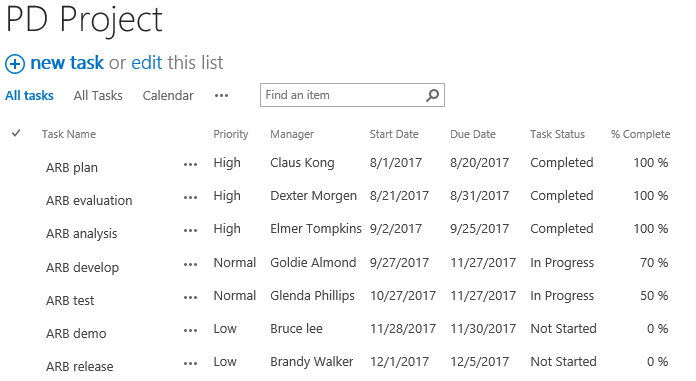
There are two lists in one site, and they have same fields. The following tutorial demonstrates how to collect these two lists and manage views/items in one web part.
a. From any page, click Settings and then click Edit Page to modify the page.
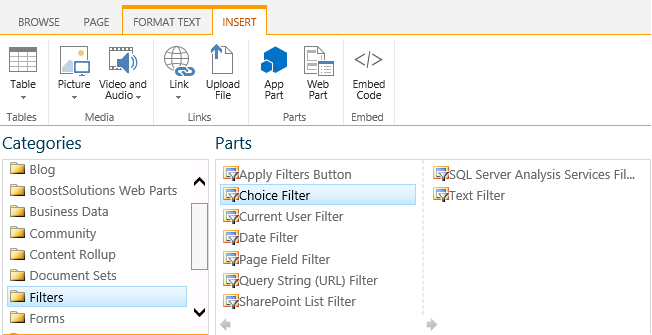
b. On the ribbon, click the Insert tab, and then click Web Part.
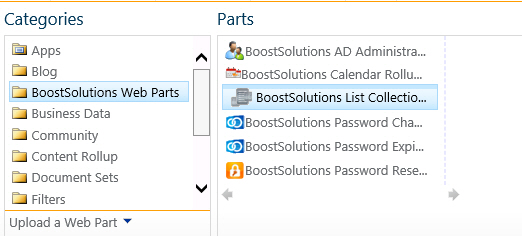
c. Under Categories, select the BoostSolutions Web Parts category. Next select the BoostSolutions List Collection Web Part under the Web Parts section and click Add.
d. Click Save to save the page. The List Collection Web Part will be added to the page.
List Collection allows you to collect multiple lists from different sites. To add a Collection part, you must have at least Design permission level.
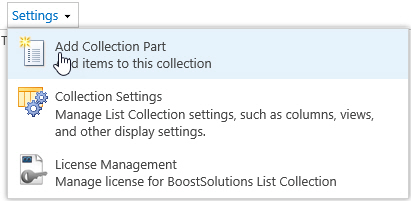
a. On the Settings menu, click Add Collection Part.
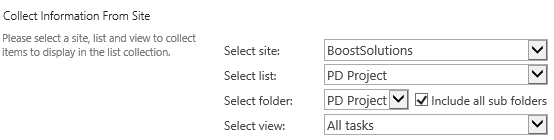
b. On the Add Collection Part page, select the site, list and view.
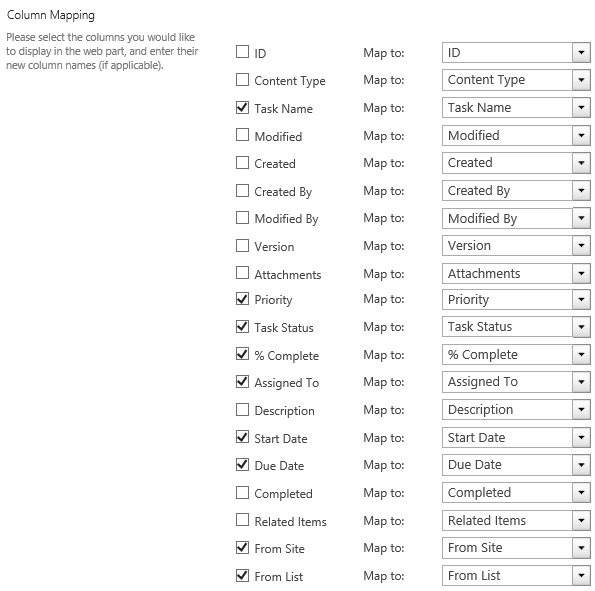
c. Map the columns and select which columns to display on the web part; then click OK.
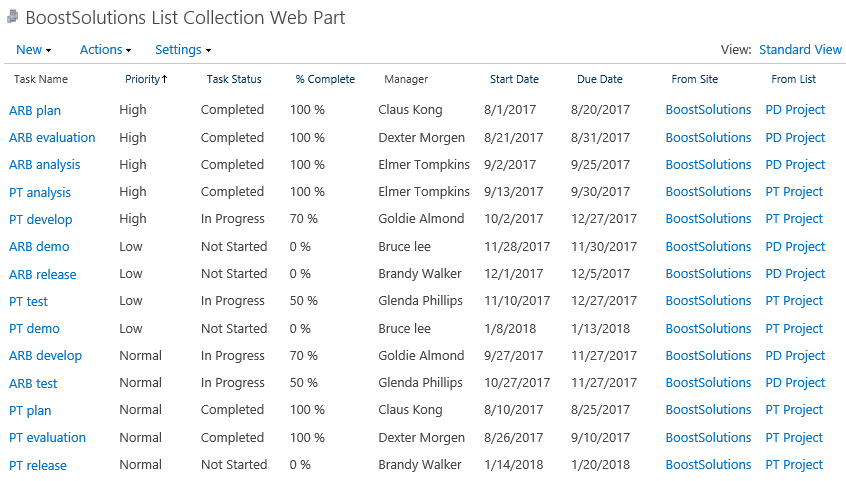
You can create views on the List Collection web part. There are three views: Standard View, Calendar View and Gantt View.
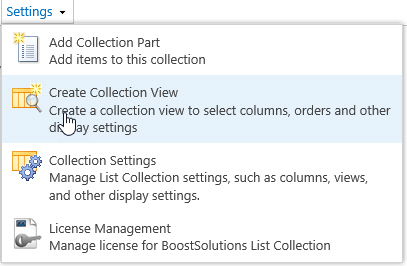
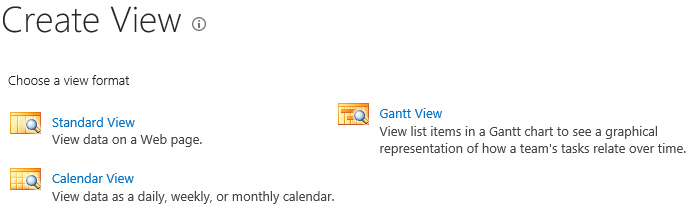
a. Click Create View in the View menu or in the Settings menu.
b. In Choose a view format section, click Standard View.
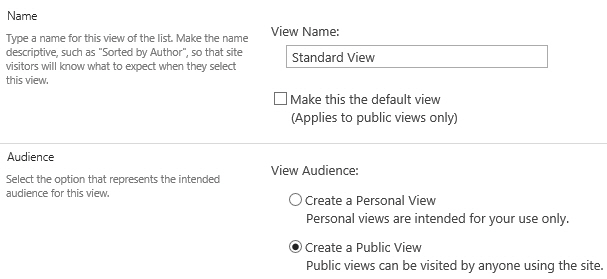
c. In Name and Audience section, type a view name, and choose View Audience.
d. In Filter section, choose the lists and list view name.

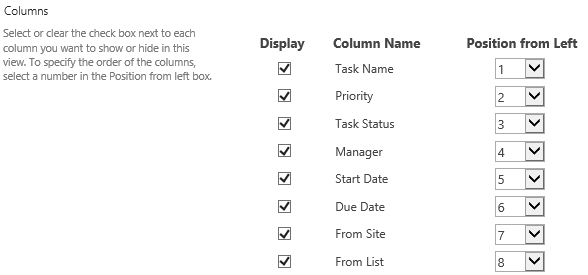
e. In Columns section, select the columns and specify the display order in the view.
f. Then, in Edit Menu section, select the column linked to Edit Menu.

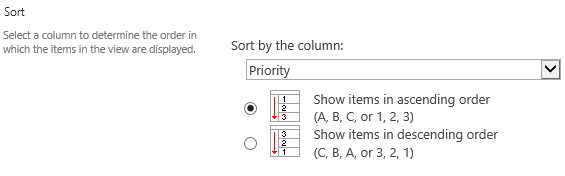
g. In Sort section, choose which column to sort and specify the sort order.
h. In Header Filter section, do not this checkbox to disable filter on header of columns.

i. In Group By section, select the column to determine how to group items in the view.
g. In the Totals section, select the column which you want to display summary calculations in the view, such as count, average, maximum, minimum.
k. In Item Limit section, type the number of items to display per page, default value is 50.
l. Then, click OK. Go to list collection web part page, and the view is created as following.
a. Click Create View in the View menu or in the Settings menu.
b. Click Gantt View in Choose a view page.
c. Specify View Name and View Audience.
d. Select the list and view to display in the view.
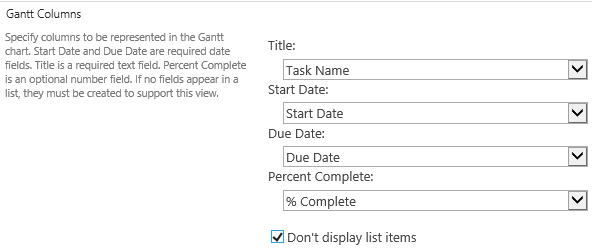
e. In Gantt Columns section, specify Title, Start Date, Due Date , and Percent Complete fields. Select the Don't display list items option, so that all items will not be shown under Gantt chart. Note that if you select this option, the Columns, Edit Menu, Header Filter and Group By sections will be hidden in this configuration page.
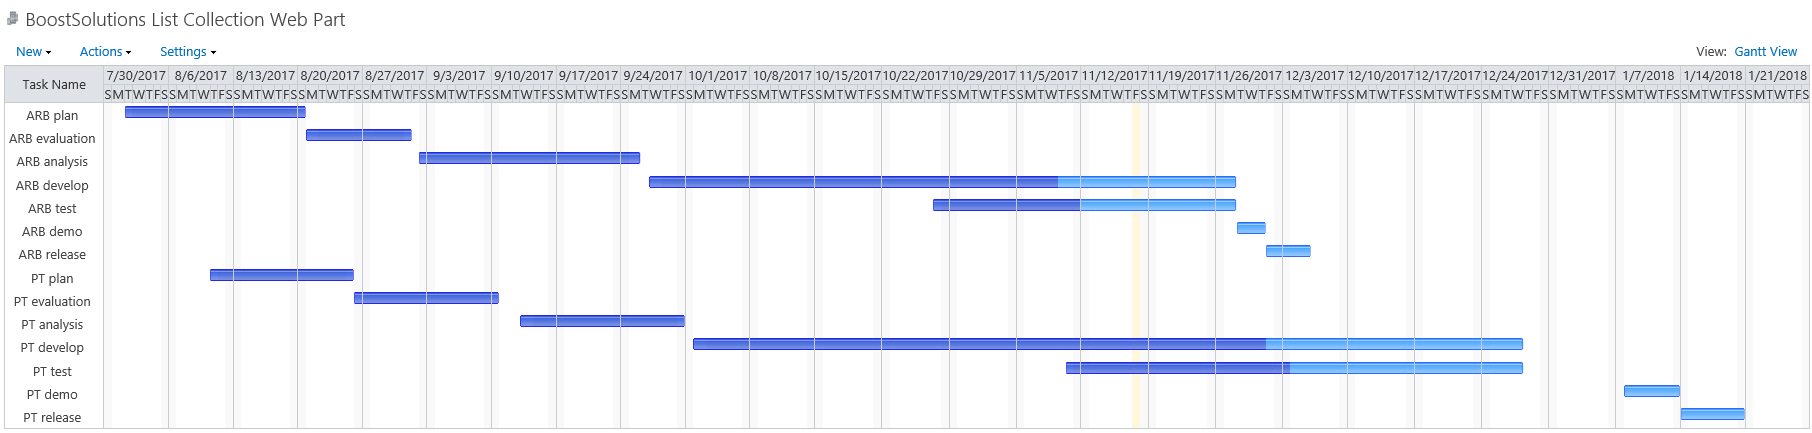
f. Configure other settings according to your needs. And then click OK. The Gantt View is as following.
a. In Choose a view section, click Calendar View.
b. Specify View Name and View Audience in the Name and Audience section.
c. In Filter section, select the list and view.
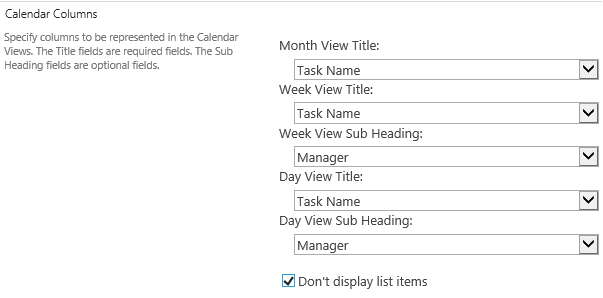
d. In Calendar Columns section, specify view title and sub heading , and select Don't display list items checkbox.
Note that after you select this option, the Columns, Edit Menu, Header Filter and Group By sections will be hidden in this configuration page.
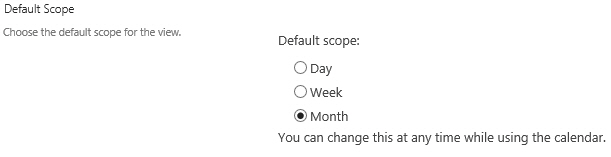
e. In Default Scope section, choose which scope type you want.
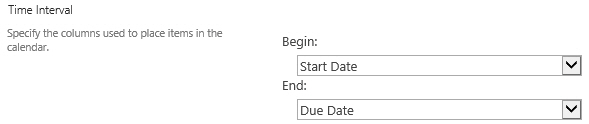
f. In Time Interval section, specify Begin and End date.
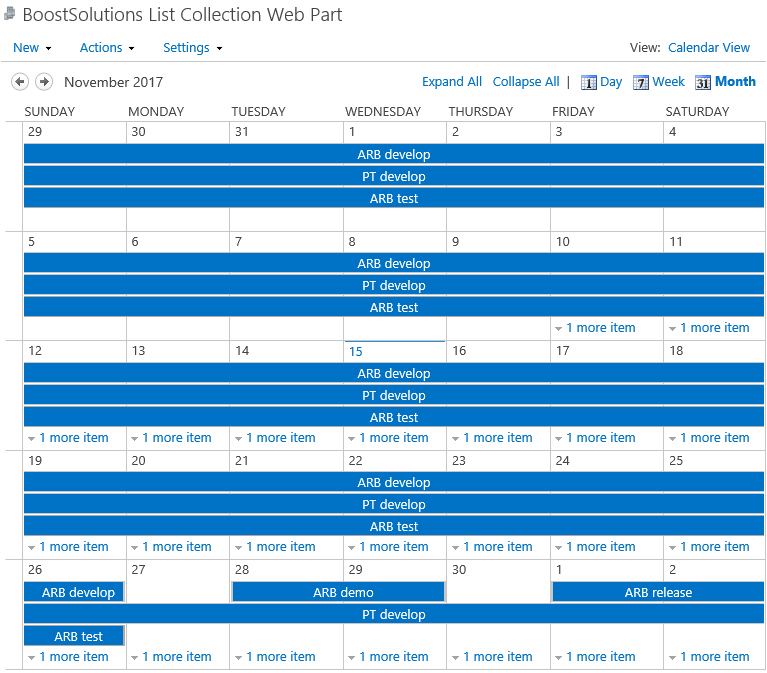
g. Then, click OK. The Calendar View is as following.
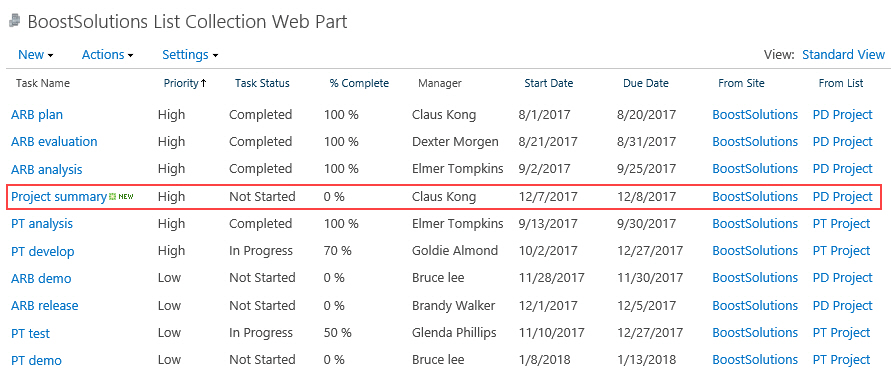
The List Collection Web Part allows you to add/edit/delete items to different lists. Original lists will auto-update accordingly.
To add an item, on New menu, choose which list you want to add item to.

The new item is added to the target list and also displayed on the List Collection Web Part.
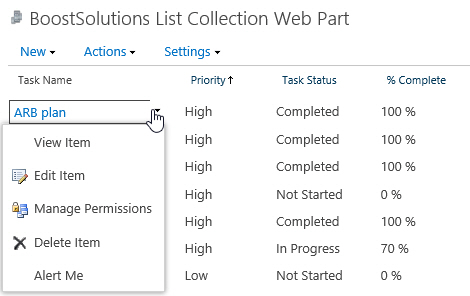
To view, edit or delete an item, click context menu of target item. The operation is the same in both Calendar and Gantt view.
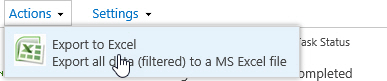
Firstly, select the view which you want to export to Excel document, supposed that we want to export the Completed View. Then click the Export to Excel on the Actions menu.
And then, specify the name and place, and click Save button.
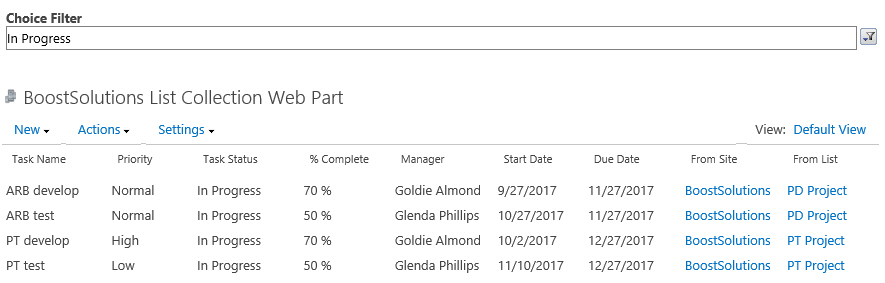
SharePoint List collection supports two types of SharePoint filter web parts: Choice and Text. You can connect List Collection Web Part to either filter to flexibly get your desired data.
a. Add a Choice Filter web part to a page where List Collection web part located.
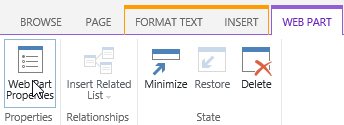
b. Select the Choice Filter web part, and click Web Part Properties command in WEB PART tab.
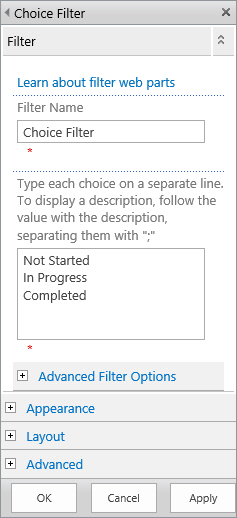
c. A configuration tool pane will appear as following on the right side; enter a name in the Filter Name box to identify the Web Part. Enter a list of values and an optional description that you want a user to select from the 'Select Filter Values' dialog box that appears when a user clicks the Filter button.
d. Optionally, configure the other settings as per your needs.
e. To save your changes click OK.
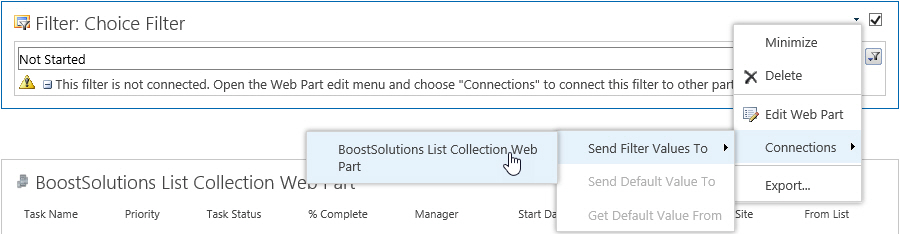
f. To connect to the Choice Filter Web Part, open the Choice Web Part drop down menu and click Connections>Send Filter Values To>BoostSolutions List Collection Web Part.
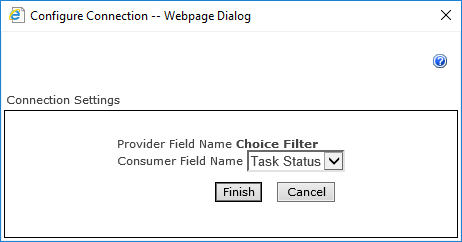
g. In the Configure Connection dialog box, set the Consumer Field Name to the column that you want to filter the List Collection Web Part by, and then click Finish.
h. When you are done configuring the connection, in the Page tab, click Save & Close to save and view the page.
i. To dynamically change the results in the List Collection Web Part, in the Choice Filter Web Part, click Filter, select a value and then click OK.