
- BoostSolutions
-
Products
-
- Microsoft Teams
- HumanLike Alert Reminder
- View All Apps
- Pricing
- Support
- Company
SharePoint Password Change & Expiration allows AD, Local NT, or Form-Authenticated users to change their own passwords from SharePoint without administrator intervention. This powerful Web Part can also send expiration notification emails to warn users before their passwords expire, send confirmation emails after users have successfully changed their passwords, customize error messages, and store all password change activities in a convenient administrator's log.
Supported FBA environment:
Notes: ADAM is what it has been called before windows server 2003, AD LDS is for windows server 2008.
2.1. Add SharePoint Password Change Web Part
a. Go to the site or page where you wish to add Password Change Web Part, and click Sittings and then click Edit Page to modify the page.
b. On the ribbon, click Insert tab, and then click Web Part.
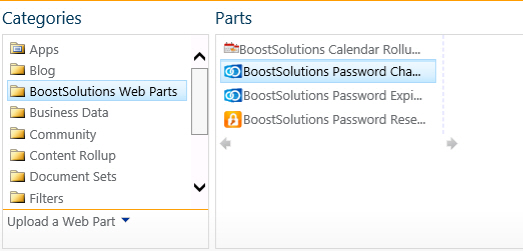
c. In the Categories box, select BoostSolutions Web Parts, select Password Change Web Part , and then click Add.
2.2. Change Your Password with SharePoint Password Change
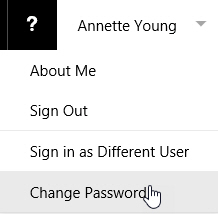
Users can access the change password page by clicking Change Password from the main dropdown menu of the current site or change the password directly from within the Password Change Web Part.
On the Password Change page, or from within the Web Part, enter the current password, new password, and confirm the new password.
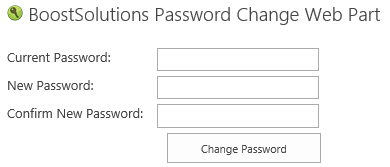
Based on the settings of the Password Change Web Part, the user might also be required to enter the domain and the account name in order to change the password. Please note that these options are only available in the Password Change Web Part.
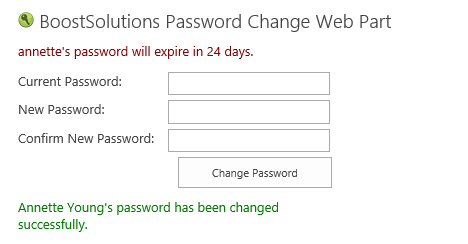
After the password has been changed successfully, a message will notify the user that password has been changed successfully.
2.3. Customize Password Change Web Part
If you want to customize Password Change Web Part. click Settings and then click Edit Page. And on the Web Part drop-down menu, click Edit Web Part.
In the Password Change Web Part Configuration section, select the Allow users to specify domain (AD authentication only) and Allow users to specify account (AD authentication only) check boxes. These options are available for AD authentication only.

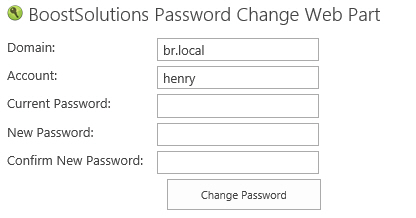
When these options are selected, users can specify other domain and account names when they change their password.
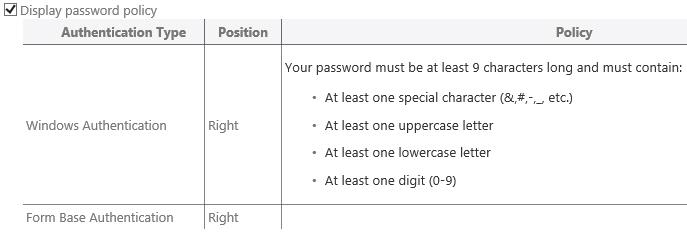
In Password Change Web Part Configuration section, you can specify if the password policy will be displayed to users when they change password via the Web Part.
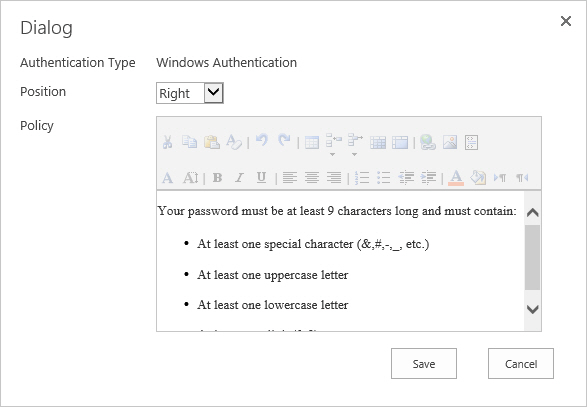
You can also edit the password policy. To edit the password policy, click Edit. In the Dialog window that appears, customize the policy message in the Policy section and select the position to display it in the Position section. After all is done, click Save.
Click Apply and OK. When a user log in, the Web Part will look like:

3.1. Activate Password Change Email Notification Timer Job
a. From the SharePoint Central Administration homepage, click Manage web applications under Application Management.
b. Select the web application to which you want to apply Password Change, and then click Manage Features . This will open up the Manage Web Application Features window.
c. Locate Password Change Email Notification Timer Job, and then click Activate.

3.2. Configure SharePoint Password Change Expiration Notification
Click Settings and then click Site Settings. Under Site Collection Administration , click Password Change & Expiration settings to enter the Password Change & Expiration Settings page.
Note: You need to have full control permssion with the current page to add and edit the web part.
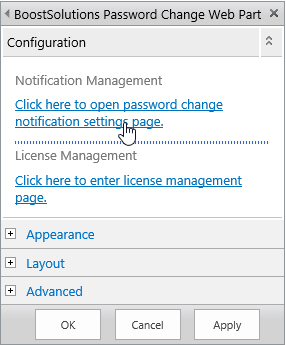
The settings page can also be accessed directly via the Password Change Web Part. Click Edit Web Part . And then click the link Click here to open password change notification settings page under Notification Management.
The Password Change Settings page is divided into 5 sections. Each section has to be enabled before it can be edited. To enable a section, click the corresponding checkbox on the left.
The Password Expiration Notification section lets you select if you wish to send a password expiration notification email to users.
Here you can:
Specify when and how often email notifications should be sent before a password expires.

Specify the site groups and users you wish to exclude from the notification policy.

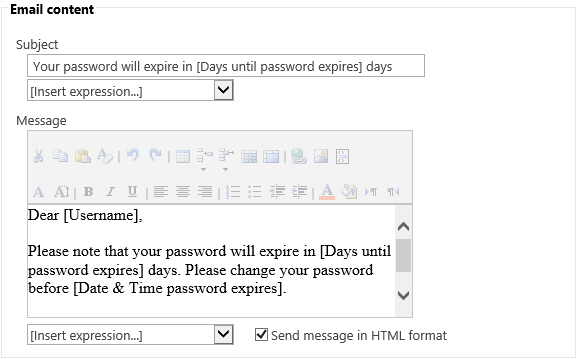
Customize the email subject and content. The Insert expression' dropdown box allows you to insert expressions corresponding to the user name, the time when the password expires, days left before the password expires, and so on.
Choose if you want administrators to be notified when a notification is sent to a user.

3.3. Configure SharePoint Password Change Email Confirmation
If you enable Password Change Email Confirmation, you can send a confirmation email to users after their passwords have been changed. The configuration is similar to that of Password Expiration Notification settings .
In the Exempt users/groups section, specify the site users/groups that you want to exclude from receiving the confirmation emails.
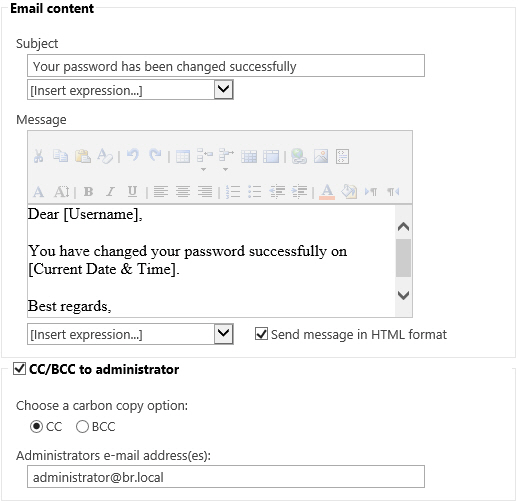
The customization of password change confirmation emails is similar to that of the password expiration notification emails. Enter the subject and message of the email. Also, you can insert expressions in the text for both subject and message, send the email in plain text or in HTML format, and CC/BCC the email to the administrator.
3.4. Check Password Change Logs
The Password Change Log section allows you to set the password log options.
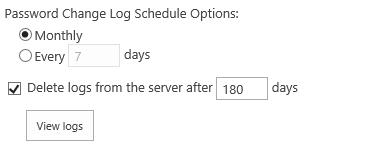
The View logs button opens up a new window that allows you to select and view the log files. It also gives you the option to delete log files.
The log files will be saved as .log files and can be edited in Notepad. Click on a file name to open and edit it.
4.1. Add SharePoint Password Expiration Warning to a Site
Follow the first 3 steps in Section 2.1. In step 4, select BoostSolutions Web Parts from the Categories box, select Password Change Expiration Warning Web Part, and then click Add to add it to your site.
4.2. Customize SharePoint Password Expiration Warning
The SharePoint Password Expiration Warning Web Part can warn you with a message on the web page before your password expires, prompting you to change the password and providing a link that takes you to the password change site.
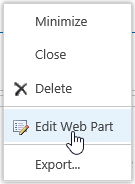
To edit it, click the Web Part dropdown menu, and then click Edit Web Part.
Set the number of warning days and specify a password change URL.
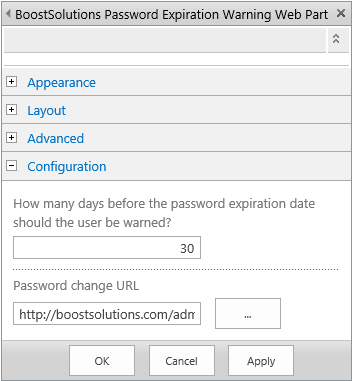
Click OK to save the current settings.
When you log on to the page, the Web Part will display a warning message and a link (Click here to change your password) if the number of warning days before the password expiration date has been reached. You can click on the link to go to the change password page.

