
- BoostSolutions
-
Products
-
- Microsoft Teams
- HumanLike Alert Reminder
- View All Apps
- Pricing
- Support
- Company
a. Go to Central Administration, on the Quick Launch, click Application Management.
b. On the Application Management page, under Web Applications, click Manage Web Applications.
c. Select a web application you want to configure and click Manage Features on the ribbon.
d. Find Permission by Rule's feature and click Activate. After a feature is activated, the Status column lists the feature as Active.

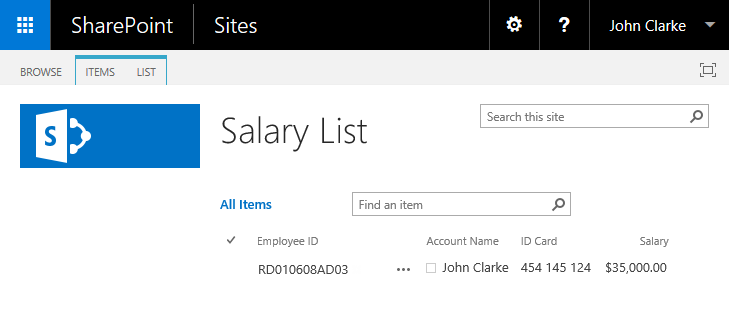
If a company is keeping salary information in a list and that list is accessible to everybody in the company, this would result in big issues with respect to confidentiality. The screenshot below is an example where all information is visible to all users. When you log in as John Clarke you are able to access all the information about salaries of every employee in the company.
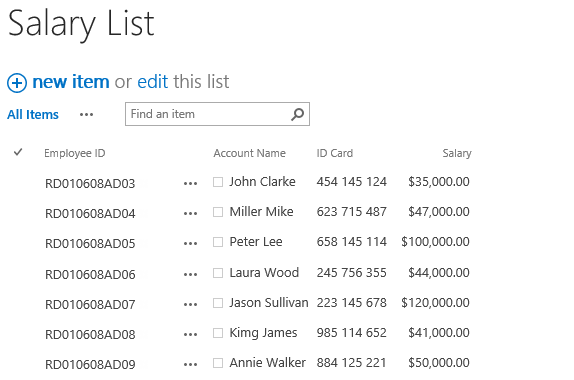
SharePoint Permission by Rule allows you to set permissions so that users can only see their own item information in this list.
a. Go to List Settings > Workflow Settings, and click Add a workflow.
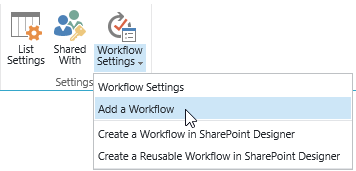
b. In the workflow template page, select BoostSolutions Permission by Rule.

c. Give a name for this workflow and then select a task list and history list for it.
d. Tick Start this workflow when a new item is created and Start this workflow when an item is changed checkboxes if you wish to start this workflow automatically.

e. Click Next to enter the workflow settings page.
f. Click Add Permission Part to enter the permission part settings page.
g. Give a name for this permission part, such as Set user permission.
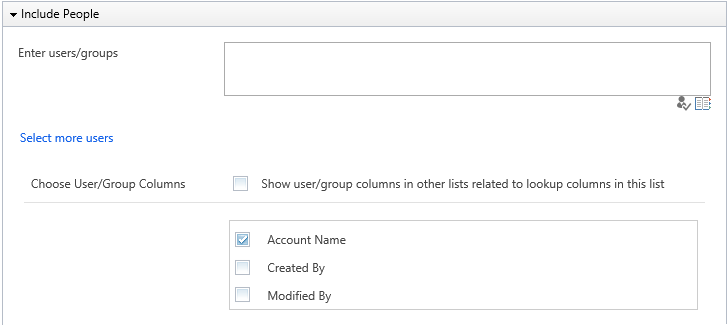
h. In Include User section, specify users or groups who will be assigned permissions.
In this case we want to select the users associated with the column Account Name as this represents the items they should have permission to see.
Click Select more users link to expand below section and select Account Name column as following.
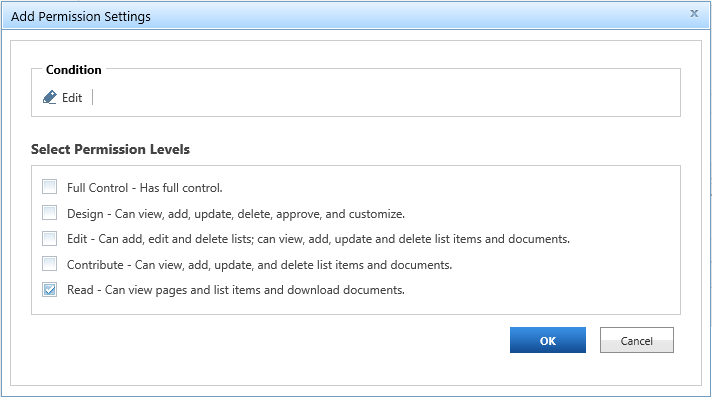
i. In Item Permission Settings section, click Add Permission Settings, and select Read permission level.
As the users should only be able to view their own information this will be set to Read. Note that these permission levels are pulled from the Site Collection permission settings.
j. In the Apply Permissions to section, select Documents or Items. The permission will be assigned to items.

k. Click OK to save the permission part.
l. To ensure the permissions settings are applied to all existing items in the list, check the Enable all permission settings effect to existed items in the list checkbox.

m. Then click OK to apply the permissions settings.
n. Wait for the workflow to finish processing. Once the workflow has finished processing, log on as John Clarke. The user John Clarke can only visit the item which is associated with his name, as you specified in the settings page.
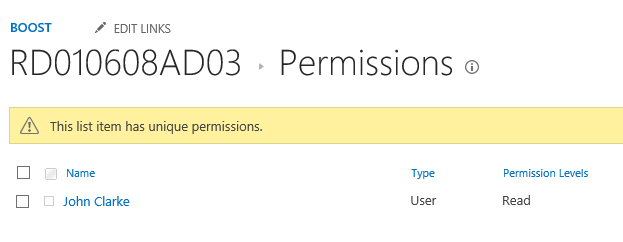
o. Check the permissions of this item, only John Clarke is assigned Read permission as you specified in the settings page.
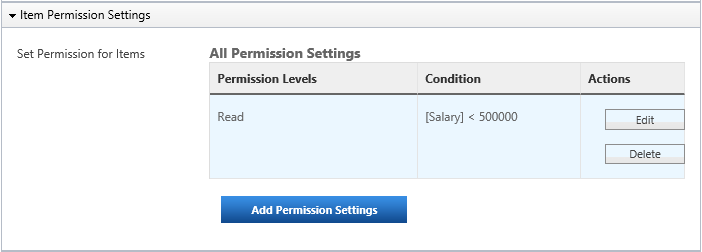
When setting permissions using the product, you can specify to which items permissions should be applied. In the Item Permission Settings section, configure a condition and select a permission level as following, then the items which meet this condition will be assigned permissions.
You can also define what permissions users should have for these items. In the Include Users section, configure a condition then the users and group who are filtered by the condition will be assigned permissions.

Two conditions types are provided in the settings page, Basic and Advanced.
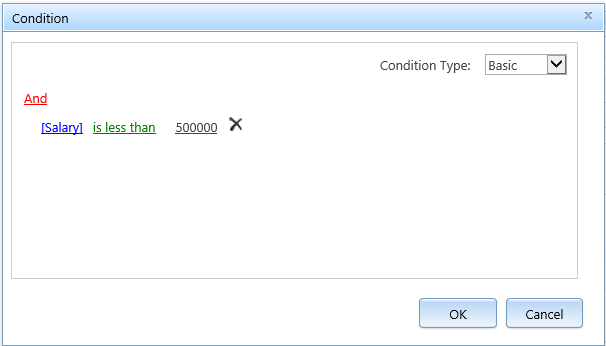
Basic conditions help administrators to easily configure conditions.
Advanced conditions provide more operators and functions to implement elaborate conditions beyond what is found in basic conditions.
For further reference, please see our Condition Editor User Guide.
This feature allows you to create permission parts based on list permission settings.

After clicking Load List permission settings, all list permissions will be loaded as followings.

You can export the Permission by Rule settings from the current list to an .xml file, and apply it to other permissions.
The Import function enables you to import Permission by Rule settings from an .xml file.

