- BoostSolutions
-
Products
-
- Microsoft Teams
- HumanLike Alert Reminder
- View All Apps
- Pricing
- Support
- Company
With Bulk Properties Editor, check in, approve/reject documents /list items in one go. In this article we will guide you to walk through the various options in Bulk Properties Editor setting’s page under Set Settings. You will be able to configure it based on your needs after understanding the options and make it work perfect for you. There are 2 ways to configure the Bulk Properties Editor settings. Today, we are going to show you how to configure the Bulk Properties Editor settings for the entire site. We will demonstrate how to configure the Bulk Properties Editor settings for specific lists/libraries in the other article.

The Bulk Properties Editor Settings page under Site Settings
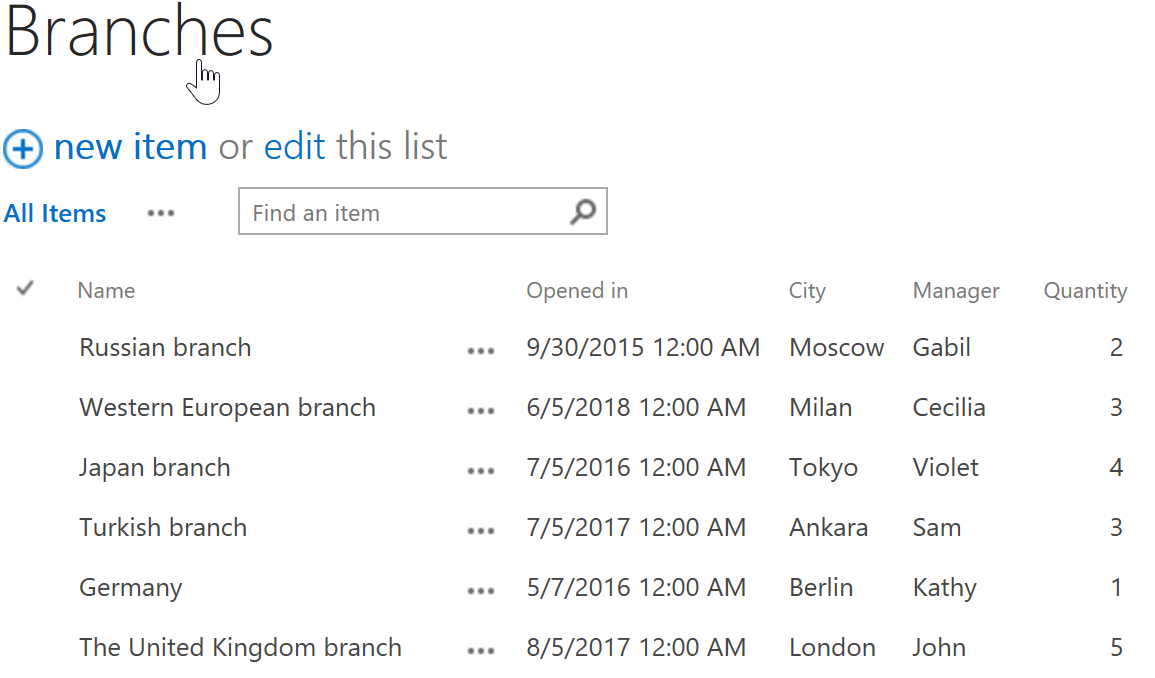
Create a list from the custom list template on a SharePoint site. Here, we created a list named as Branches in which we stored the name of the branch, the time the branch opened in, the city in which the branch is located, the manager who is in charge of the branch and the quantity of the branch. The manager column is a required value column. You can create the list based on your needs.
Download the trial version of Bulk Properties Editor, and install it to your SharePoint server.
Navigate to the site in which the Branches list is located.
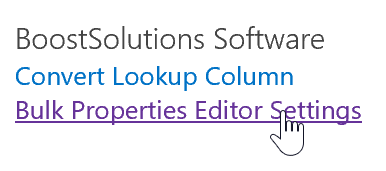
Go to Site Settings page, then click Bulk Properties Editor Settings under BoostSolutions Software in the bottom right corner.
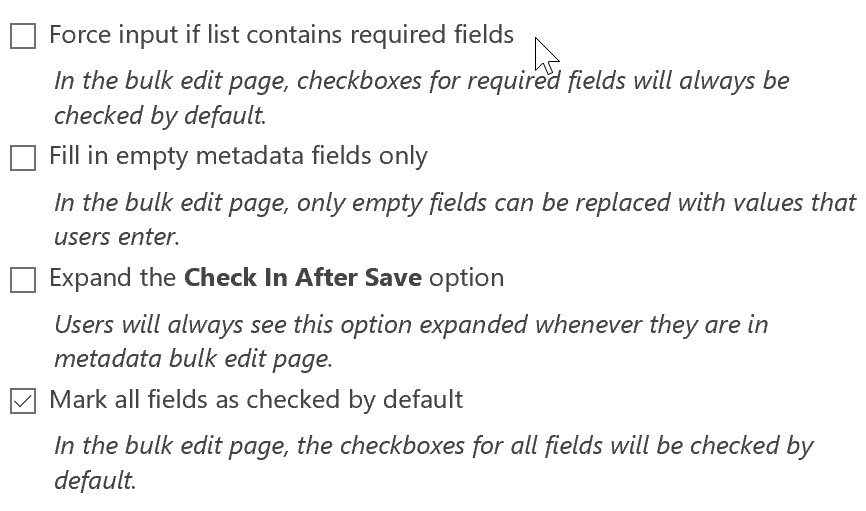
First, let’s dive into the General Settings section. Here, you will find four options provided which you can configure based on your needs. And the last option is checked by default. Now, let’s investigate the second option.
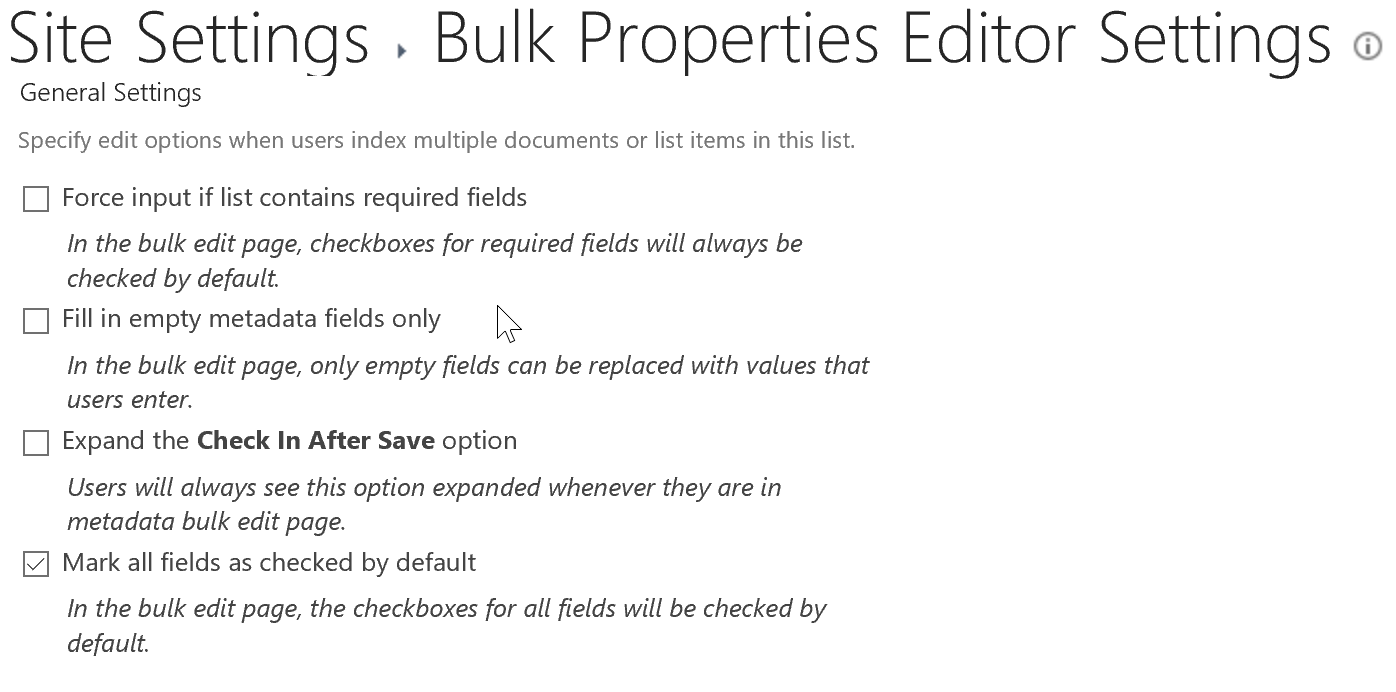
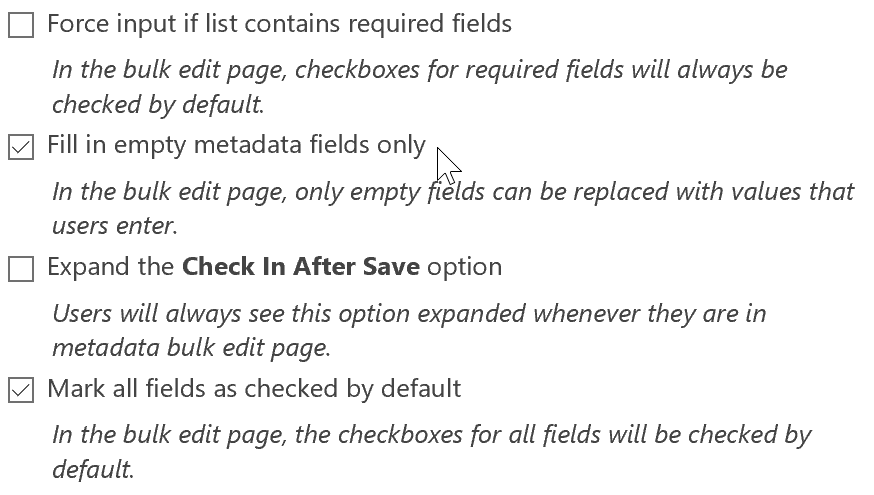
Fill in empty metadata fields only, with this option checked, in the bulk edit page, only empty fields can be replaced with values that users enter.
First, let’s check the checkbox for this option then click Save in the bottom right corner of the settings page to see what will happen.
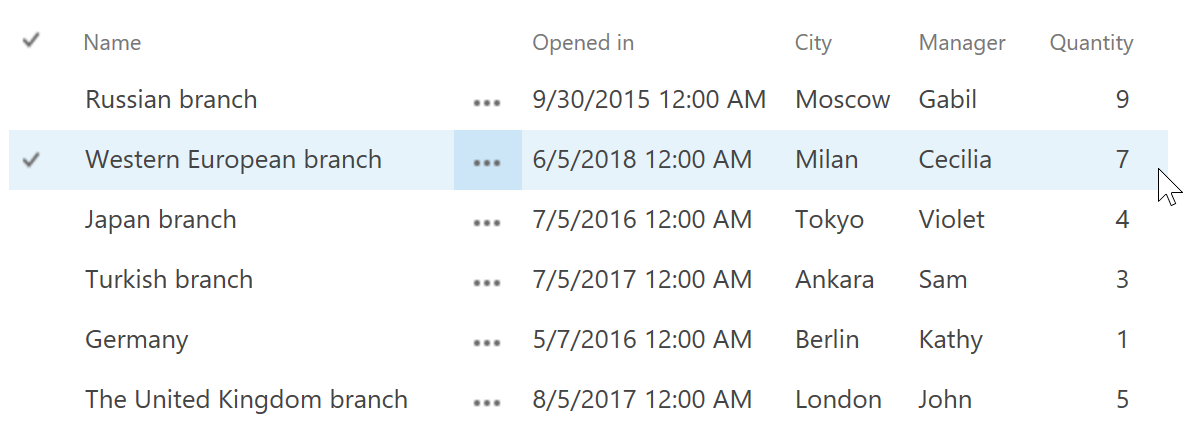
Navigate to the Branches list prepared above and select several items to try the Bulk Properties Editor’s functions. Here we selected the first three items in the list. Then click ITEMS and click Bulk Edit/Group Edit/Edit All in Manage group.
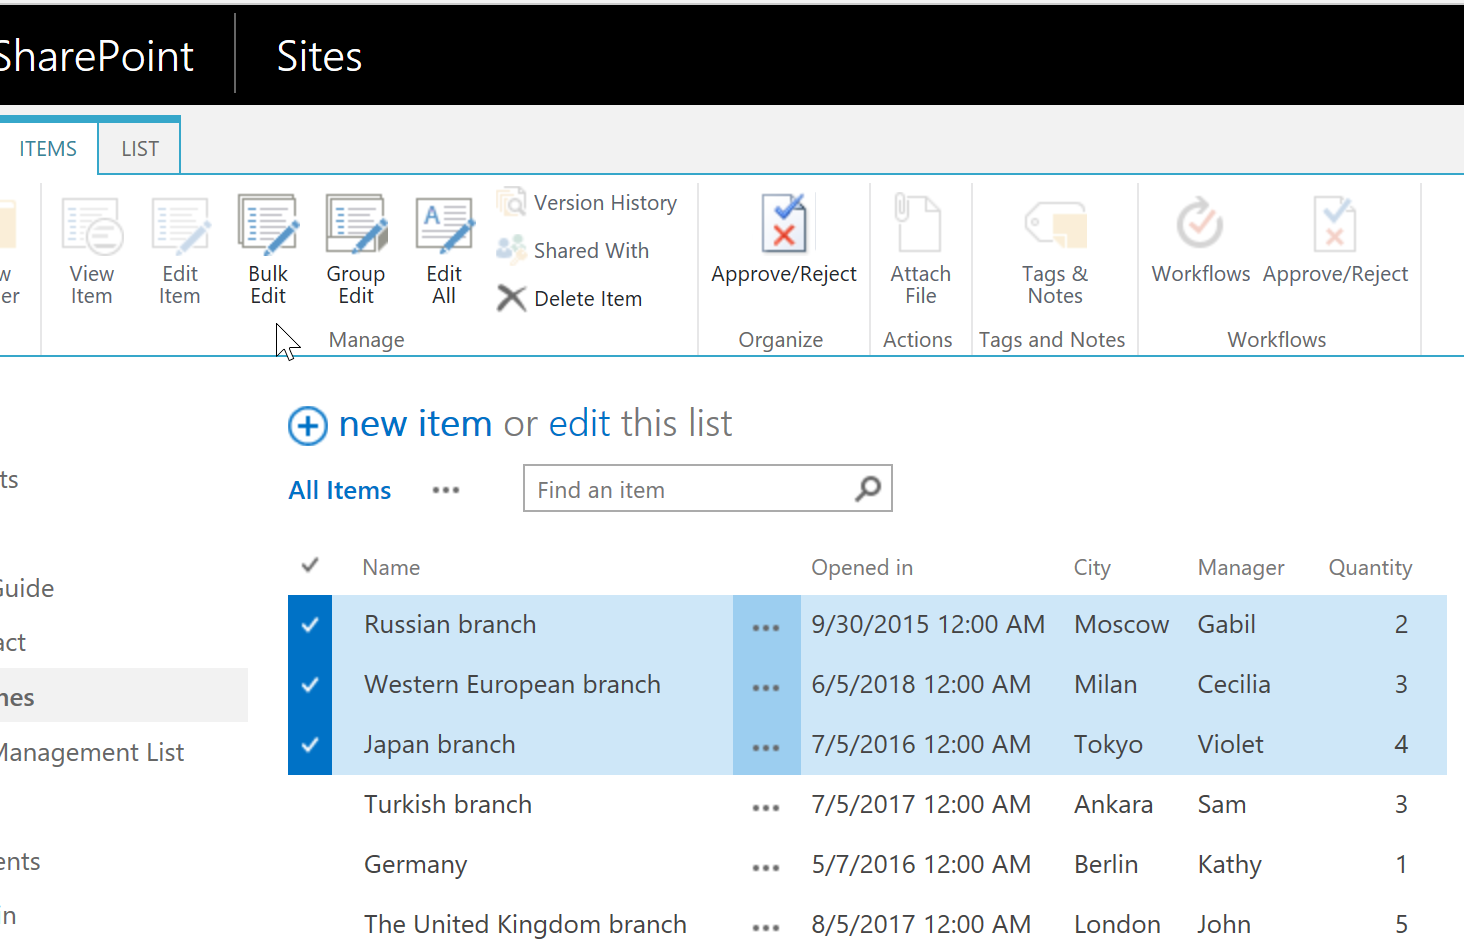
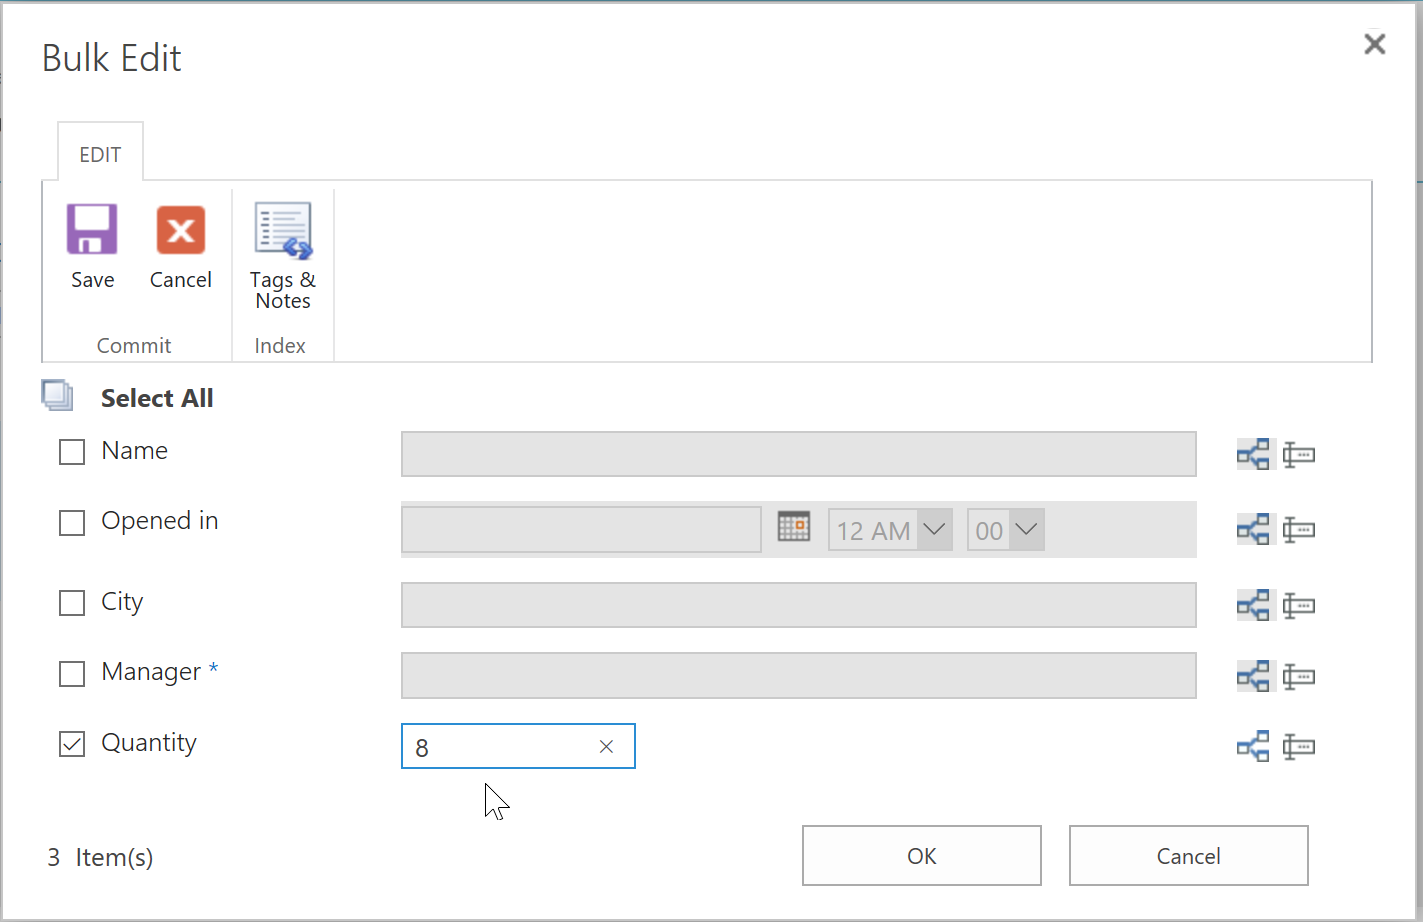
All columns are shown as empty by default in the Bulk Edit/Edit All page. Here let’s uncheck the checkbox of columns except the Quantity column, we will use the Quantity column to demonstrate the option Fill in empty metadata fields only. Now, let’s Bulk Edit the Quantity value of the three selected items to 8.
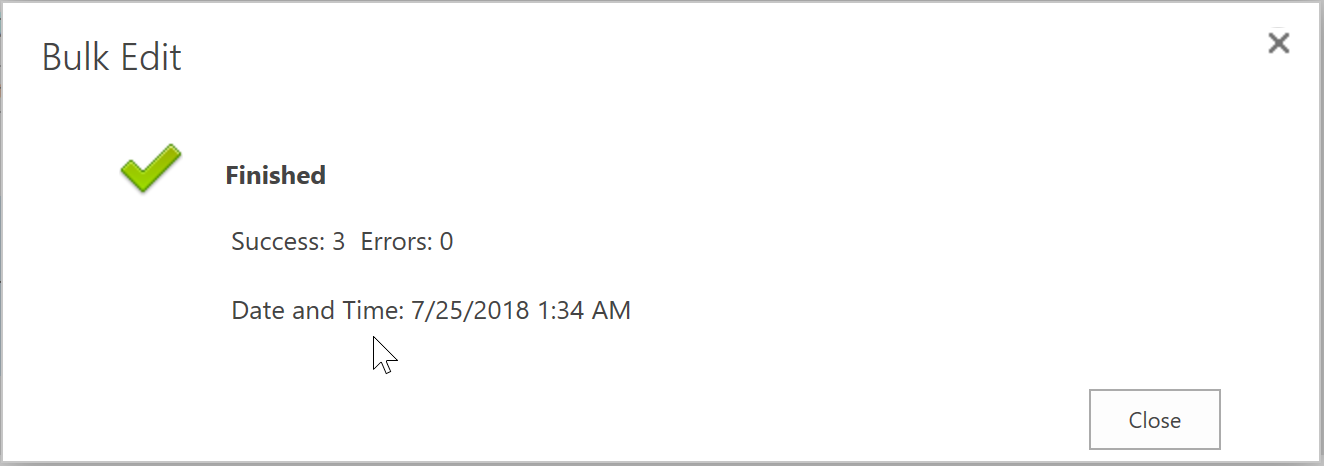
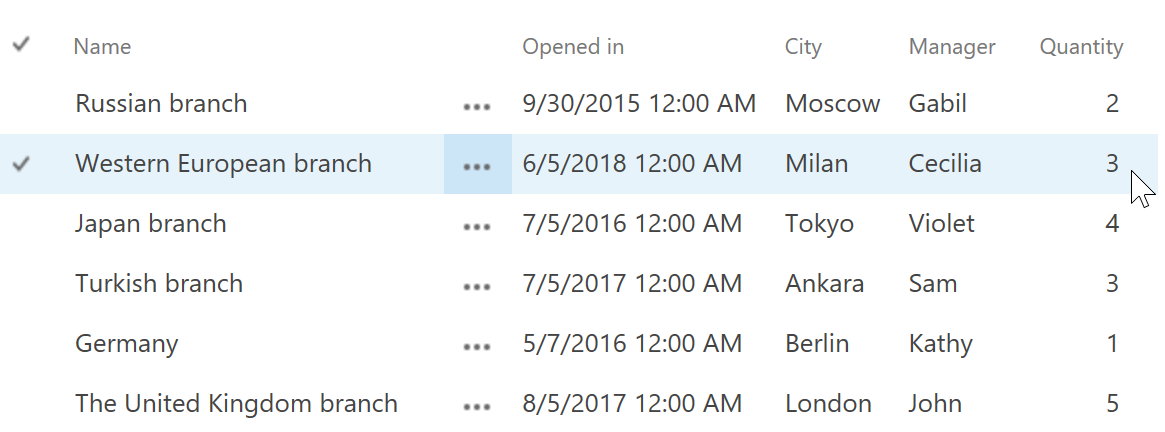
Click OK, after a short loading process, you will find a finished page indicates that your change has been successfully performed. Click Close. And you will find out that the values of Quantity column of those three items have not been changed because they are not empty fields (they have original values in the list).
So, if you check the checkbox of Fill in empty metadata fields only, then the metadata fields which have original values will not update to the new modified value.
Now, let’s change the value of the Quantity column of the first two items as empty.
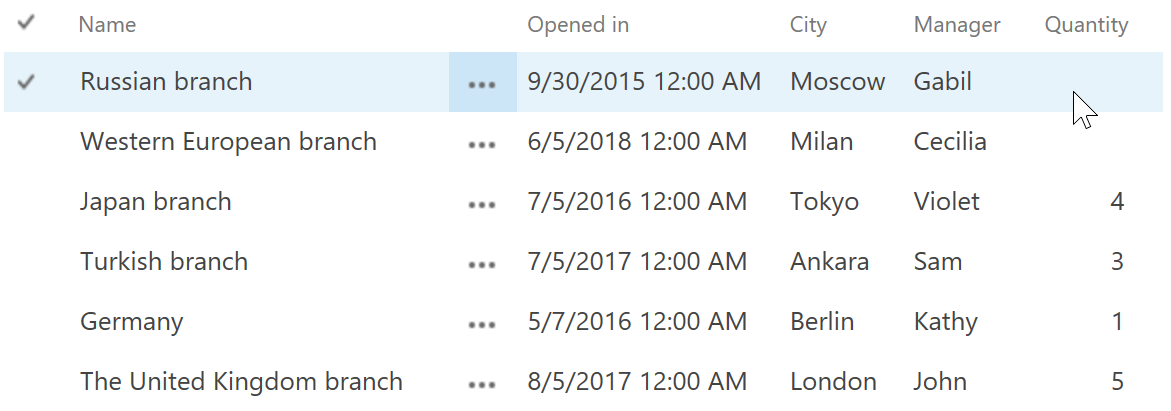
Then, try the Bulk Edit again. Select the first two items, then click ITEMS and click Bulk Edit/Edit All in Manage group.

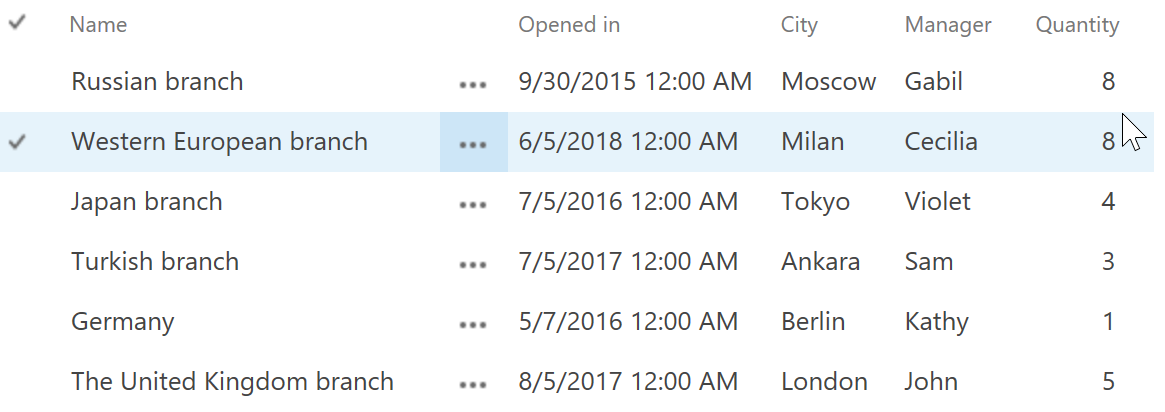
Uncheck the checkbox of columns except the Quantity column, we will use the Quantity column to demonstrate the option Fill in empty metadata fields only. Let’s Bulk Edit the value of the Quantity column of the two selected items to 8 and click OK. After it’s finished, you will find out that the values of Quantity column of these two selected items have been changed to 8 successfully because they are empty columns in the list this time.
You can also select the first two items, then click ITEMS and click Group Edit in Manage group. Because the value for Quantity column for the two selected columns are empty, so you can also input a value and get it updated.
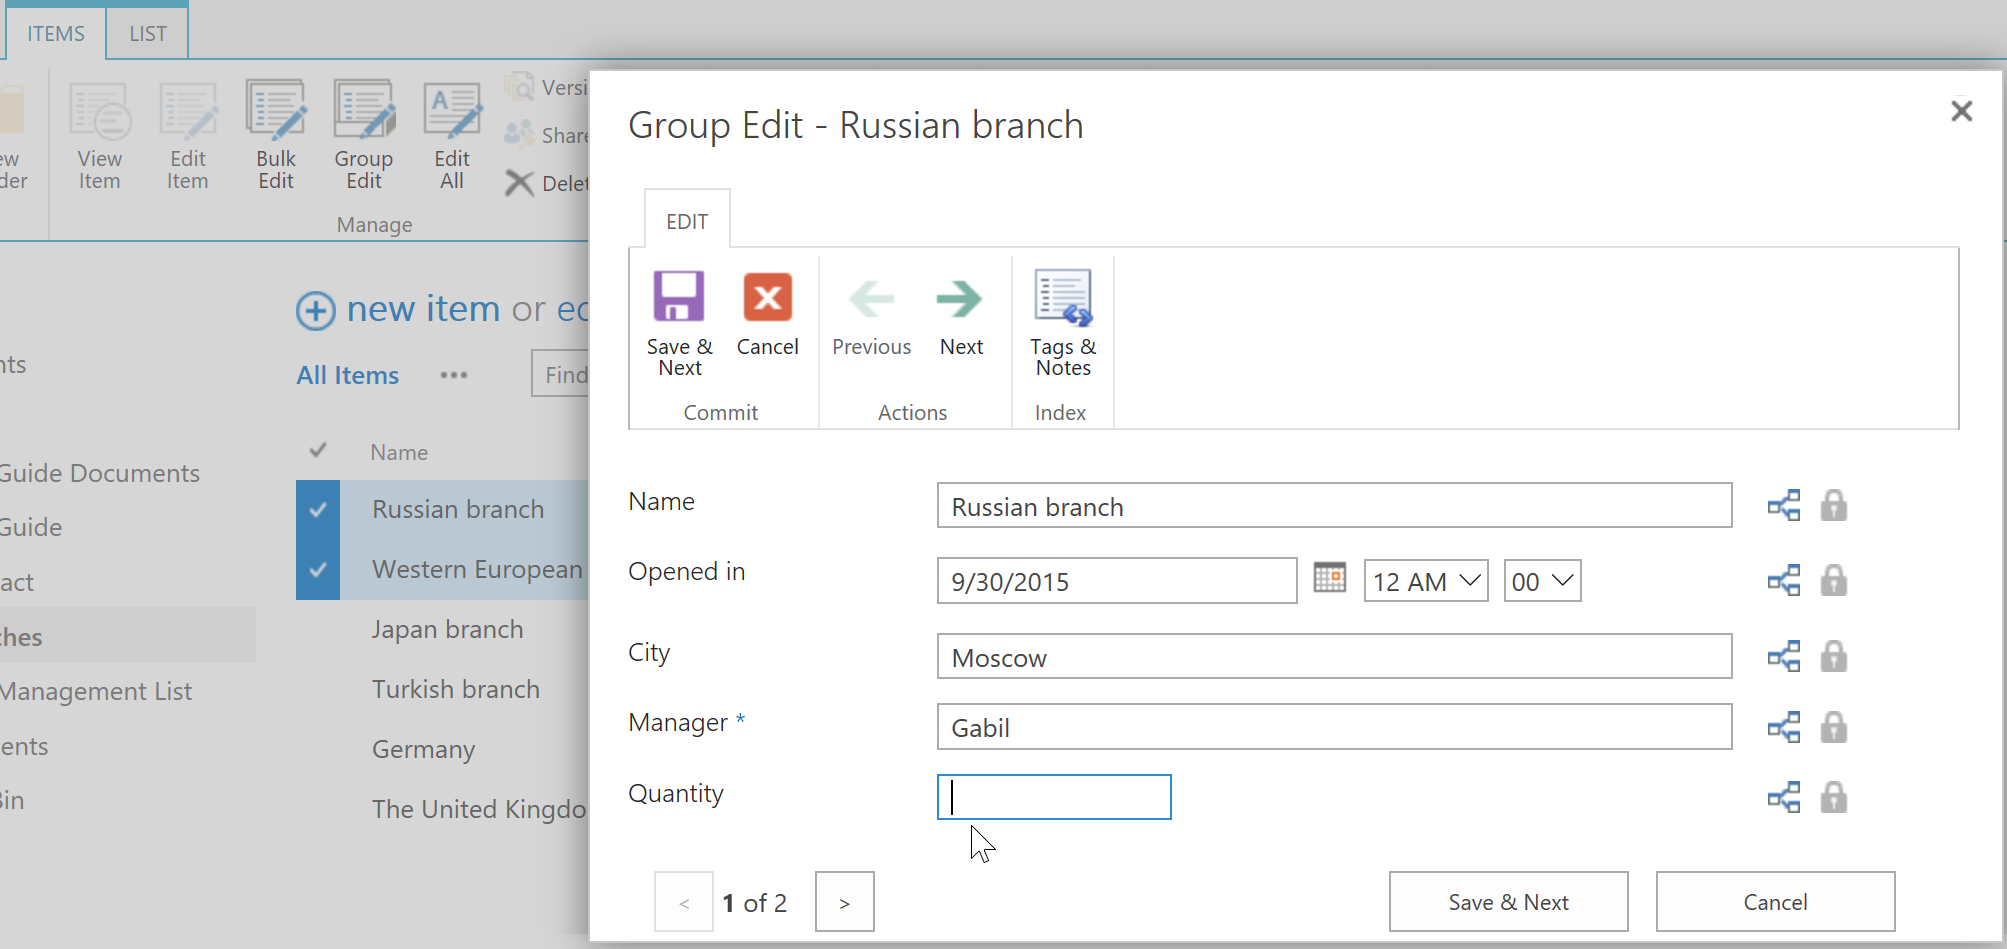
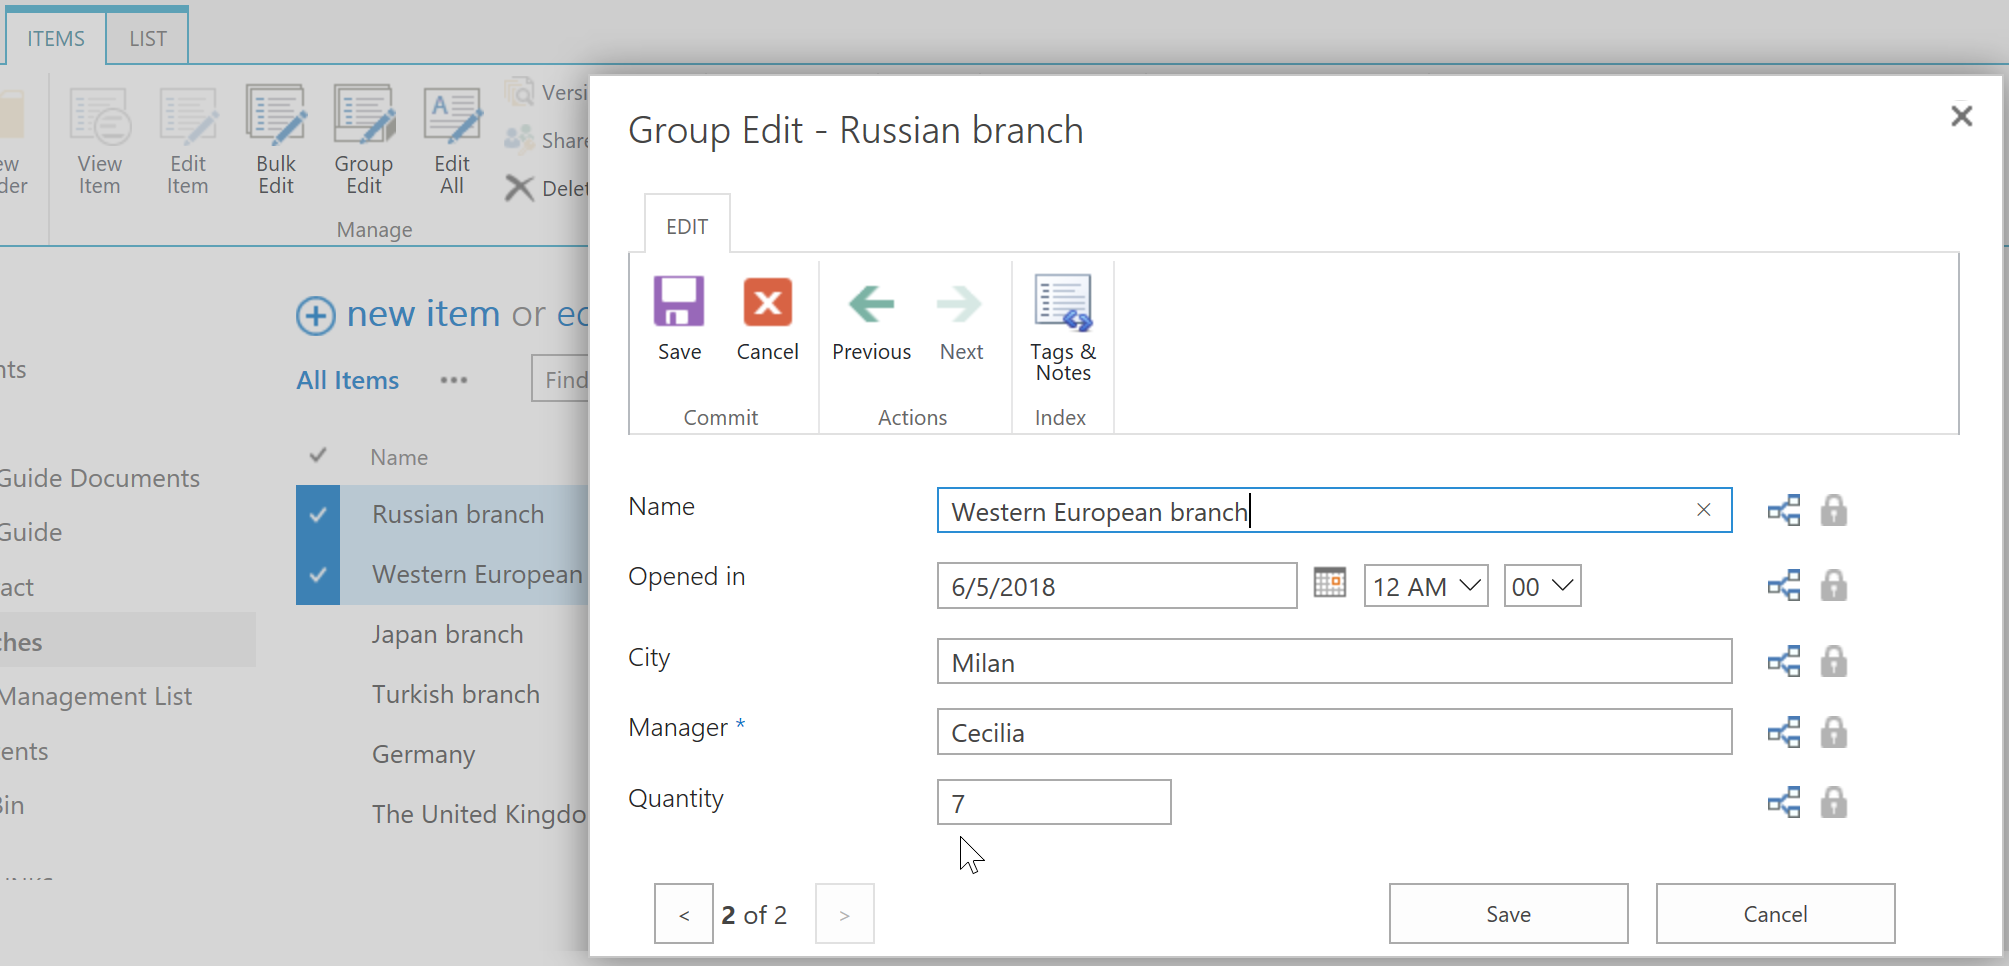
For example, we input 9 for the Quantity column for item Russian branch and click Save & Next, then we input 7 for the Quantity column for item Western European branch and click Save, then you will find out that the values of the Quantity column for the two selected items have been updated successfully too.

Now, let’s uncheck the checkbox for Fill in empty metadata fields only then click Save in the bottom right corner of the settings page to see what will happen.
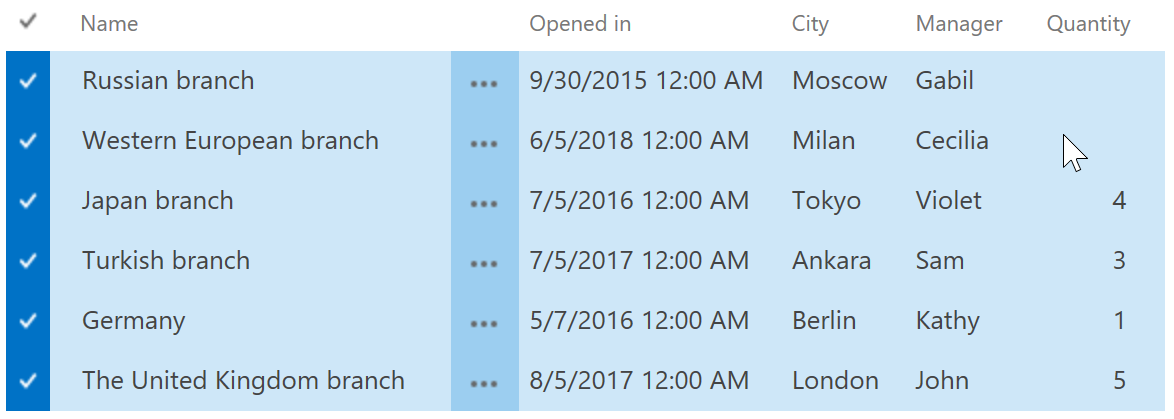
Let’s change the value of Quantity column of the first two items as empty as we did above and keep others as remaining. Now, let’s select all items in the list, then click ITEMS and click Bulk Edit/Edit All in Manage group.
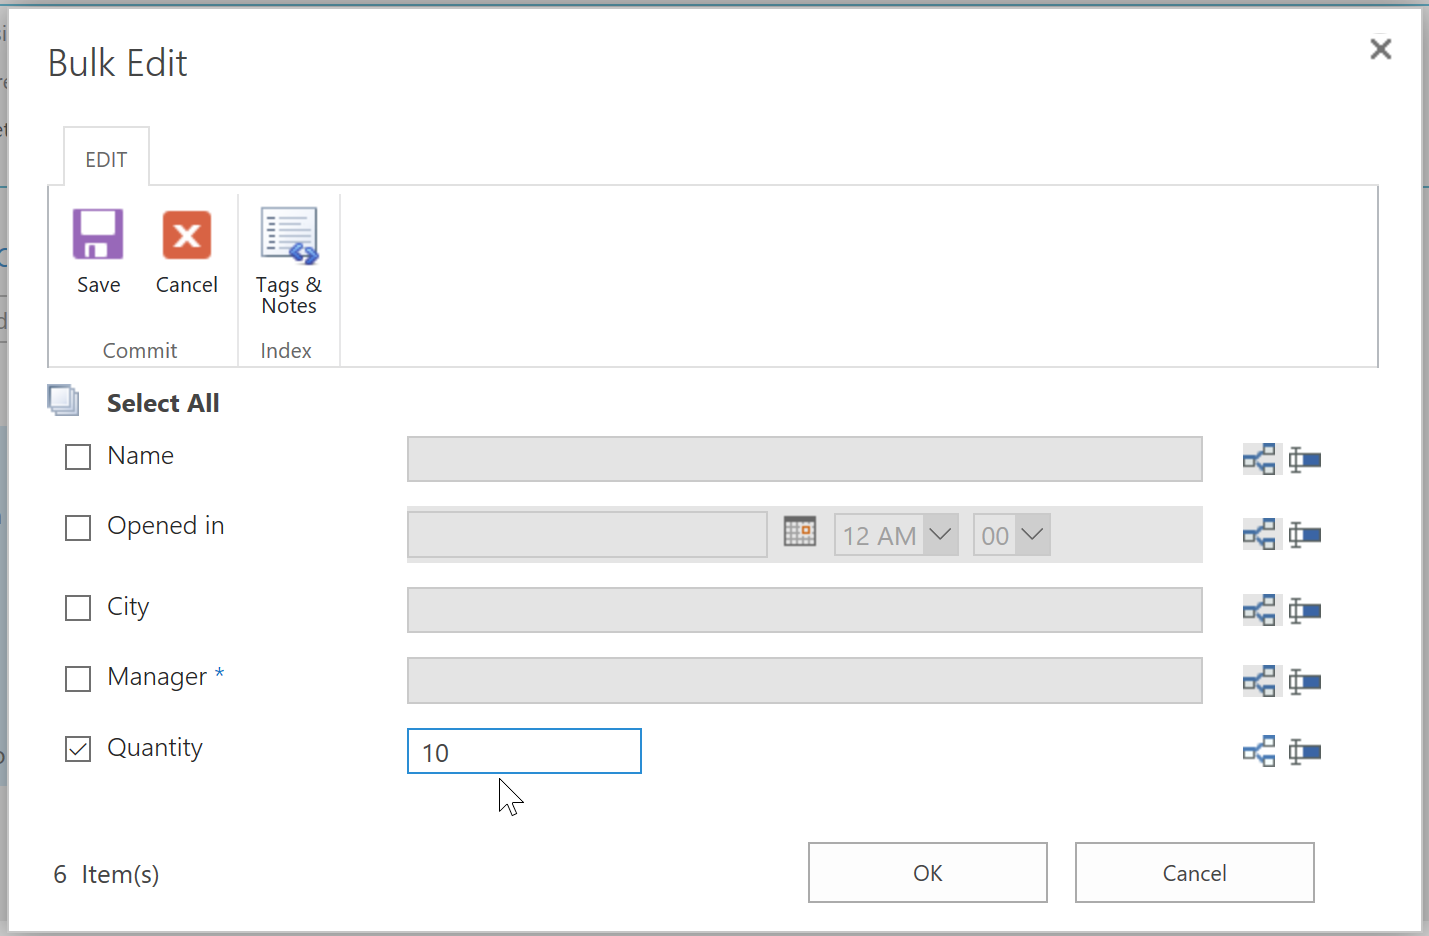
Uncheck the checkbox of columns except the Quantity column, we will use the Quantity column to demonstrate the option Fill in empty metadata fields only. Let’s Bulk Edit the value of the Quantity column of all items to 10 and click OK.
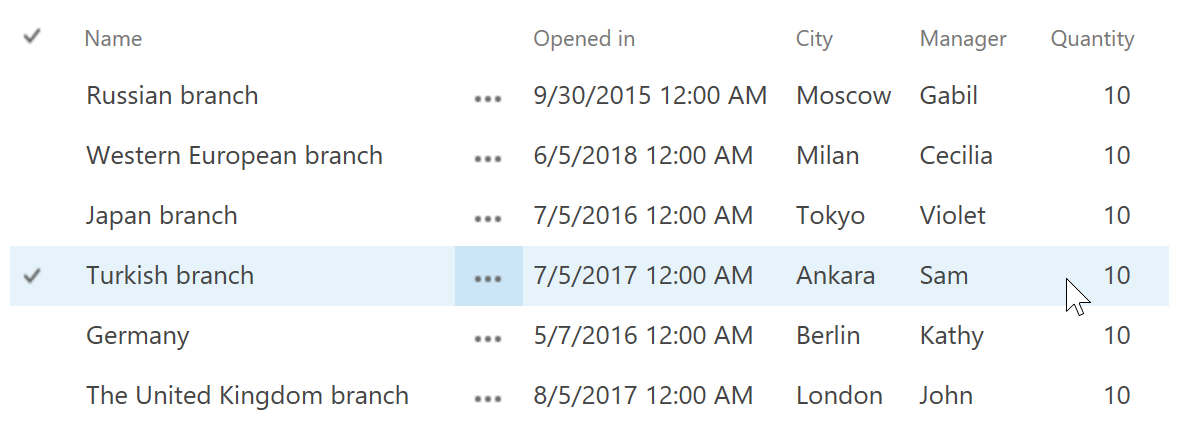
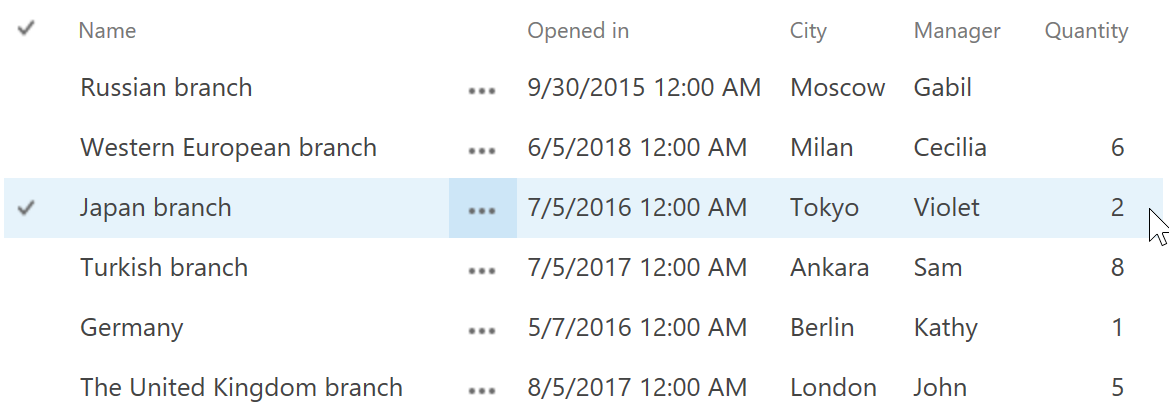
After a short loading process, you will find out that the values of Quantity column for all items have been changed to 10 successfully no matter whether it is an empty column or a column with value already.
You can also select any item/items, then click ITEMS and click Group Edit in Manage group to have a try. Because we have unchecked the checkbox for Fill in empty metadata fields only. So, this time you can update the Quantity column of selected items to some ones new one by one for sure no matter it has/has not original value. Here we selected three items as shown below, one of the has an empty value for Quantity column and the other two have original values for Quantity column.
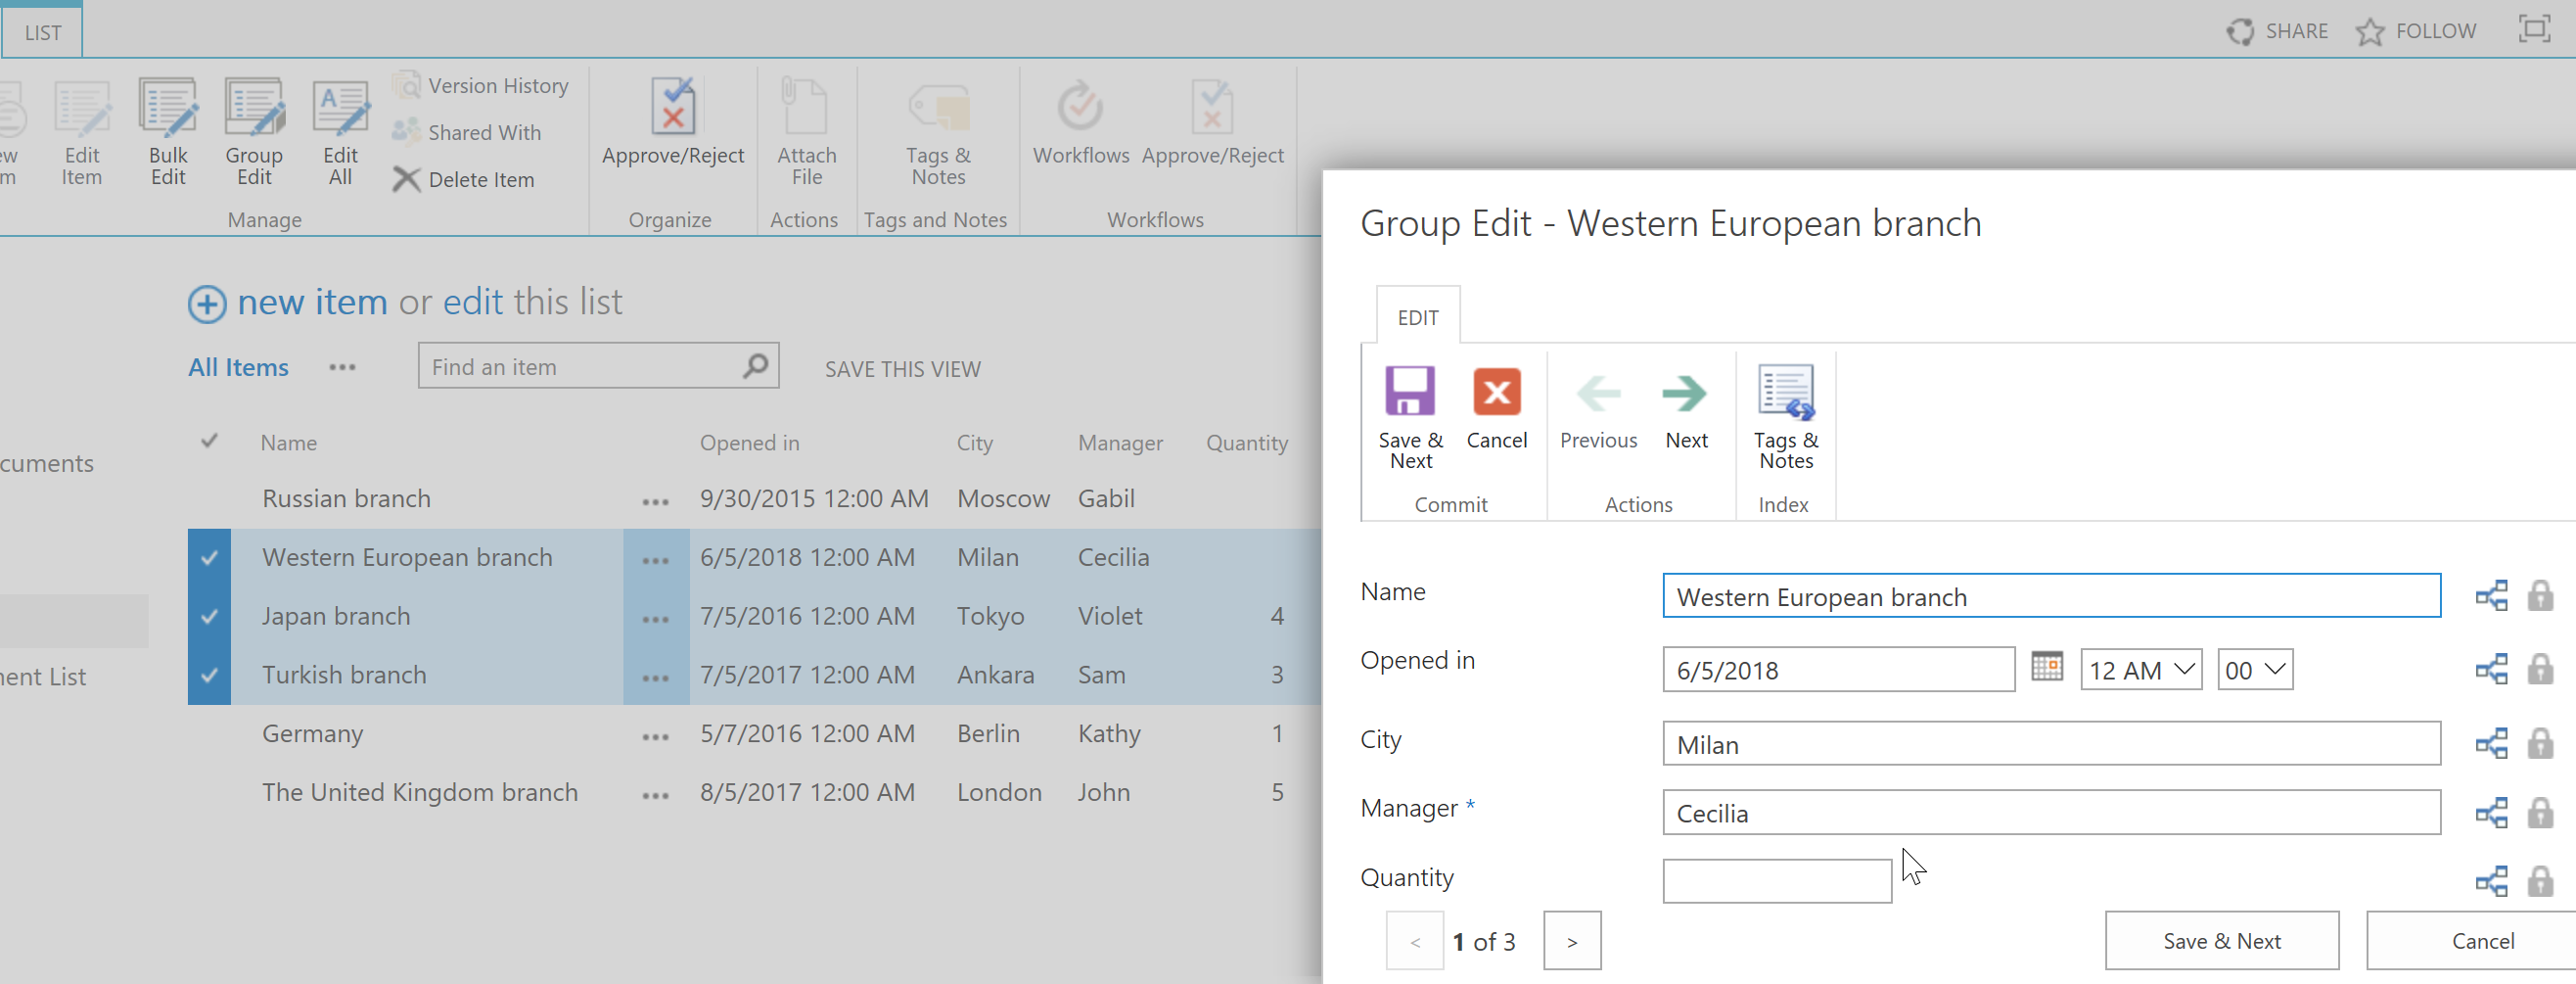
For example, we input 6 for the Quantity column for item Western European branch and click Save & Next, then we input 2 for the Quantity column for item Japan branch and click Save & Next, we input 8 for the Quantity column for item Turkish branch and click Save, then you will find out that the values of the Quantity column for the three selected items have been updated successfully too.
Note:
In this article, we talked about how to configure Bulk Properties Editor settings through Site Settings which means that all the configuration we did above will be applied to all lists and libraries in the current site.
How to manage Bulk Properties Editor settings for a site - Part 1?
How to manage Bulk Properties Editor settings for a site - Part 3?
How to manage Bulk Properties Editor settings for a site - Part 4?
How to manage Bulk Properties Editor settings for a site - Part 5?
How to manage Bulk Properties Editor settings for a site - Part 6?
