- BoostSolutions
-
Products
-
- Microsoft Teams
- HumanLike Alert Reminder
- View All Apps
- Pricing
- Support
- Company
With Bulk Properties Editor you can bulk edit properties, check in, approve/reject documents /list items in one go. In this article we will guide you to walk through the various options in Bulk Properties Editor setting’s page under Set Settings. You will be able to configure it based on your needs after understanding the options and make it work perfect for you. There are 2 ways to configure the Bulk Properties Editor settings. Today, we are going to show you how to configure the Bulk Properties Editor settings for the entire site. We will demonstrate how to configure the Bulk Properties Editor settings for specific lists/libraries in the other article.

The Bulk Properties Editor Settings page under Site Settings
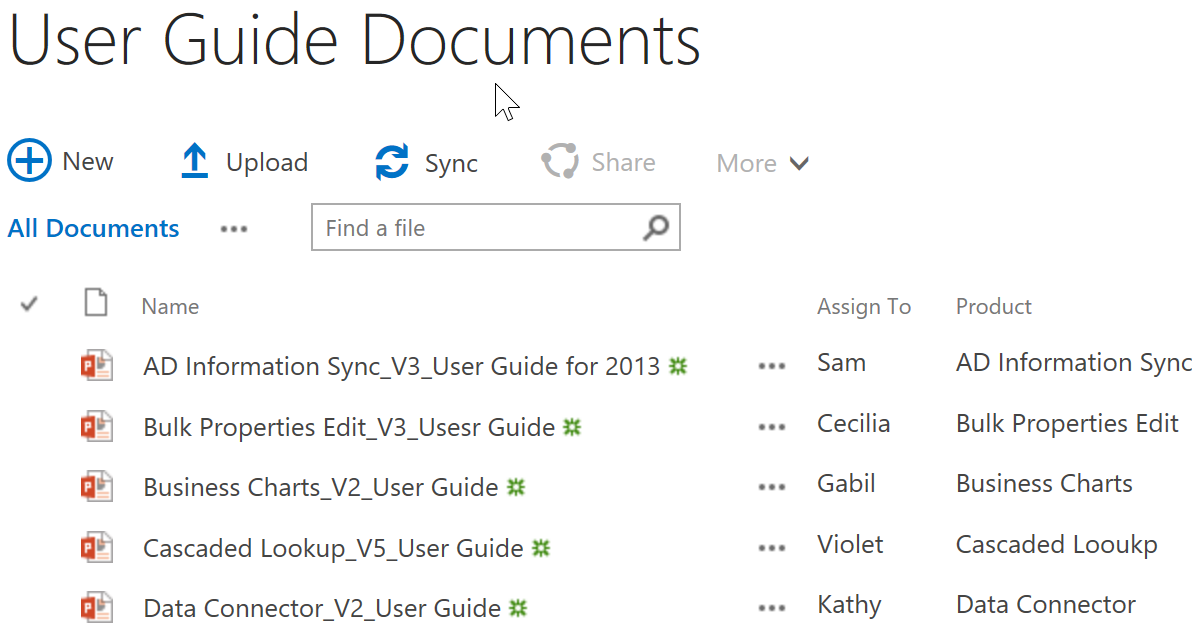
Create a library from the Document Library template on a SharePoint site. Here, we created a library named as User Guide Documents in which we stored the information of user guides. You can create the library based on your needs.
Download the trial version of Bulk Properties Editor, and install it to your SharePoint server.
Navigate to the site in which the User Guide Documents library is located.
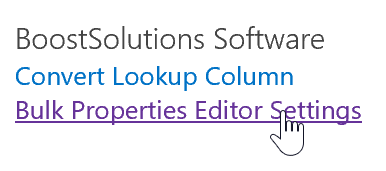
Go to Site Settings page, then click Bulk Properties Editor Settings under BoostSolutions Software in the bottom right corner.
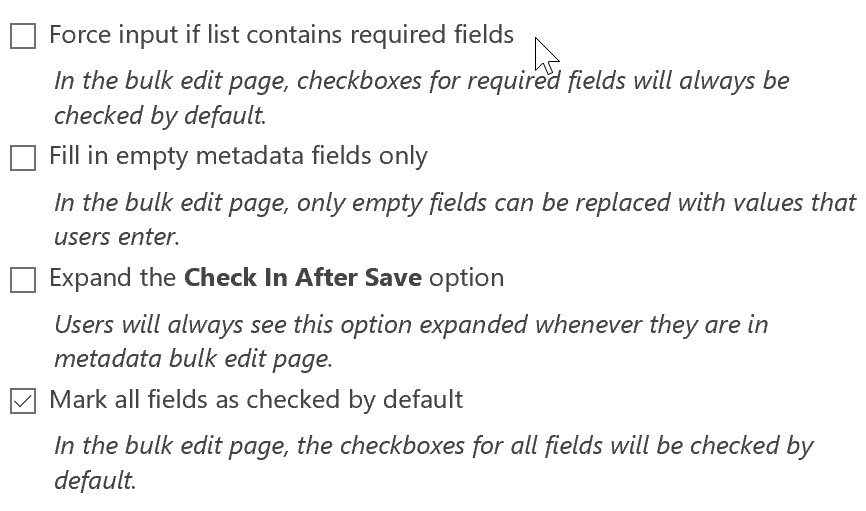
First, let’s dive into the General Settings section. Here, you will find four options provided which you can configure based on your needs. And the last option is checked by default. Now, let’s investigate the third option.
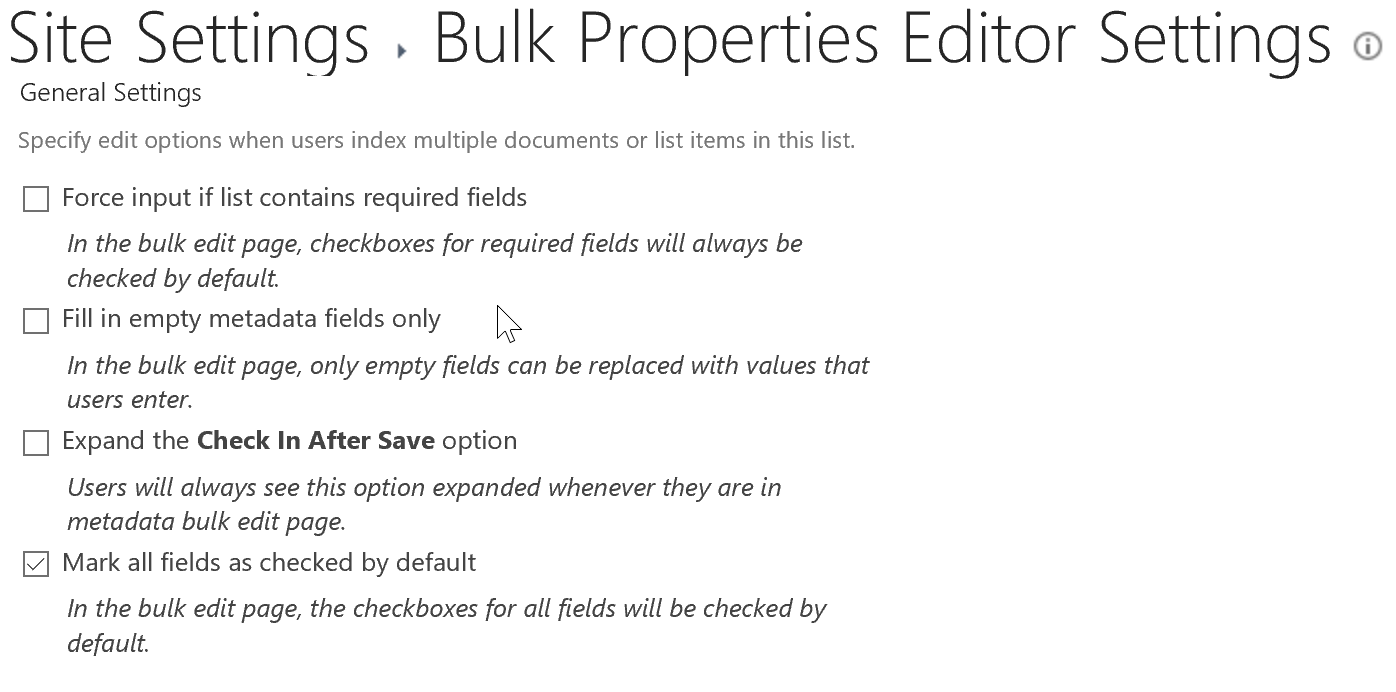
Expand the Check In After Save option, with this option checked, the Check In After Save option will be checked by default and users will always see this option expanded whenever they are in metadata bulk edit page.
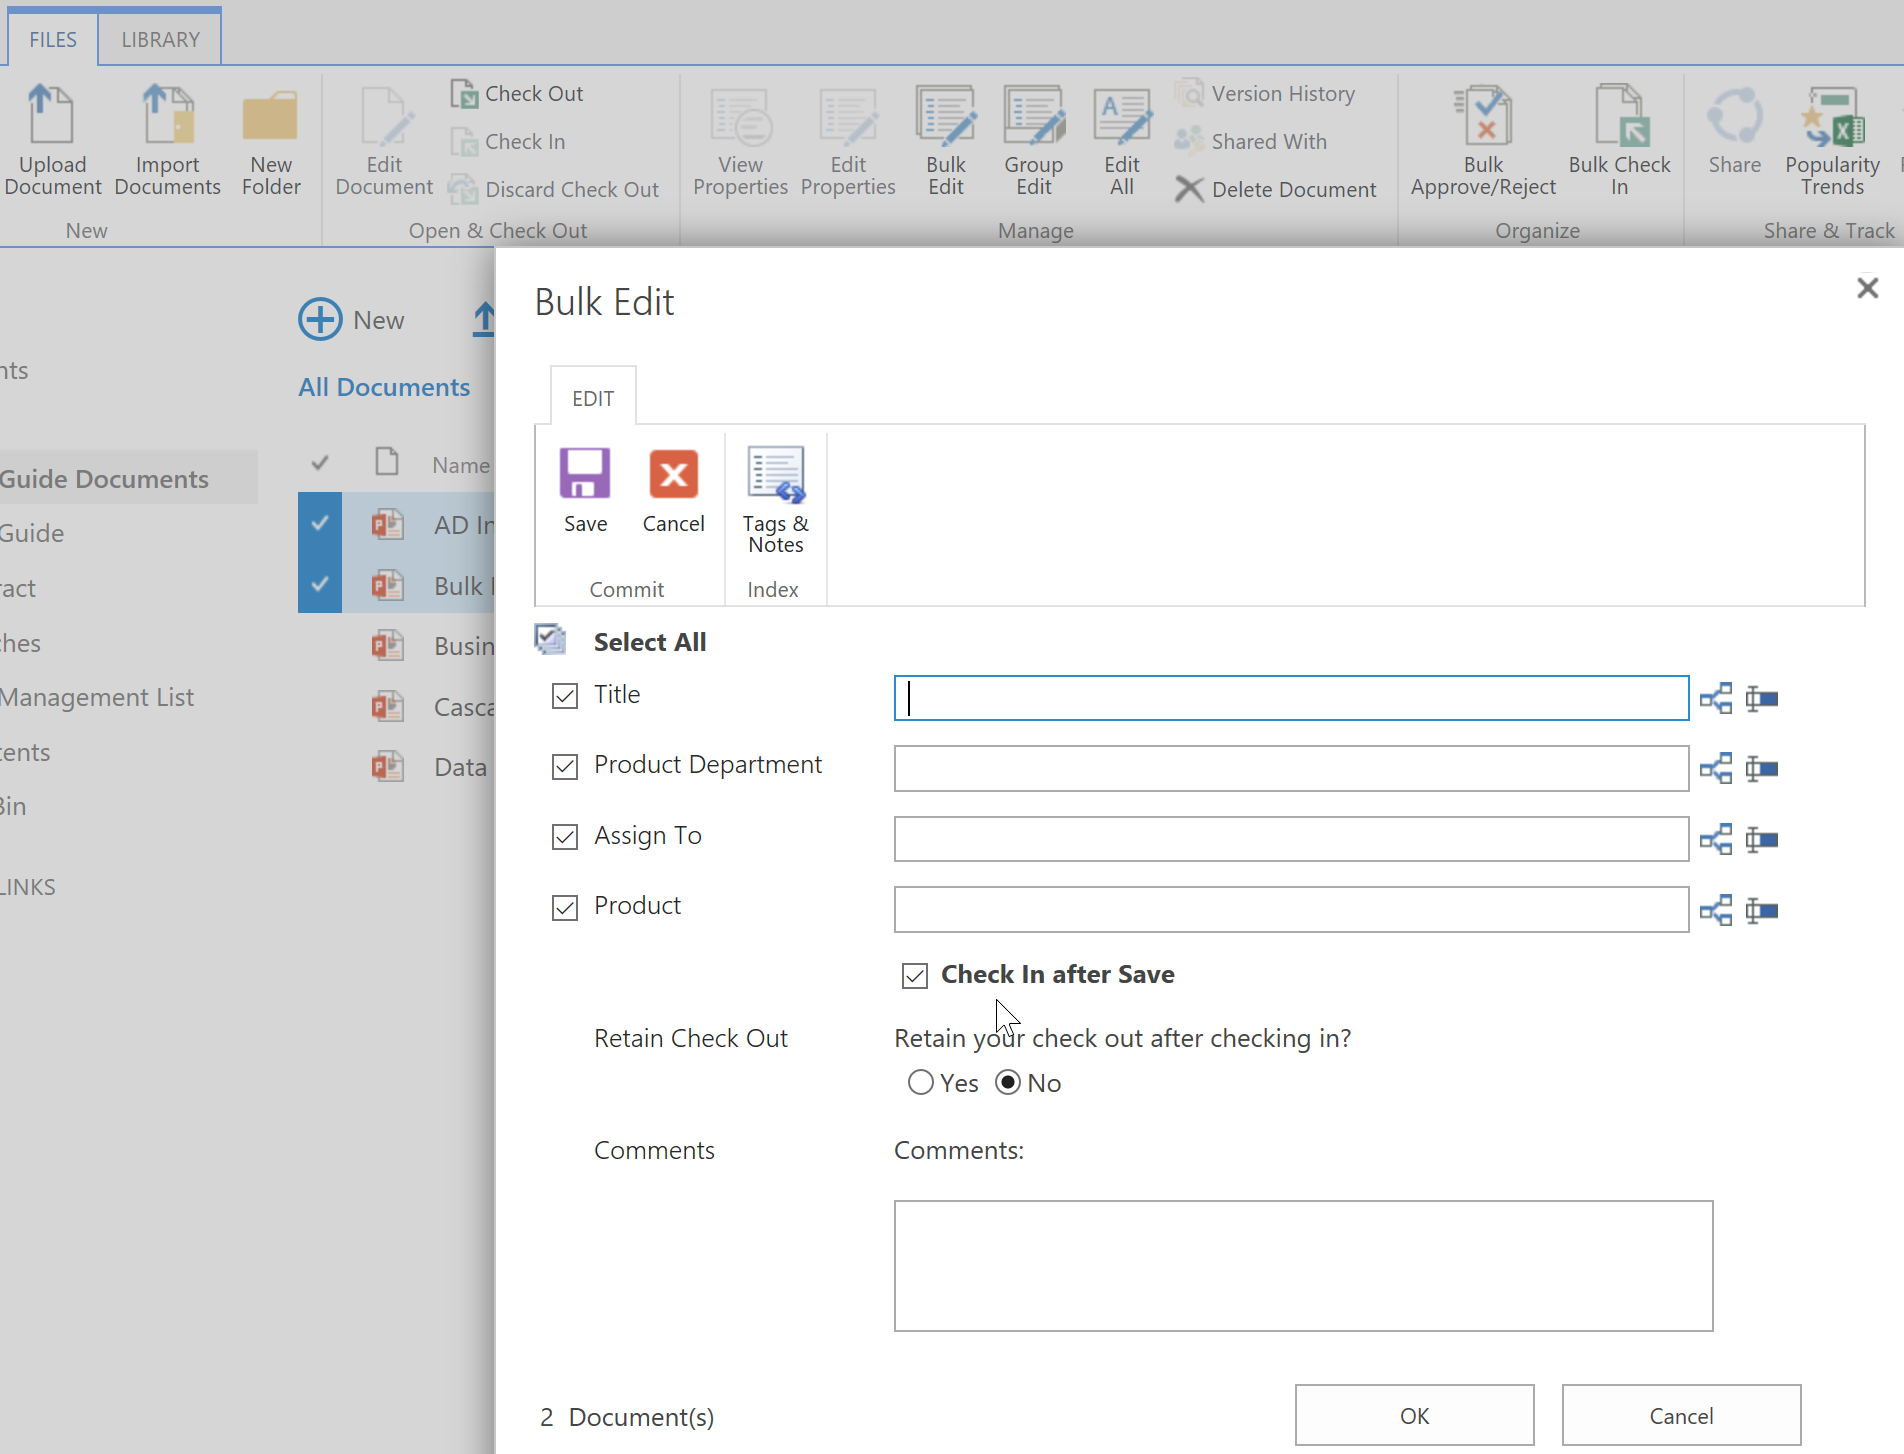
First, let’s check the checkbox for this option then click Save in the bottom right corner of the settings page to see what will happen.
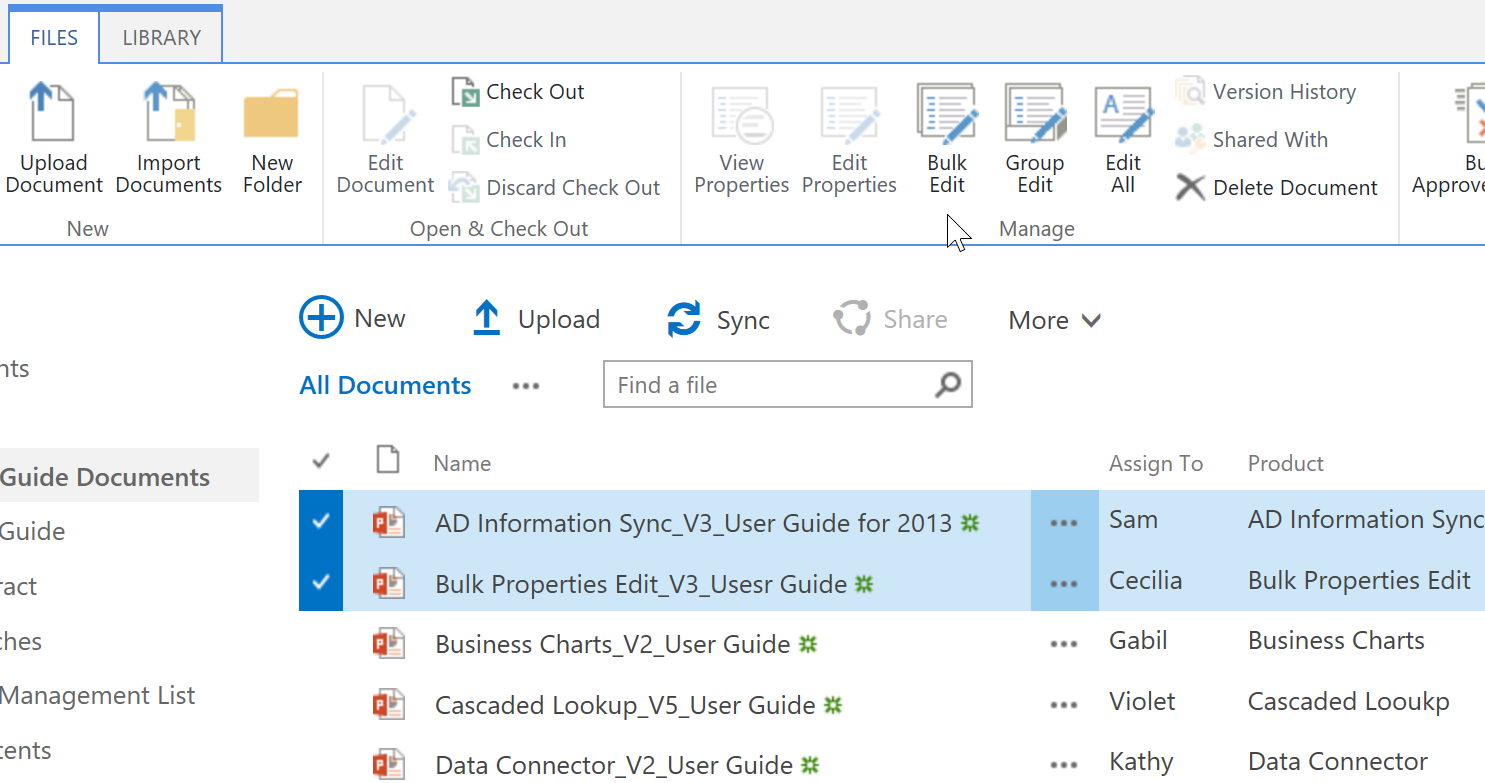
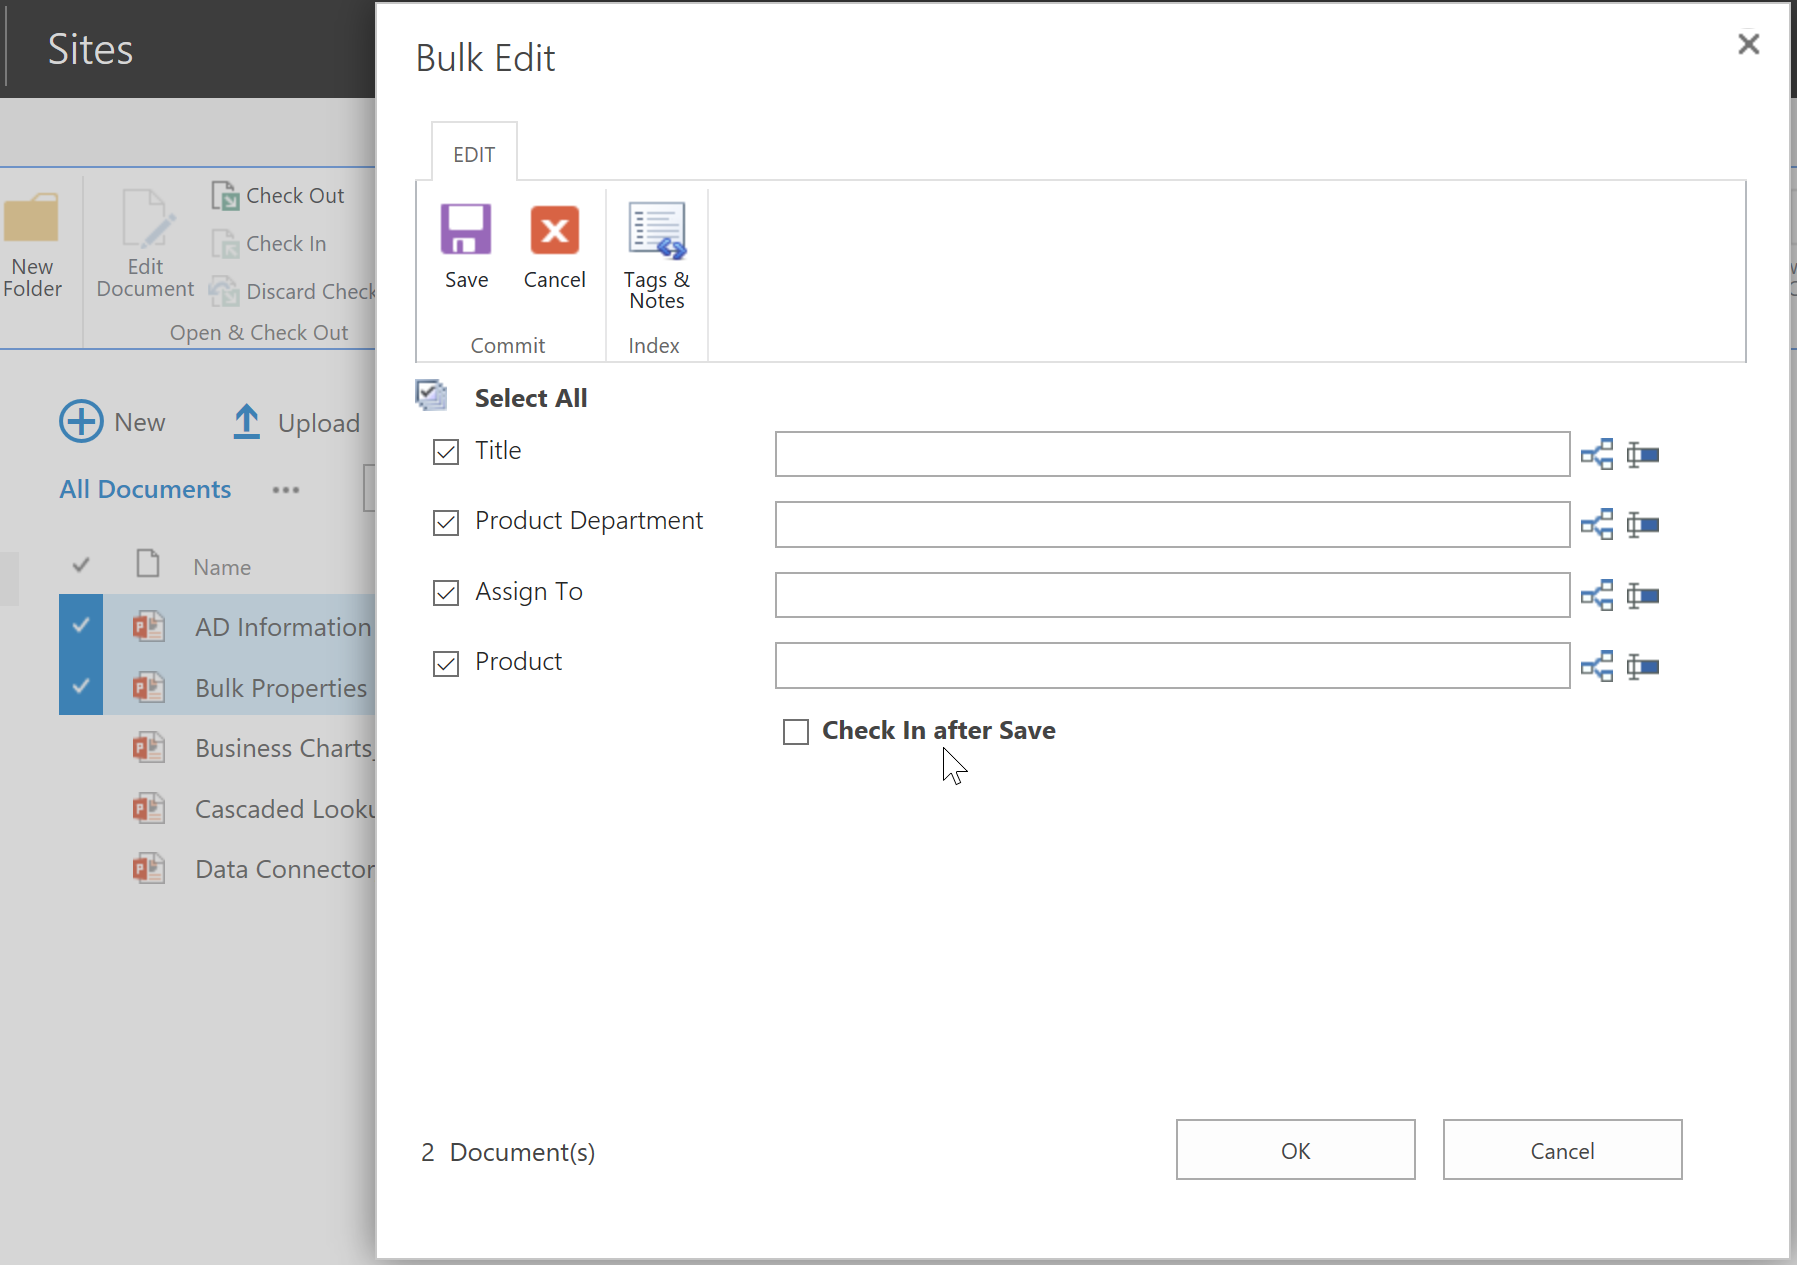
Navigate to the User Guide Documents library prepared above and select several documents to try the Bulk Properties Editor’s functions. Here we selected the first two documents in the library. Then click FILES and click Bulk Edit/Group Edit/Edit All in Manage group.
In Bulk Edit/Bulk Edit All Documents page, you will find out that the Check In after Save option is checked by default and you will always see this option expanded.
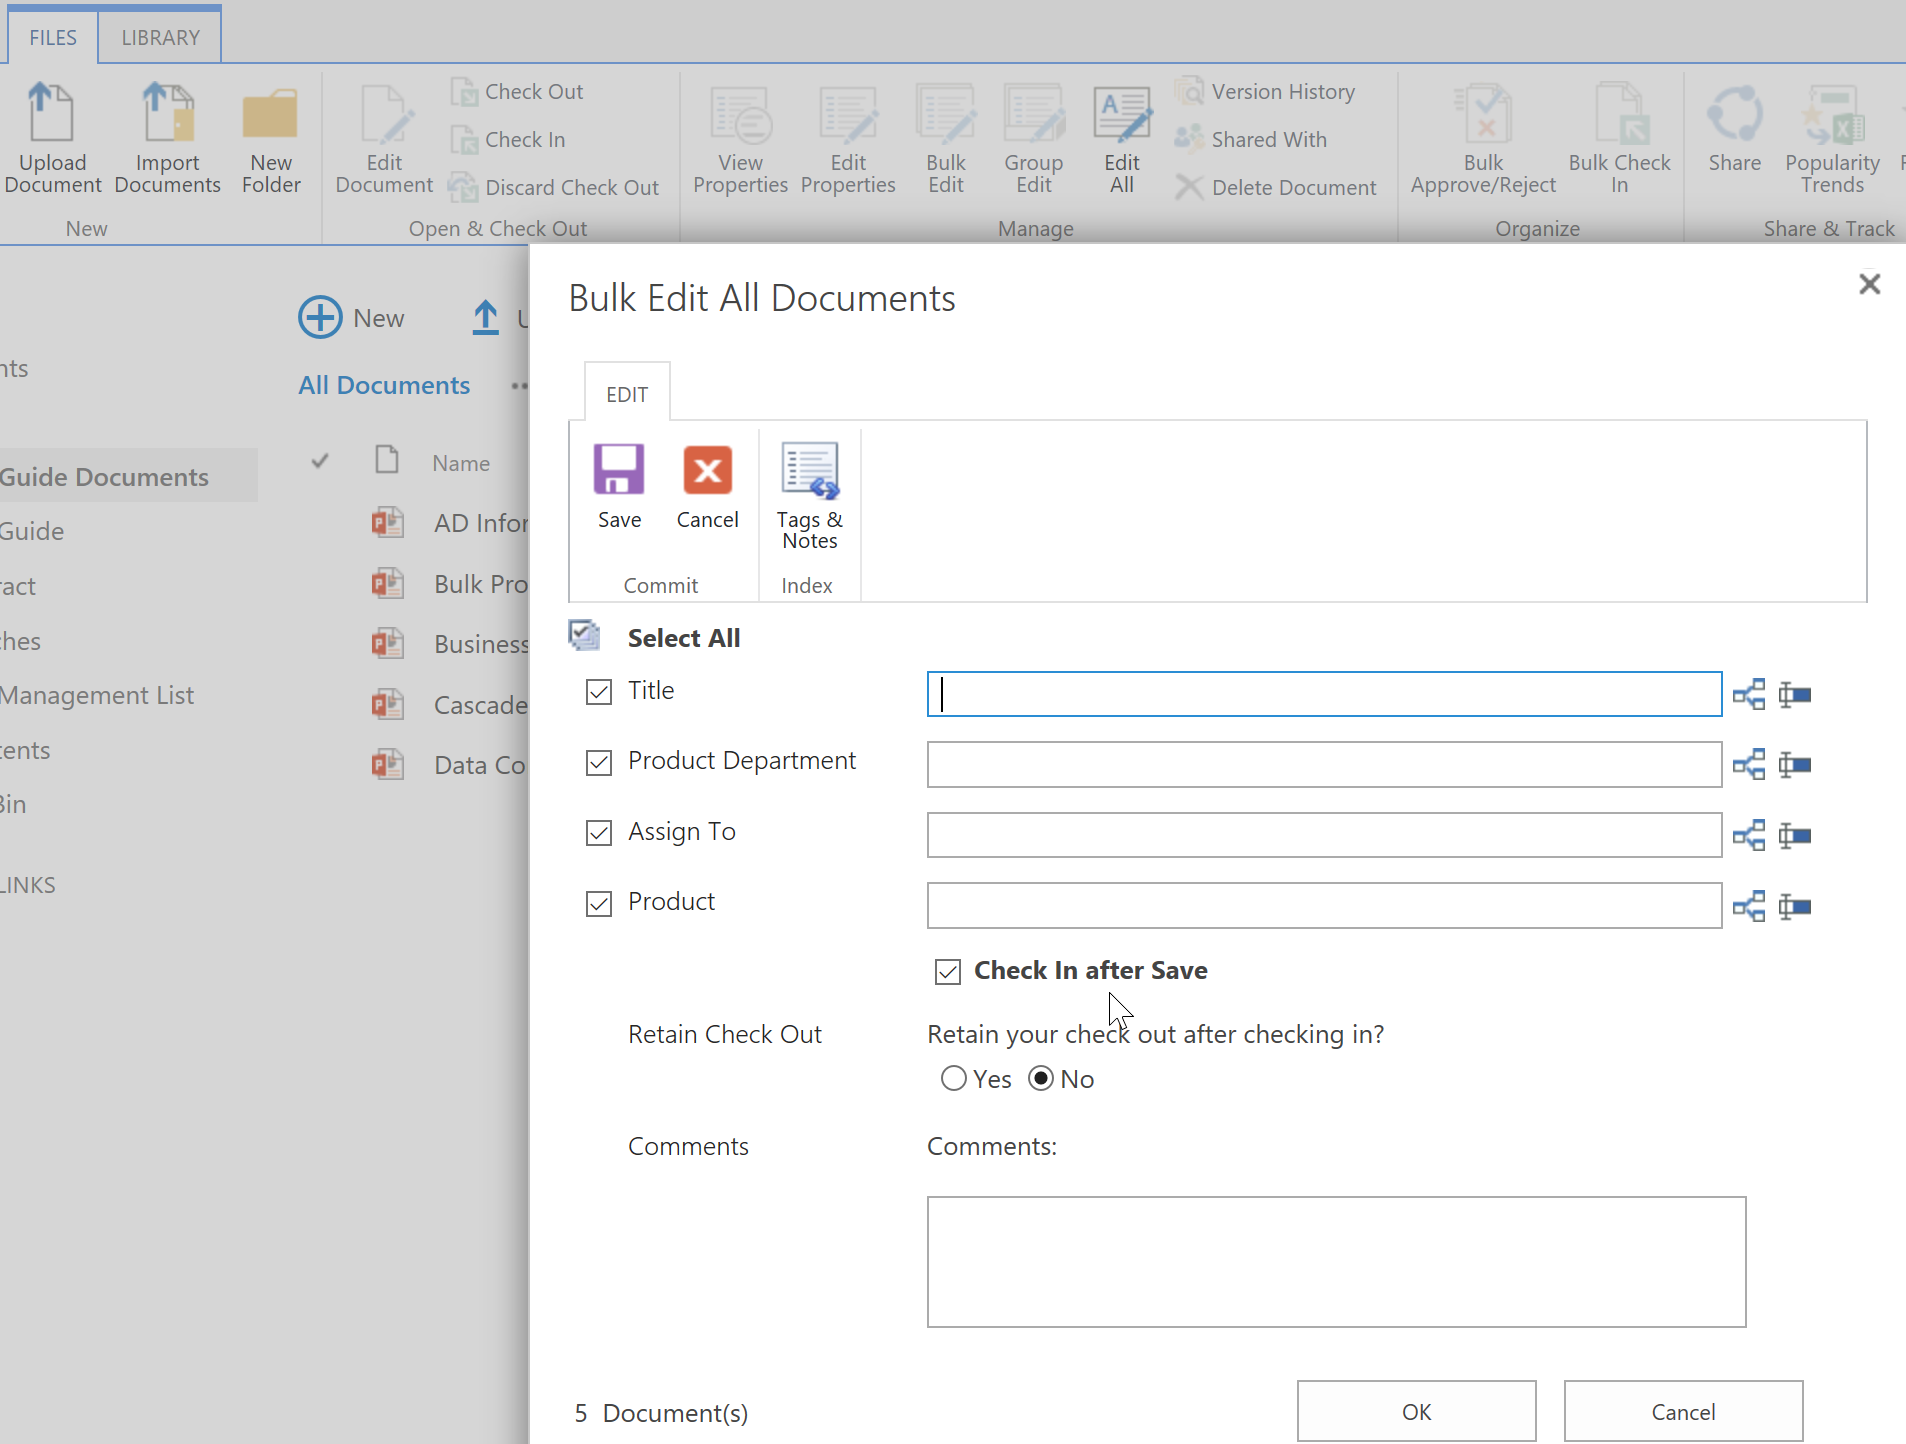
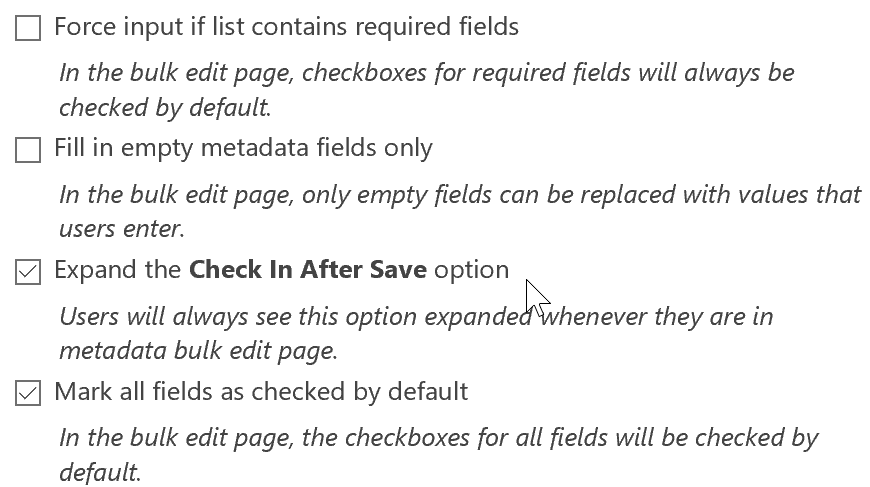
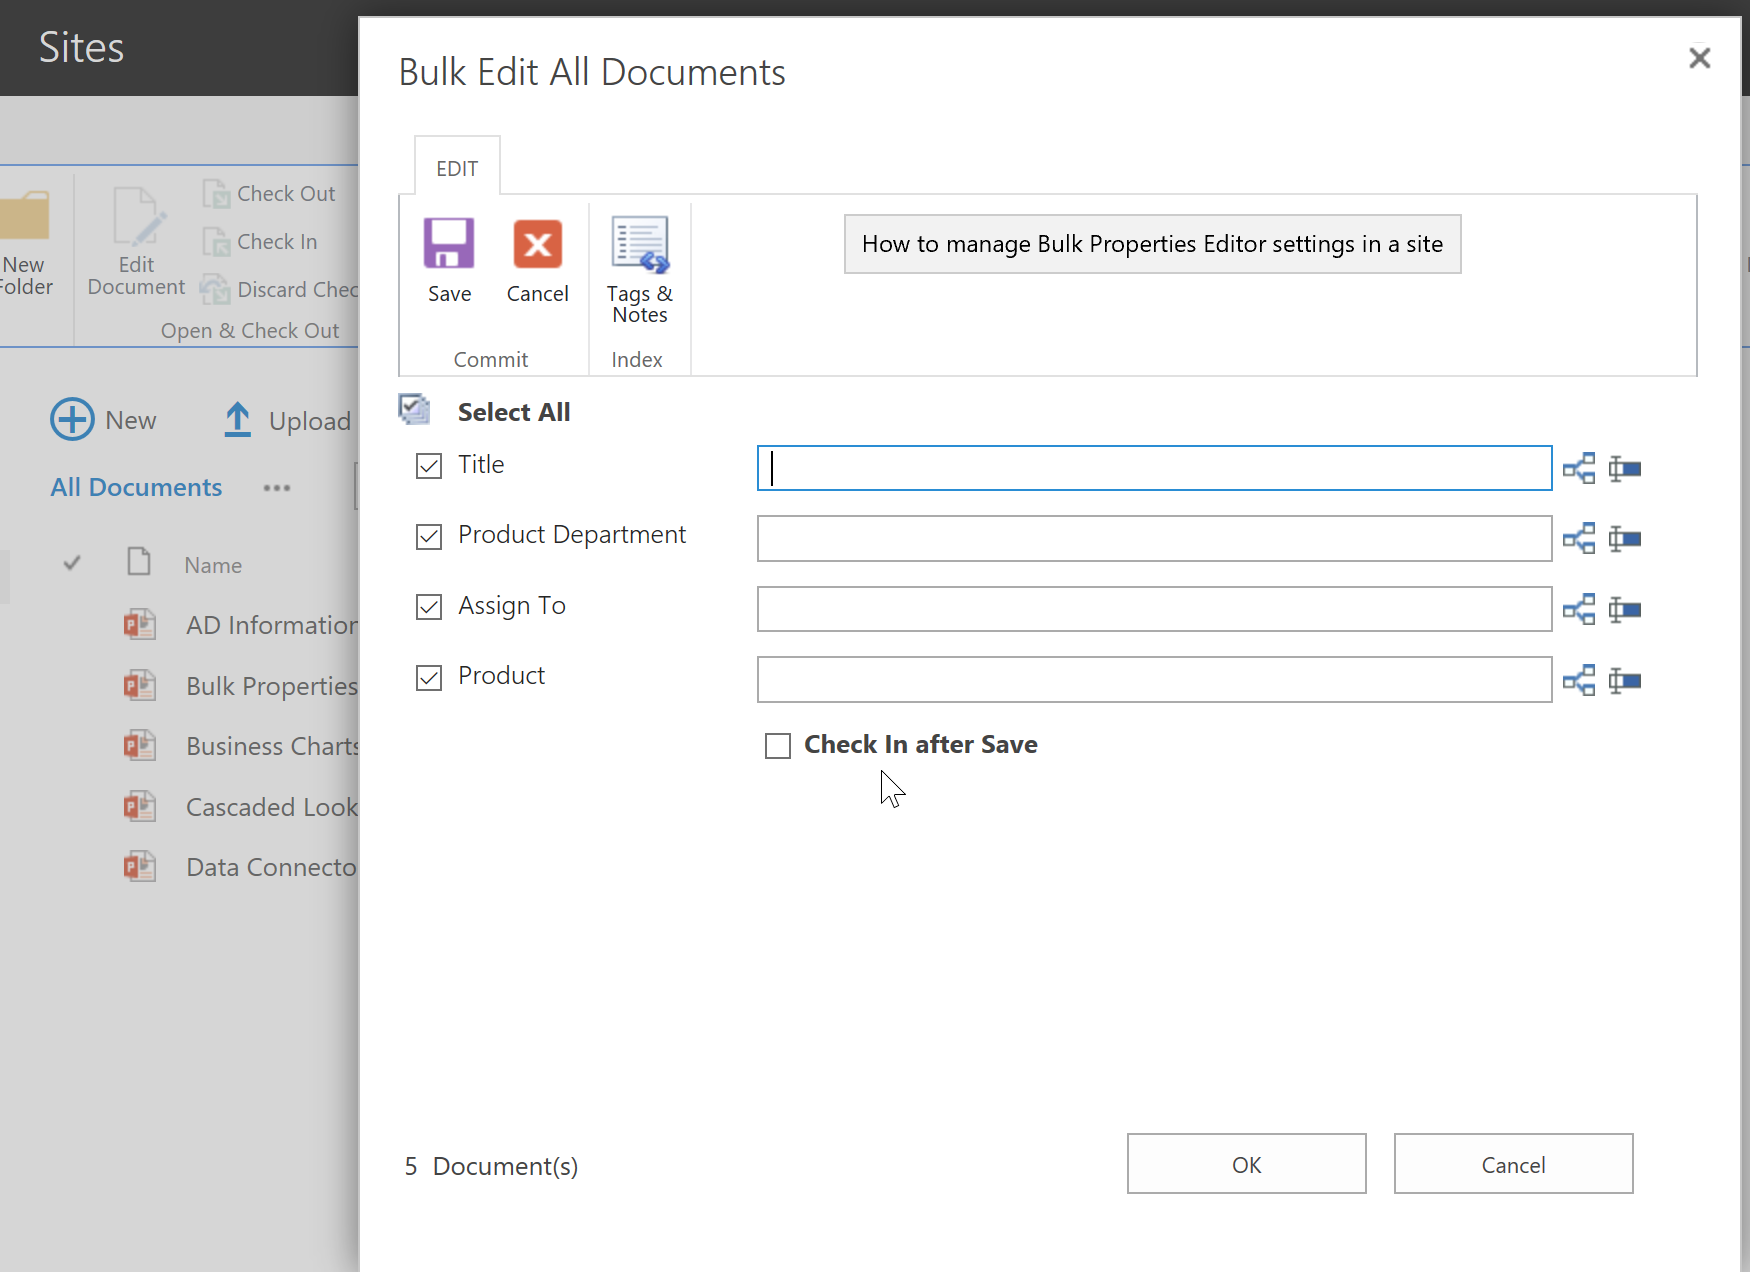
Now, let’s uncheck the checkbox for Expand the Check In After Save option and see what will happen.
Navigate to the User Guide Documents library prepared above and select several documents to try the Bulk Properties Editor’s functions. Here we also selected the first two documents as we did. Then click FILES and click Bulk Edit/Edit All in Manage group. Now, you will find out that the Check In after Save option is unchecked by default and you couldn’t see the expanded options for Check In after Save in the Bulk Edit/Bulk Edit All Documents page.
Note:
In this article, we talked about how to configure Bulk Properties Editor settings through Site Settings which means that all the configuration we did above will be applied to all lists and libraries in the current site.
How to manage Bulk Properties Editor settings for a site - Part 1?
How to manage Bulk Properties Editor settings for a site - Part 2?
How to manage Bulk Properties Editor settings for a site - Part 4?
How to manage Bulk Properties Editor settings for a site - Part 5?
How to manage Bulk Properties Editor settings for a site - Part 6?
