- BoostSolutions
-
Products
-
- Microsoft Teams
- HumanLike Alert Reminder
- View All Apps
- Pricing
- Support
- Company
If you have multiple lists and they have same field, is there any way to combine or merge these lists into one list and keep this list updated? With BoostSolutions’ List Sync, you can sync multiple lists to one SharePoint list and combine items.
In this article, we will demonstrate how to merge two SharePoint lists into one.
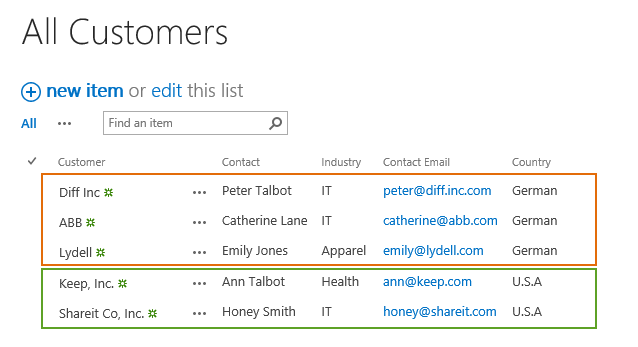
The All Customers list are combined with two lists, German Customers and USA Customers.
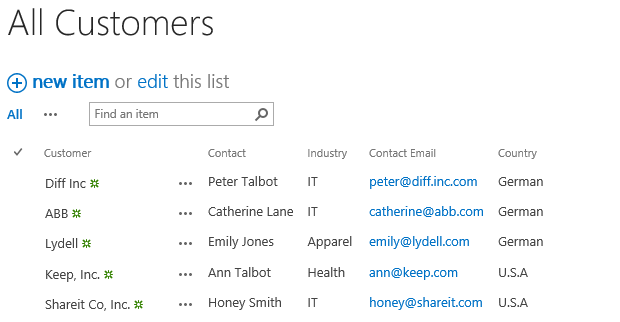
There is a SharePoint list named as All Customers with following columns on a SharePoint site.

Download the trial version of List Sync and install it to your SharePoint server.
Navigate to the site where All Customers locates.
In the top right corner, click Settings and then click Site Settings.
On Site Settings page, click List Sync Settings under BoostSolutions Software section.

On the List Sync Main Settings page, click Add new profile to create a new profile, specify a unique name for it.
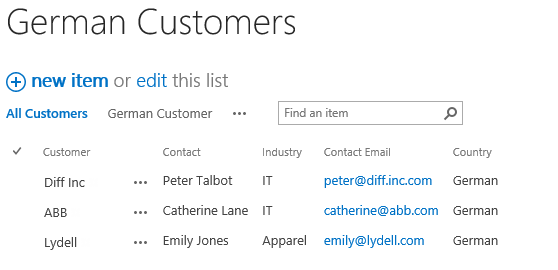
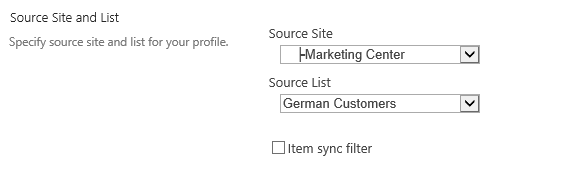
In the Source Site and List section, select site Marketing Center and German Customers.
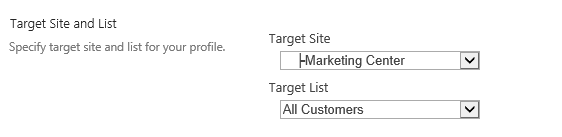
In the Target Site and List section, select site Marketing Center and All Customers.
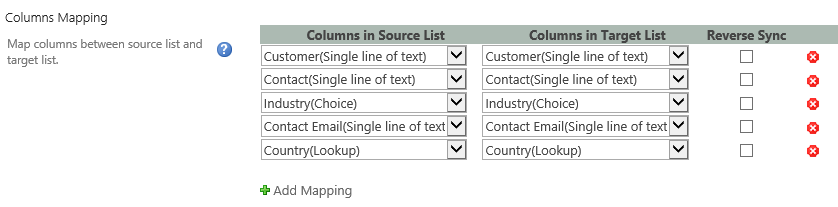
In the Column Mapping section, select these columns in source list and map them to the target list as following.
Keep other settings as default and click OK to save the settings for the profile.
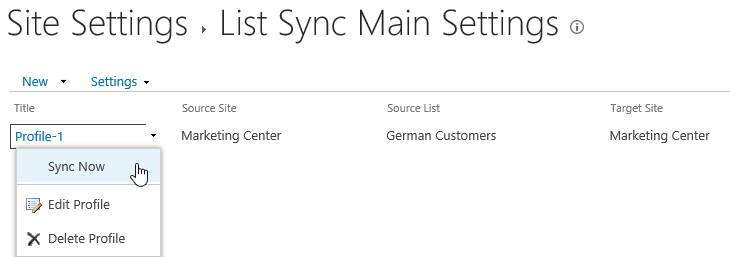
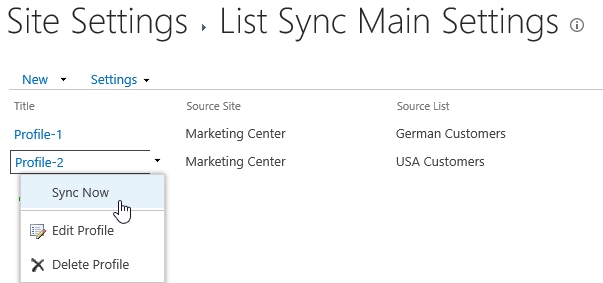
Then there is a profile created in the List Sync Main Settings page, click Sync Now for this profile.
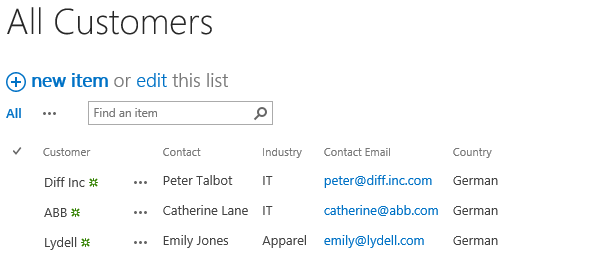
Wait for a few seconds for synchronization complete. Navigate to the All Customers and you will find that customers are imported to this list as following.
On the List Sync Main Settings page, click Add new profile to create another profile, specify a unique name for it.
In the Source Site and List section, select site Marketing Center and USA Customers.
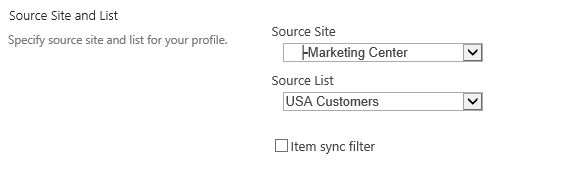
In the Target Site and List section, select site Marketing Center and All Customers.
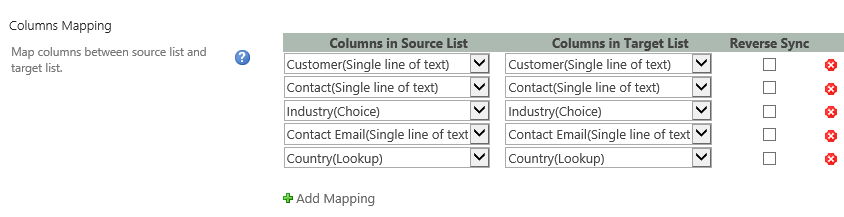
In the Column Mapping section, select these columns in source list and map them to the target list as following.
Keep other settings as default and click OK to save the settings for the profile.
Then there is a profile created in the List Sync Main Settings page, click Sync Now for this profile.
Wait for a few seconds for synchronization complete. Navigate to the All Customers list and you will find that customers are imported to this list as following.