- BoostSolutions
-
Products
-
- Microsoft Teams
- HumanLike Alert Reminder
- View All Apps
- Pricing
- Support
- Company
If you have a large SharePoint list and plan to split or separate it into different lists, BoostSolutions’ List Sync provides an easy to figure it out.
In this article, we will demonstrate how to split a large SharePoint list into different lists.
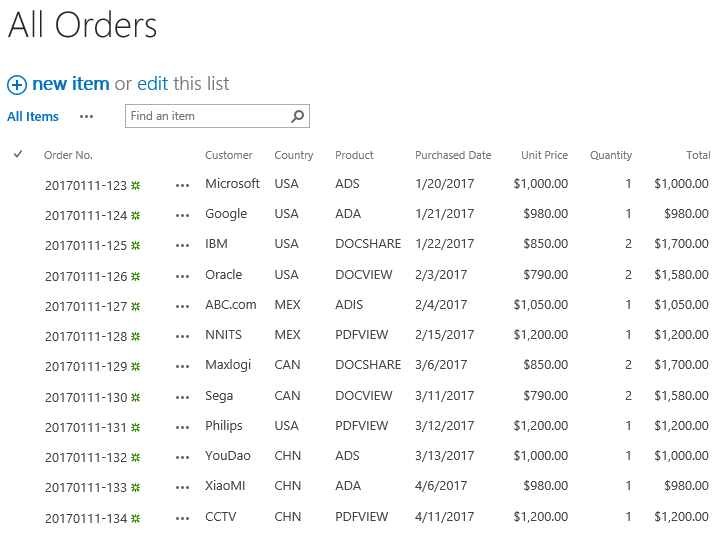
The orders ofAll Orderslist will be synced to four different lists, USA Orders, CHN Orders,CAN Orders and MEX Orders
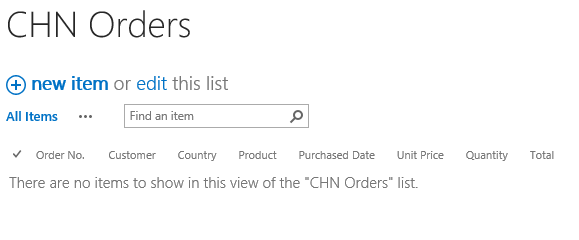
There is a SharePoint list named as CHN Orders with following columns on a SharePoint site.
Download the trial version of List Sync and install it to your SharePoint server.
Navigate to the site where All Orders locates.
In the top right corner, click Settings and then click Site Settings.
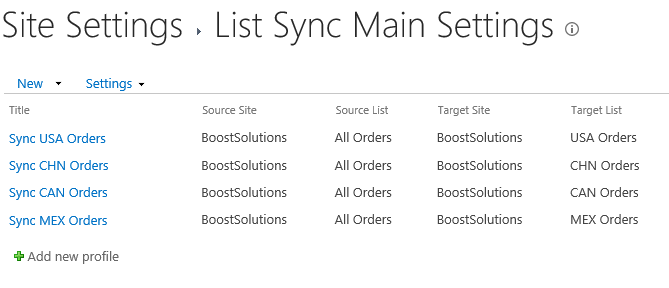
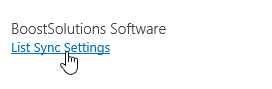
On Site Settings page, click List Sync Settings under BoostSolutions Software section.
On the List Sync Main Settings page, click Add new profile to create a new profile, specify a unique name for it.
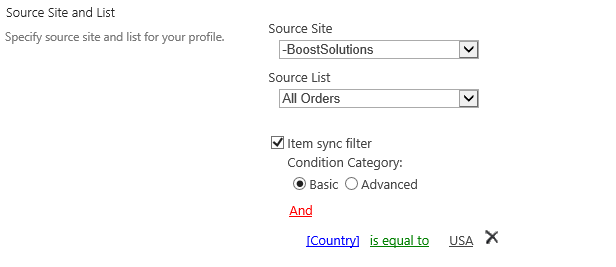
In the Source Site and List section, select site BoostSolutions and All Orders.
Select Item sync filter option, when the condition editor appears, specify the condition as following, which means only to sync orders which Country are USA.
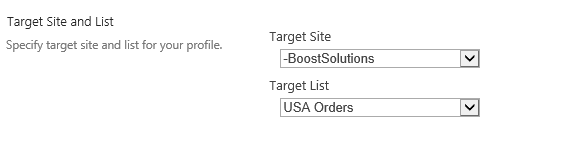
In the Target Site and List section, select site BoostSolutions and USA Orders.
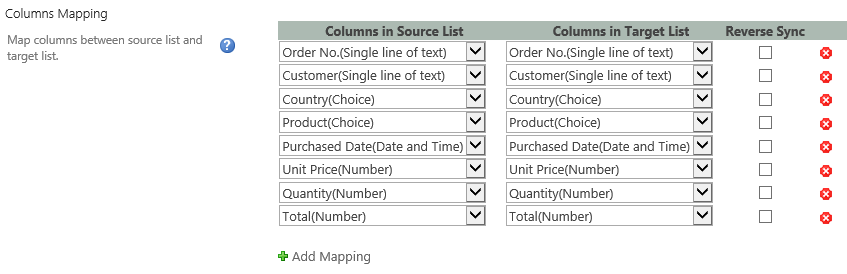
In the Column Mapping section, select these columns in source list and map them to the target list as following.
Keep other settings as default and click OK to save the settings for the profile.
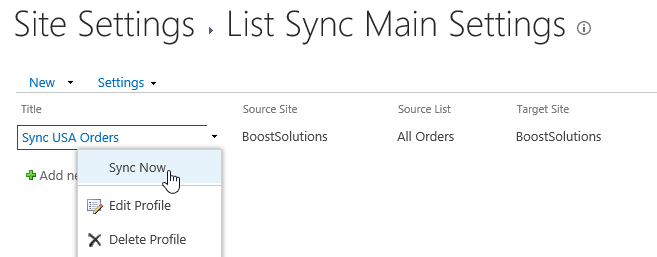
Then there is a profile created in the List Sync Main Settings page, click Sync Now for this profile.
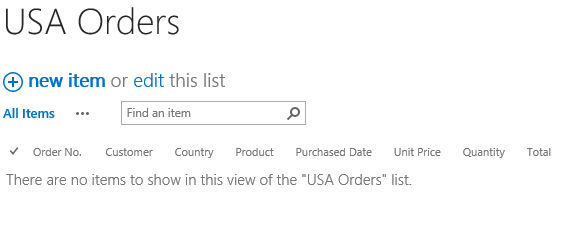
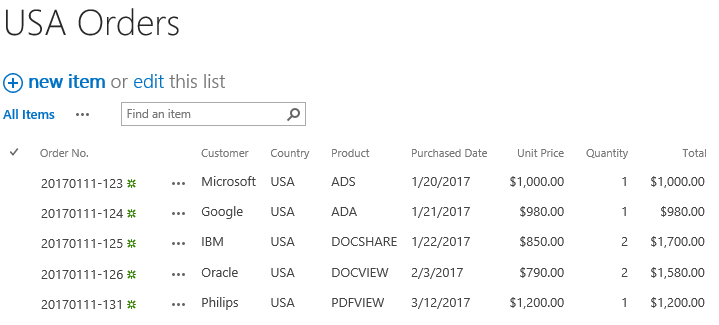
Wait for a few seconds for synchronization complete. Navigate to the USA Orders and you will find that the USA orders are synced to this list as following.
On the List Sync Main Settings page, click Add new profile to create another profile, specify a unique name for it.
In the Source Site and List section, select site BoostSolutions and All Orders.
Select Item sync filter option, when the condition editor appears, specify the condition as following, which means only to sync orders which Country are CHN.
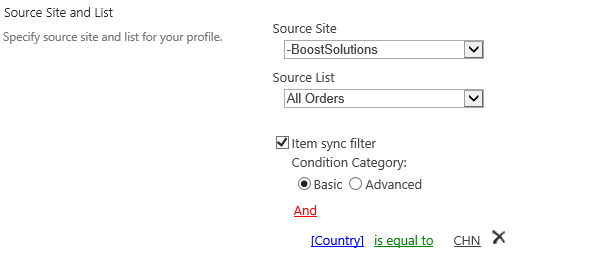
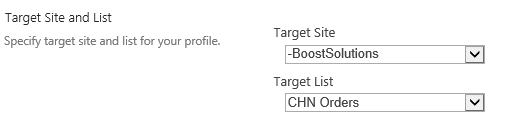
In the Target Site and List section, select site BoostSolutions and CHN Orders.
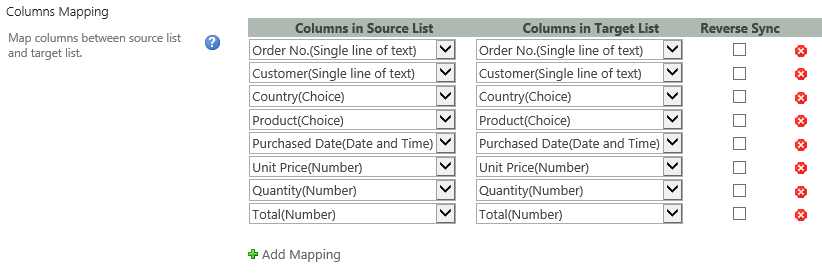
In the Column Mapping section, select these columns in source list and map them to the target list as following.
Keep other settings as default and click OK to save the settings for the profile.
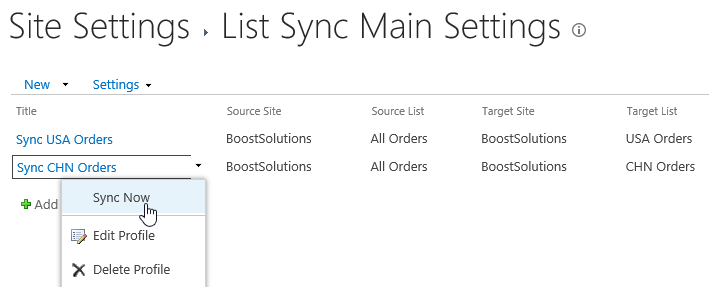
Then there is a profile created in the List Sync Main Settings page, click Sync Now for this profile.
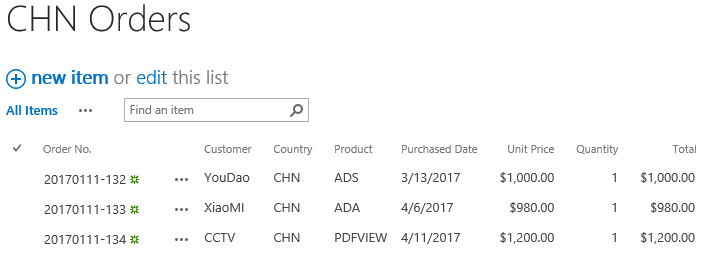
Wait for a few seconds for synchronization complete. Navigate to the CHN Orders and you will find that the CHN orders are synced to this list as following.
Repeat above steps, create more profiles to sync orders to different lists as following.
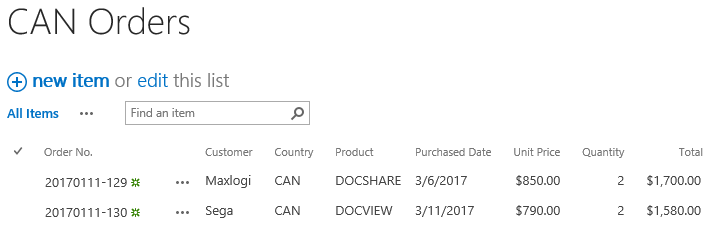
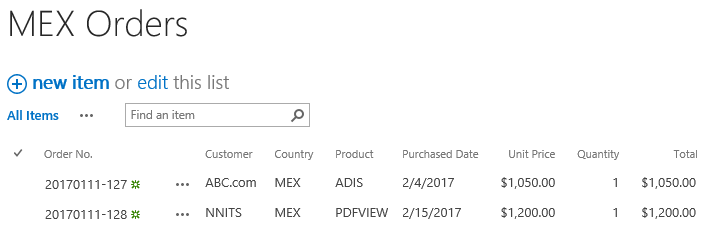
Click Sync Now for these profiles, then navigate to the CAN Orders and MEX Orders you will find that the corresponding orders are synced to these lists as following.