- BoostSolutions
-
Products
-
- Microsoft Teams
- HumanLike Alert Reminder
- View All Apps
- Pricing
- Support
- Company
SharePoint AD Self Service enables administrators to decentralize AD management, allowing authorized users to directly manage AD information. Those users will be able to change AD information such as phone numbers, addresses and etc. in this article we will demonstrate to you how to use the web part to change the AD profile information.
User Denise will be able to change her own AD information without administrator’s help.
Create a new site page and called it AD Self Service, then add the AD Self Service Web Part to this page and connected to Active Directory. You can refer to another article to see how to do it.
Download the trial version of AD Self Service, and install it to your SharePoint server.
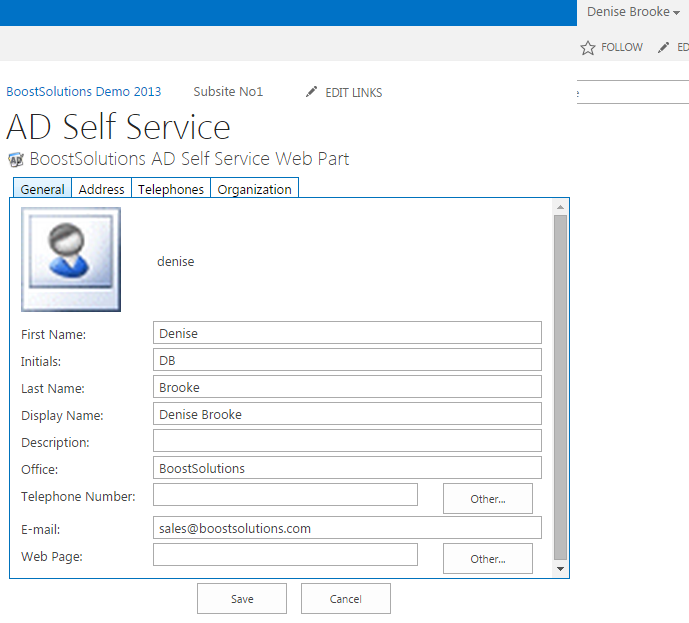
Log in as the user Denise Brooke and and navigate to Site page prepared above.
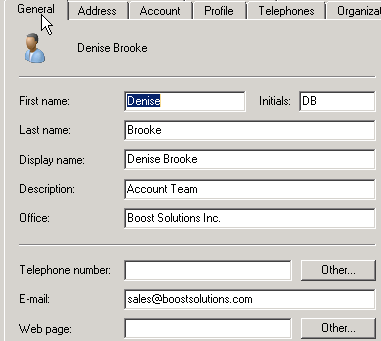
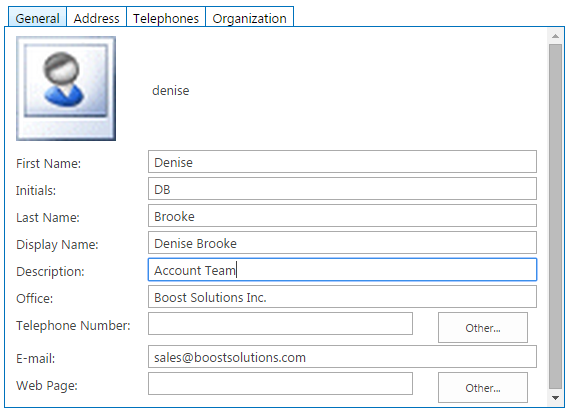
In General tab change Office to Boost Solutions Inc. And type in Account Team in Description.
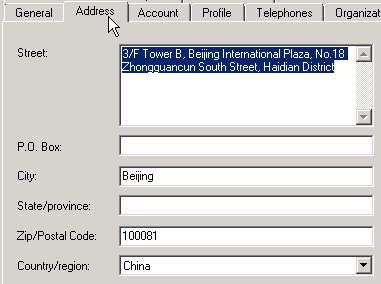
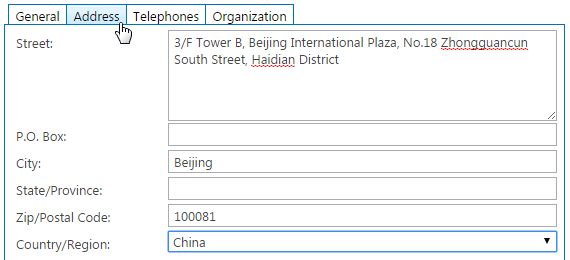
In Address tab fill in Street, City, Zip/Postal Code and Country/Region properties as following.
In Telephones tab, let’s fill in Mobile Phone.

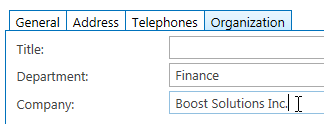
In Organization tab let’s fill Department and Company properties as Finance and Boost Solutions Inc. respectively.
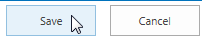
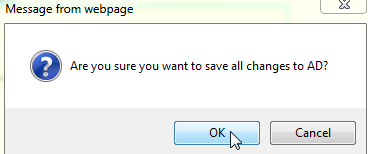
After finish modifying the profile click Save button under the web part, then click OK for the pop up window question. and you will see the confirmation message appear under the web part.
Now let’s check if the information in Active Directory has been changed.